
What is a storyboard, and why do they matter?
So you’ve got a plan for what you want your recording to cover. You might even have a full script and think you’re ready to jump straight into recording!
But let’s pause first and talk about why creating a visual storyboard beforehand can be a great way to improve your overall recording quality and save you some time along the way.
Creating a storyboard will help you organize your plan and streamline your recording process.
First things first: what is a storyboard? Simply put, a storyboard is like a visual outline. The goal of a storyboard is to convey the different visuals that will be shown throughout the course of a video, and is often paired with text components of the script so you can see how spoken content pairs with visual elements.
With a storyboard in hand, you’ll be in much better shape when you go to record or stream, since you have a well thought out plan for what you’ll show at each stage of the video. That means less retakes and improvising and a smoother, less stressful recording process.
How to create a storyboard
Storyboards come in many different shapes and forms, and ultimately you’ll come to your own preferences for the style and approach you take, but before you even create one, here are some of the key components you need to think through:
- What camera angles or shots do you want to feature?
- What will your intro, outro, and transitions between shots look like?
- What graphics or overlaid elements will you need?
- Will there be any superimposed images or videos? Where will they be positioned in the frame?
- What different layouts will you have if multiple videos are featured at once? (For example, a side by side shot of two people speaking)
Once you have some sample shots and assets (or even just general ideas) about these questions, you can start to build and refine a storyboard that helps you visually see how these pieces come together to form a full video.
Different tools and formats for storyboarding
As we mentioned, there are many different formats that storyboards can take. Here are some of the most successful examples we’ve seen:
Two-column scripts
A two column script is a tried and true classic when it comes to planning the visual components of your video or stream. The way these work is they force you to break your script into chunks, placed within a table alongside boxes for what will visually accompany each piece. This forces you to map out both the words and visuals for every moment of your video (via written description, illustration, or whatever you want).
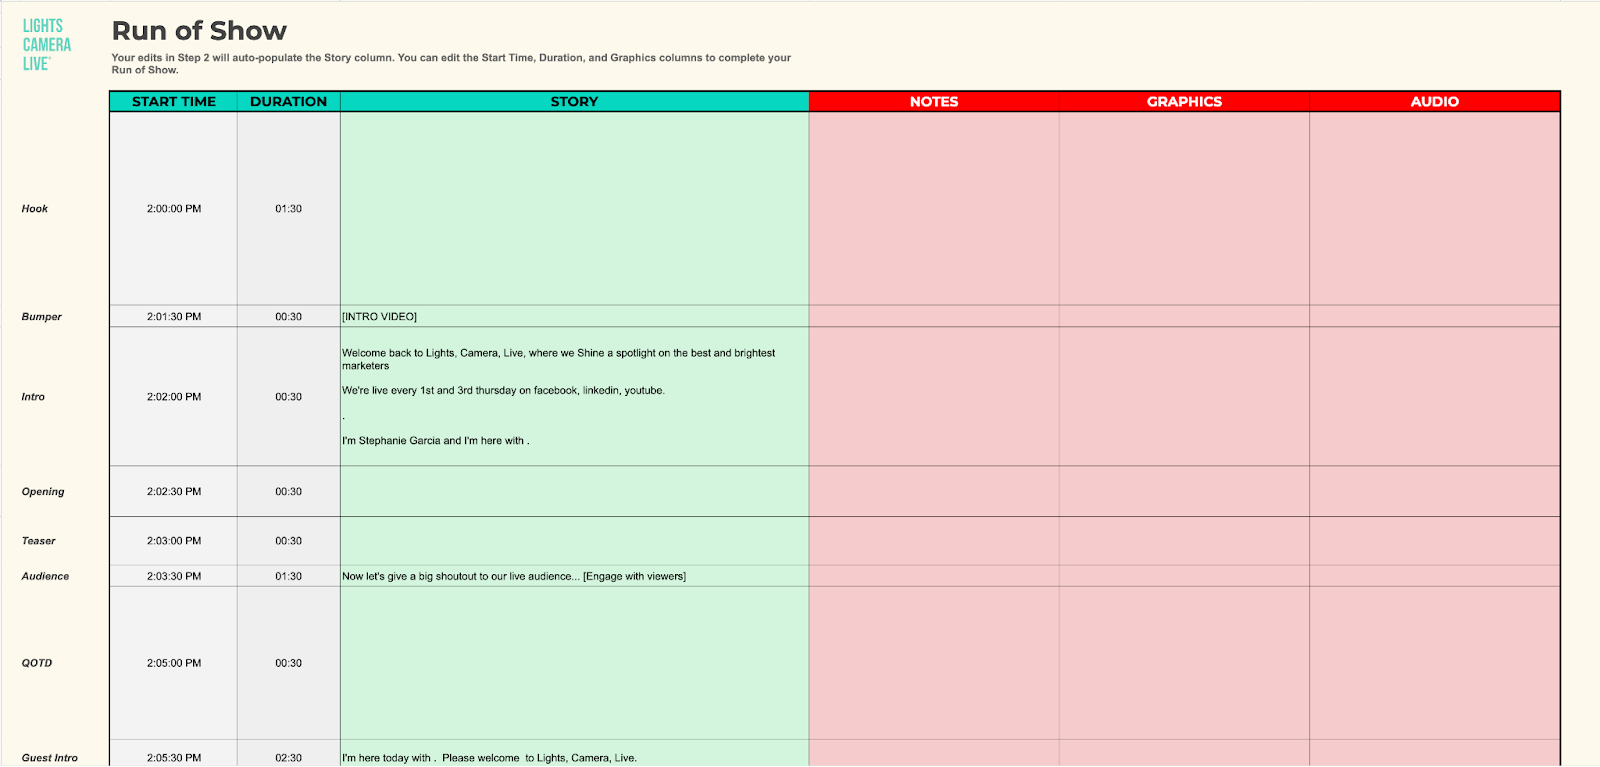
A great example of a column script (it’s a little more than two-columns), is Stephanie Garcia’s Video Script Maker. This script maker helps you plan out your video from start to finish, helps you create strong hooks, insert the graphics you are using for these videos, and even the audio cues you want to trigger during each portion of your video.
This is the perfect companion for a creator who’s a strong writer, or just loves a supercharged chart.
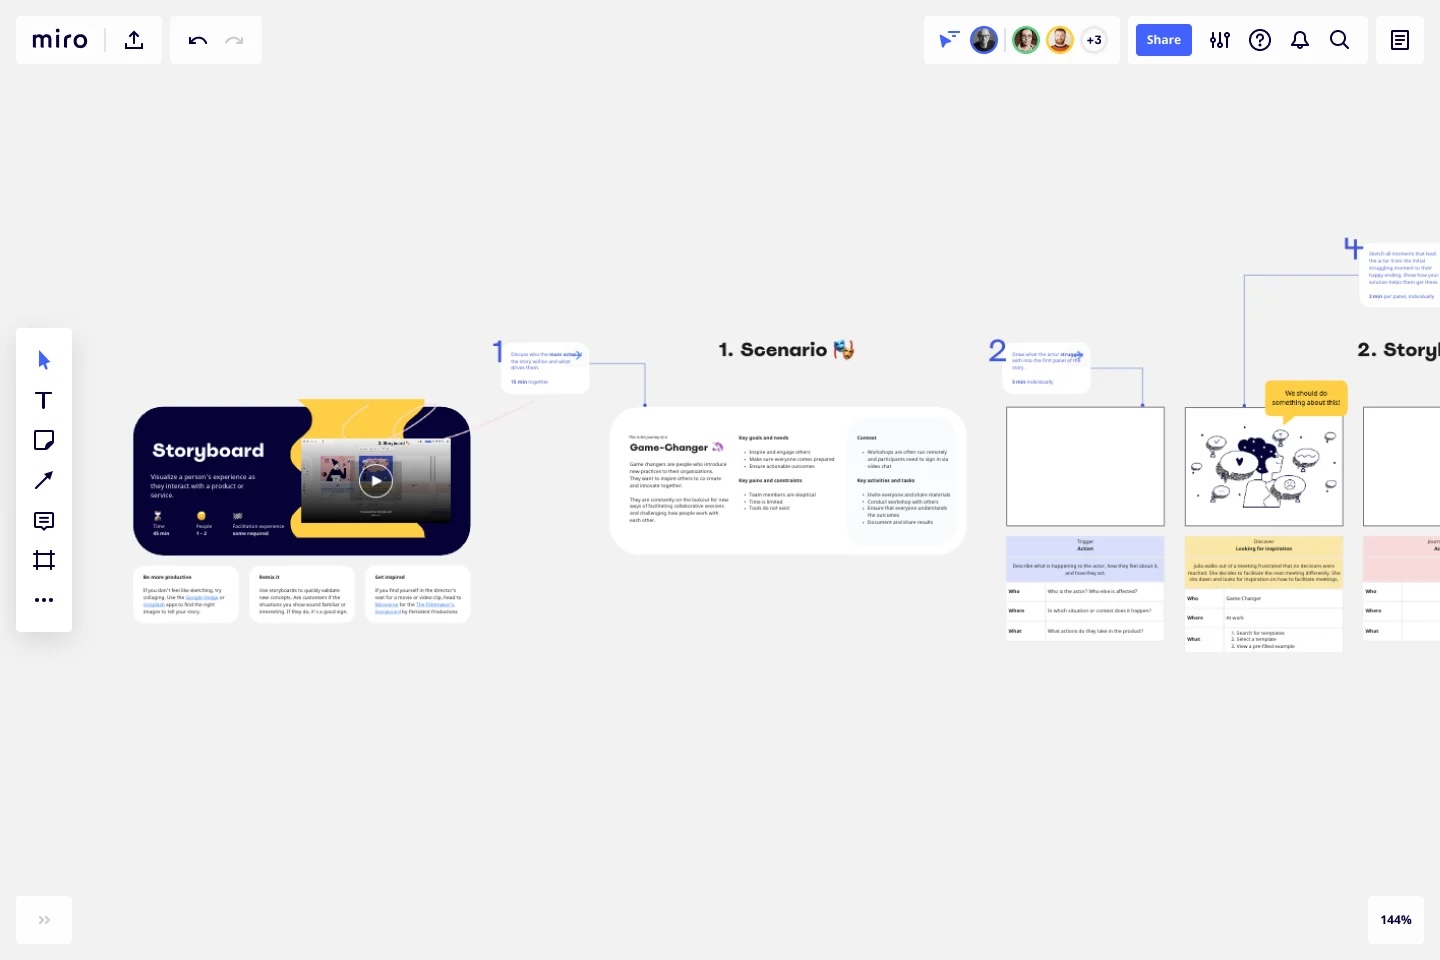
Whiteboarding tools
[image provided by Miro]
If you want to extend the concept of a two-column script into an environment that allows you to piece together visuals and or inspiration more freely, you can explore using whiteboard tools like Miro or Figjam. With these tools you can paste the “chunks” into the project as text elements, then paste images and graphic elements alongside them to more clearly show what visuals accompany each piece.
This is perfect for creators who are typically visual learners and want to make sure that their graphics, story, and concept flow concisely from A-Z. Whiteboarding tools like this will help you clearly lay out your plan, ensure your graphic elements are cohesive, and easily import your ideas into Ecamm Live to record your content.
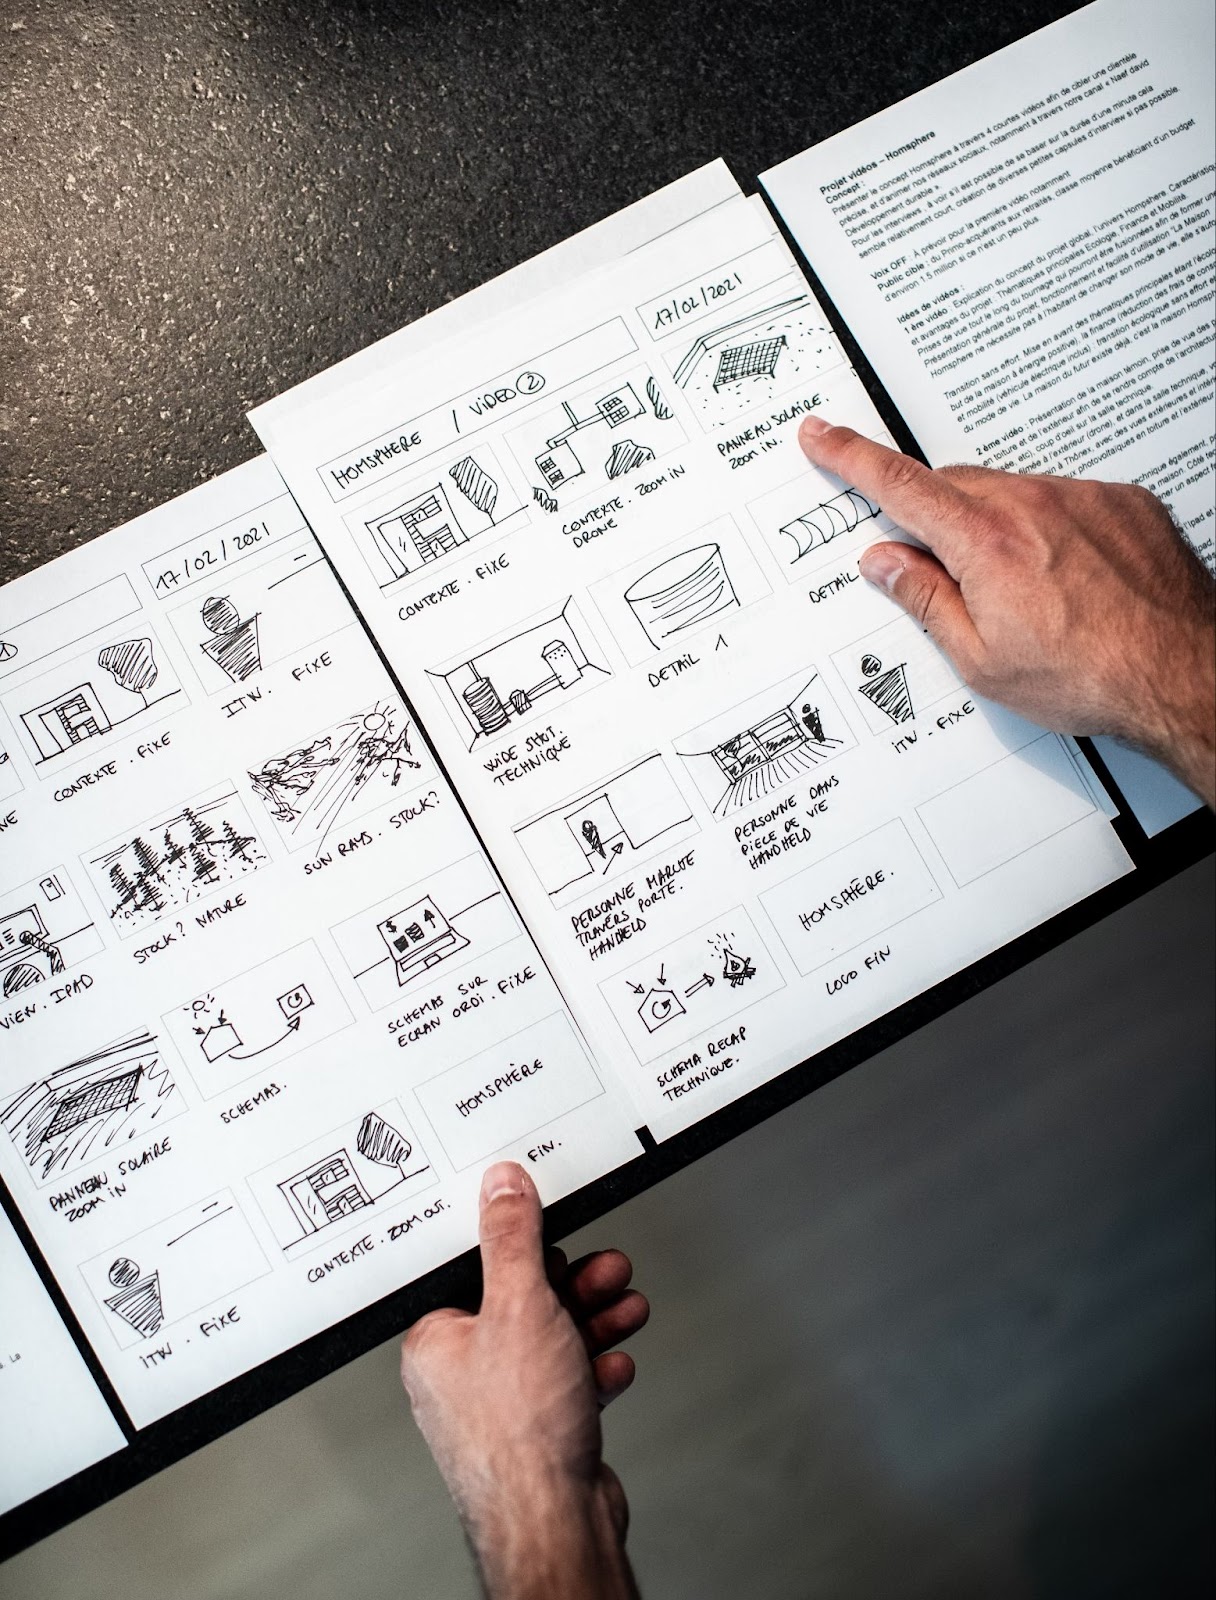
Remember that it’s always OK to sketch out or draw out your storyboard on a physical whiteboard or even a piece of paper or notebook. Sometimes low-tech is a great option for getting ideas out of your head and in front of you.
Using Ecamm to Build Your Storyboard
Once you have your outline or storyboard drafted, you can bring it to life inside Ecamm using Profiles, Scenes, and Overlays. We call this creating a run of a show.
- Profiles help you organize different shows, presentations, or video types. Each Profile can house its own set of Scenes, keeping your productions clean and organized.
- Scenes are like the building blocks of your video. You can create a Scene for each part of your storyboard — for example, one for your cold open, one for your intro, one for each content segment, and so on. Each Scene can have its own layout, camera angles, video clips, and more.
- Overlays allow you to add graphics, text, lower thirds, timers, and other visual elements to your Scenes. Use them to emphasize key points, display your branding, or engage your audience.
By mapping your storyboard directly into Ecamm, you’ll be able to move seamlessly through your content without fumbling around or breaking the flow. Think of it as setting the stage before the curtain goes up.
Storyboarding doesn’t have to be complicated, but it should always be your first step. A little planning goes a long way toward creating videos that are clear, confident, and compelling.