Do you want a successful live stream show? If your answer is a resounding yes, then you’re in the right place. In this post, we’re talking all about the run of show, which is basically how to plan out a successful live video show and how to use Ecamm Live to implement it.
There are two main things that go into a successful live video:
- Well planned content. What are you going to talk about?
- The “Flow” (we call this a run of show or runsheet). Basically, how do you move through your show in the software so that everything looks professional?
Remember that a good live stream always requires planning. You’ll want to make sure you know what you’ll be talking about, how you’ll be talking about it, and how to use Ecamm Live to flow through your content efficiently and effectively.
Let’s break it down.
In this post we’ll cover:
- How to structure a stream on the content side
- Setting up your software for a successful stream
- How to deliver value and engage (to avoid common mistakes)
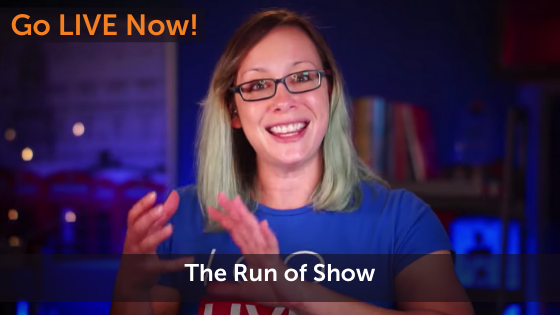
Watch the full episode
Go LIVE Now! is a weekly live video show hosted by Luria Petrucci of LiveStreamingPros.com. You can catch new episodes each week on Facebook and YouTube.
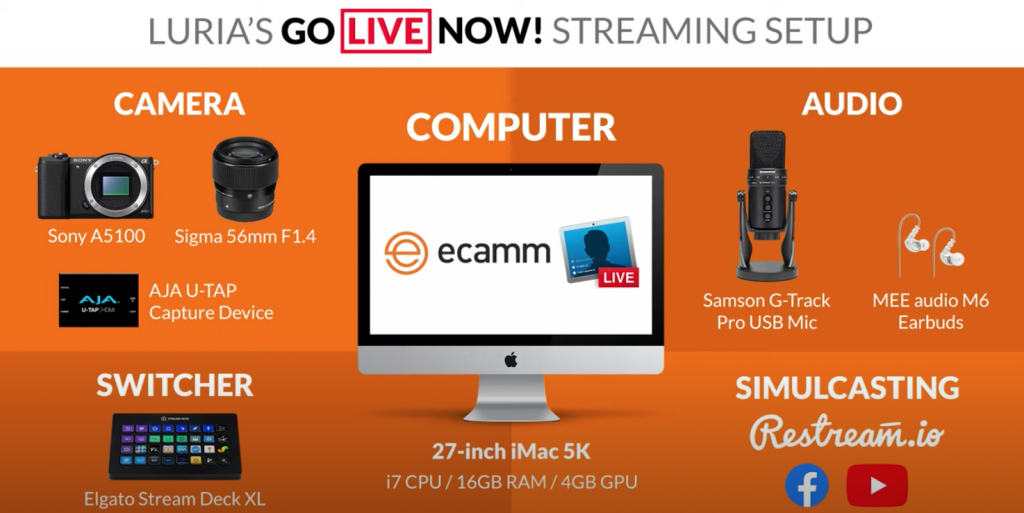
Want to know what gear Luria is using? Check out the full Go LIVE Now! gear guide.
The Content
Let’s start by talking a little bit about the content itself. Successful live stream broadcasts maximize value for the viewers and include engagement, but don’t allow the engagement to be the entire focus of the show.
There are two common mistakes that live streamers make when it comes to show flow: not thinking about the replay and over engagement.
Not thinking about the replay
The replay is really important, but is often something people forget about when live streaming.
Not all of your viewers are going to be watching you live, so you’ll want to make sure that you’re keeping that in mind when you hit that “go live” button. Avoid common mistakes like waiting too long to start jumping into the main content (or point) of your broadcast.
Pro tip: If you want to make sure to give time for people to join in, consider adding a countdown timer so that people have time to jump on and get ready. Once the timer hits zero, jump into the content itself and give that value.
Over engagement
One of the best parts of live streaming is that it’s a two-way conversation. You can see comments coming in from your live viewers and engage with them by pulling them on screen and answering questions.
Engagement is great way to build your community, but be careful of over engaging. Say hi to a few viewers right when you start your show, but consider leaving Q+A to the end so that you can focus on delivering your content effectively without being distracted every time a comment comes on screen.
Pro tip: if you keep engagement to the beginning and end of your show, it’s easier to trim down the video and repurpose your main content.
Show Flow Structure
Okay, so let’s go through a basic show flow structure so that you can see how you can start planning out your content.
The Tease
This is how you’ll start your show. The moment you hit that “go live” button, share a teaser. In this show, I said “are you ready to have a smooth flowing live stream?” That’s how I kick off the show.
Introduce Yourself
Don’t drag this out too long. Simply introduce yourself for anyone new. Hi, I’m Luria Petrucci from Live Streaming Pros and this is Go LIVE Now, a weekly live streaming show I do in partnership with Ecamm Live. In this show, I talk about topics related to live streaming so you can go live now.
Ask a Question for Engagement Purposes
It doesn’t matter if you don’t have any viewers at this point. Ask an easy “yes or no” question anyway. Keep it to something super easy to answer that will work for live viewers and replay viewers alike.
Remember that there’s a delay with live video, so you need to make sure you’re thinking about that. Asking the question and then answering it yourself allows time for your viewers’ comments and answers to come through to you.
Here’s an example:
Are you afraid of live video?
Dive in and answer it: “when I first started live streaming, I was terrified that I’d screw it up and…” and continue on with your short story while people answer the question in the comments. This helps solve the delay.
What is the value that you’re bringing?
Now it’s time to get to the content. What are you sharing? What value are you offering? The easiest way to go about doing this is with 3 bullet points.
Value point #1
Break for engagement
Value point #2
Break for engagement
Value point #3
Break for engagement
The Run of Show Process
When I say run of show, I’m talking about the production flow in the software itself. This is a really important part of the process and I’ve got a few tips for you as we go through this.
Think about the flow in advance.
Before you ever go live, you should be thinking about the content itself and creating an outline of your show. This can be in Word document, a note, or even written down on paper. Whatever works best for you to think through the plan.
Once you’ve done that, you’ll want to make note of any assets you need. When I say assets, I mean video overlays (or graphics) you might want to make.
Are you going to share your screen in order to present information? How about guests? These are the questions you need to ask yourself and the assets you’ll need to plan out.
Let me put this into perspective for you.
This show had the countdown timer (that’s an asset), and then we had a teaser (what are you going to learn today), then I do a little bit of engagement (I hang out with you guys), then I restate the teaser in a different way, I ask if you’re new because I love meeting new people and learning more about you, I roll the intro video (that’s another asset), I talk about the goal, I share the GLN (or Go LIVE Now) gear guide (another asset)… you get the idea.
Once I have the outline done, it’ll help me identify what assets I’ll need and then I can start adding those into Ecamm Live and planning out my Scenes.
Moving your plan into the software
Once you open Ecamm Live, you’re going to want to take a moment to make sure the app is laid out the way that works best for you and for your show. You can show all windows, change their size, rearrange them, or even remove ones that you don’t need. Remember that every change you make will stick until you change it again.
For example: If you are doing a Q+A, you might want the comments window a little bigger and arranged where you can see it best.
It might take some trial and error, but you’ll figure out what works for you.
When you’re working on your show flow, you’re going to want to have the Scenes window open. In my show, the first scene is my countdown timer, and then the next scene is my teaser (so it’s my main camera on me), and then the next scene is my intro video, and so forth.
Once you have your scenes laid out and labelled, then you can go in and add the assets to each relevant scene. This means you can upload your countdown timer animated graphic and music to the countdown timer scene and maybe you want to add a picture-in-picture Overlay for one of your Scenes.
Remember that with Video Overlays and music, you can assign actions in Ecamm Live. This means you can set it so that when your intro video ends, it goes automatically to the next scene. It’ll make it easier for you to flow through your show.
Pro tip: Once you have your Scenes looking perfect, you can lock them so that nothing changes when you’re live.
Another thing that I like to do is have some extra Scenes at the bottom just in case something comes up in your show that you might want to change over to, like going into Ecamm Live Demo Mode or having a blank Scene with no Overlays in case a guest wants to share their screen.
Scene folders for the win
If you have more than one live show that you’re managing, you’ll want to take advantage of Scene Folders. This will let you store pre-planned Scenes so that you can find them easily.
You can also drag Scenes or Scene Folders from Ecamm Live onto your Desktop and send them along to another Ecamm Live user if you’re remote producing a show. Then he/she just needs to pull them into their Ecamm Live app to have everything all ready to go.
Remember that a good live show requires planning. You need to have a good outline of what content you’re going to share and then you need to implement that outline in your software so you’re prepared to run through your show flow without any errors.
Good luck!
We’re here to help!
Wherever you are right now with your business, you’re not alone and we’re here to help. Go LIVE Now! is a weekly live show on YouTube and Facebook. If you join us live, you can ask your questions at the end of each episode. If there’s a subject you want us to cover, let us know in the comments below.
Want to learn more about Ecamm shows? We have lots of amazing shows to choose from so you can take your live streaming to the next level.
Or…
Join the Ecamm Live Community to network with other live streamers like you.
Snag some free Ecamm Live training with Luria.
Get help from the Live Streaming Pros in Creating Your Own Dream Studio.