Once you’ve made the decision to start live streaming and you’ve grabbed all of the live video gear you need to get started, the next step is making sure that you have professional graphics (or assets) to share and display throughout your show. In Ecamm Live, these are added to your broadcast as Overlays.
Are you sharing your logo on screen? Adding your font and brand colors to the graphics you choose? If not, why not? All of these things not only give your live videos a professional look and feel, but they also build a sense of brand recognition among your viewers week after week.
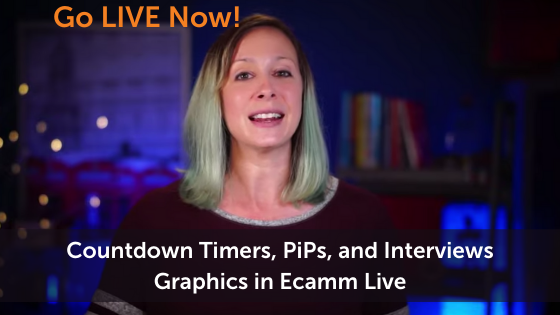
Our goal today is to help you learn how you can use graphics in Ecamm Live to up your game and give your live stream videos a truly pro look. We’ll be talking about countdown timers, intro videos, lower thirds, picture-in-picture (PiPs!), interview graphics, Overlays, and more.
In this post we’ll cover:
- How to set up your graphics in Ecamm Live for a professional look
- What you need to know about creating your graphics
- What file types and specs you need
Watch the full episode
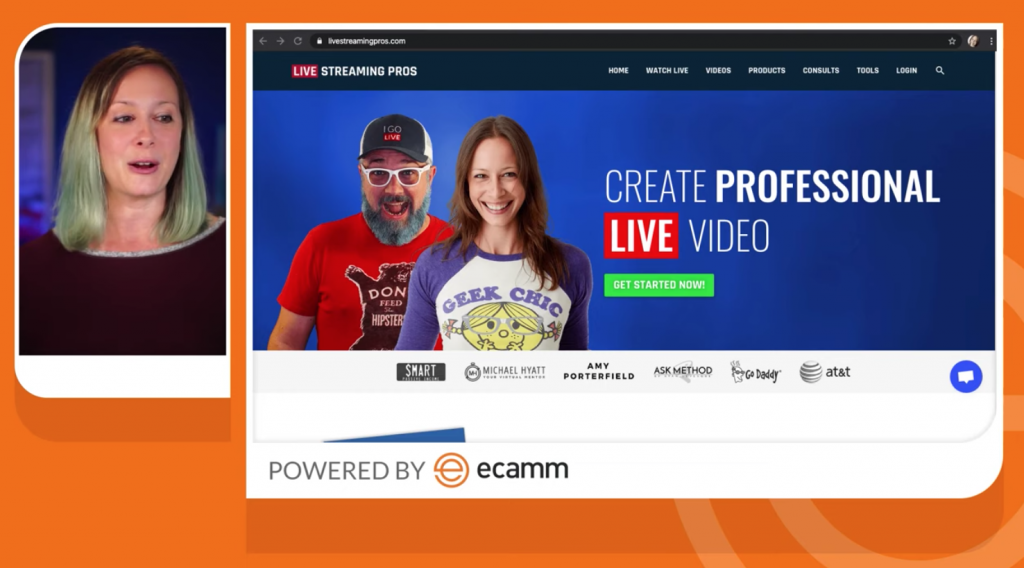
Go LIVE Now! is a weekly live video show hosted by Luria Petrucci of LiveStreamingPros.com. You can catch new episodes each week on Facebook and YouTube.
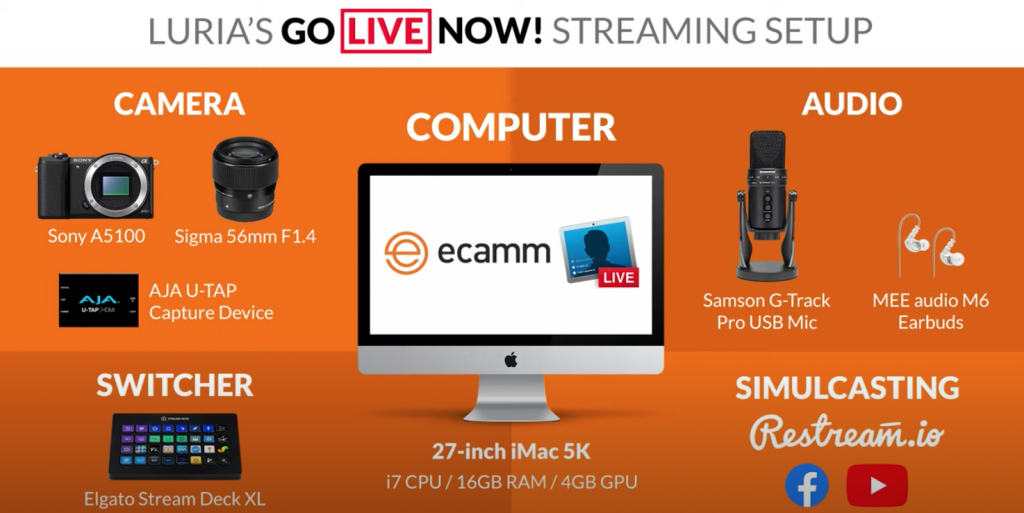
Want to know what gear Luria is using? Check out the full Go LIVE Now! gear guide.
Note: we had a technical glitch and this episode is broken into two parts. Please see part one and part two below.
Part 1
Part 2
What Exactly Do You Need For Your Graphics?
Everything we’ll show you today was created by a professional graphic designer (thanks Paul Dixon!) and then brought into Ecamm Live as an Overlay. You can do this by dragging and dropping the files in or uploading them into Ecamm Live from wherever they sit on your computer.
Some of the things we’ll discuss today are features in Ecamm Live. That includes things like countdown timers, picture-in-picture, and bringing on guests. Those features are enhanced by the graphics that are created elsewhere (ie: by a designer or by yourself using a graphic design app or tool).
You can absolutely create everything you see in this episode of Go LIVE Now! All you need are images (16:9 ratio, 1920 x 1080 pixels with transparent “holes” where the video will go) and/or an Apple Pro Res 4444 formatted video files. These files are easily added into Ecamm Live.
An important thing to remember! Not all of us are graphic designers and should be creating graphics. Consider whether it makes sense for you tackle this on your own or if you should hire someone to help.
Apps You Can Use to Create Your Own Graphics
- Milanote
- Easil
- Canva
- Snappa
- Photoshop
- Keynote (yep! You can use this to remove background colors and save images as PNG files)
Remember to keep it simple if you’re designing it yourself as you learn what works and what doesn’t.
How to Build Out a Countdown Timer for Your Live Video

The countdown that we use for Go LIVE Now! is a transparent MOV file that sits on top of our main camera Scene in Ecamm Live. This allows viewers to see the video feed behind the graphic (dancing and prepping for the show) and gives a unique and professional look to the broadcast. You could choose to just have a regular video file that you layer the countdown on top of or even a static image. It depends on the look and feel you’re trying to achieve.
In our example, we add the transparent MOV file into Ecamm Live as an animated Overlay. Adjust it to take up your full screen. Make sure you’ve created a short, small file so that you can loop it and not worry about it bogging down your computer.
Creating a Loop of Your Animated Overlay
To create a loop of the animated Overlay, you just need to click the arrow to the right of the play button in Ecamm Live and select “loop”.
This file has an animation (the moving circle) and “starting soon” text built into it and is slightly transparent (so that you can see Luria behind it). The MOV file does not contain the countdown. That’s a feature in Ecamm Live.
Once you have your transparent animated Overlay laying on your Scene, you can add the countdown feature into it. You’ll find countdowns in the Overlays menu in Ecamm Live and you can customize the amount of time, the font, the color, and the size.
Be sure to check the “go to the next Scene when finished” checkbox so that when your countdown ends, your show will start.
You can always test out your countdown timer. And you can certainly start your broadcast 10 minutes earlier (or whatever countdown time you decide on) so that it counts down to your exact start time.
You can also add music to your countdown timer in Ecamm Live. Make adjustments as you need. And don’t forget to mute your mic! It’ll unmute when it goes to the next Scene and your show starts.
Make sure you’ve planned out your Scenes in advance and have a next Scene to go to. Here’s more on Scenes.
Important note: If you want to try Epidemic Sound for your music, you can grab a free trial here. Please please please do not play copyrighted music. You will be shut down.
How to Add an Intro Video to Your Live Video

You can create an intro video for your show by adding it into Ecamm Live as an animated Overlay and selecting “play full screen with audio.” You could also drag and drop it into Ecamm Live.
Remember, this is a file that you (or a designer) have created previously and are adding into Ecamm Live.
When you add the video in full size, Ecamm Live will automatically mute your microphone. If you show up as a picture-in-picture in the bottom corner, you can close that out if that’s the look you prefer.
Make sure you select “go to the next scene” on the video file so that when it finishes, you don’t have to worry about changing to the next scene manually.
How to Use a Lower Third in Ecamm Live

A lower third is the text, graphic, or animation that you bring into your live video that shows your name, a URL, your business name, or a guest’s name. It can be created in Ecamm Live if you’re just looking for text. Create your own by going to Overlays > Text Overlay.
In this example, we’re going to walk through how to to use an animated lower third in Ecamm Live.
If you’re a church live streamer or someone who needs more detailed, automated lower thirds, you can also use an additional app like ProPresenter 7 or NewBlue Titler to bring lower thirds into Ecamm Live using NDI.
To add your lower third into Ecamm Live, simply drag and drop it into a new Scene or upload it as an Animated or Image Overlay. To trigger your Overlay, you can simply turn it on or off in Ecamm Live’s Overlay menu (click the eye icon) or put it in its own Scene and use Ecamm Live’s hot keys or a Stream Deck to change to your Overlay and back.
How to Add a PiP (Picture-in-Picture) to Ecamm Live
If you’re looking to share your screen to present something, but also have your video feed in the live video, then you’ll want to try PiPs alongside a pre-designed PiP graphic that you’ll upload as an Overlay into Ecamm Live.
Like everything else in this post, you’ll need a pre-designed graphic (asset) that has two transparencies. One for where your video comes through (the PiP) and one for where your screen share will come through.
As we’ve gone through previously, you’ll upload (or drag and drop) your PiP Overlay graphic into Ecamm Live and make it full screen.
Then you’ll share your screen and resize that to fit into the transparency space on the right.
Once you’ve done that, you’ll want to add a picture-in-picture by clicking on the plus icon on the video you want to add from the Ecamm Live video source switcher.
Move the picture-in-picture up to the correct space, make sure you select “tall” aspect ratio, and uncheck “show above Overlays” so that everything looks seamless.
Then position your shared screen, turn off the bookmarks bar, and adjust it accordingly to give it a clean look.
PiP achieved! Bam. How easy was that?
How to Create a Guest Pip (or Interview Graphics)
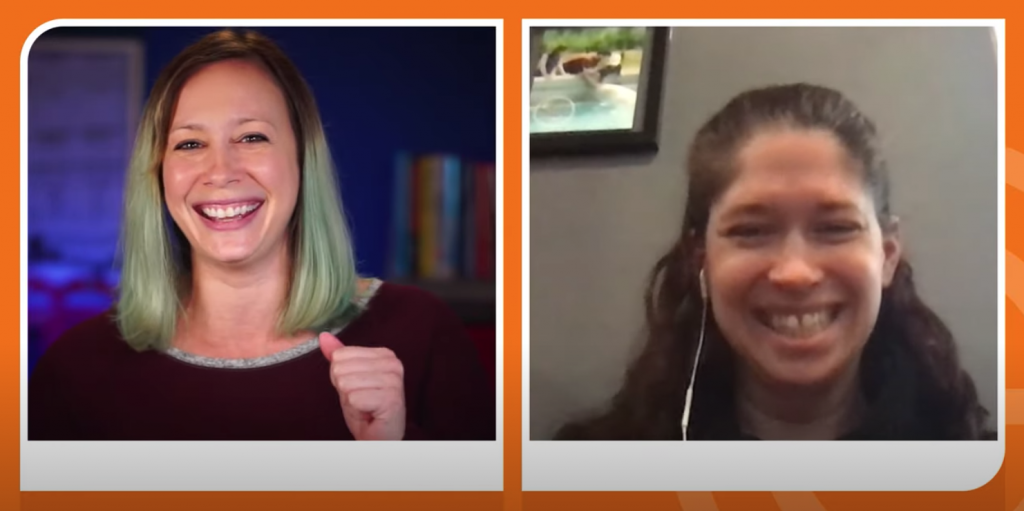
To bring on a guest in Ecamm Live, the easiest way is via Skype. Here are the steps to easily bring on a guest.
Once you’ve sorted out how to bring on a guest, here is how to create and use a designed interview PiP graphic.
Add an Overlay to your Scene by dragging and dropping into your Scene in Ecamm Live or using the Overlay menu to open and find your graphic (asset) on your computer.
Once you’ve added your Overlay in it’ll look a little awkward. Hang tight.

Now you’ll want to add in your guest using the video switcher in Ecamm Live. Click on the + icon on the video feed you want to pull into the second transparent space in your graphic.
That will bring your guest’s camera feed into Ecamm Live and will fill up the right hand transparent box in your graphic. Good news! You won’t have to do much positioning. Just add or remove your guest.
You could also do a simpler version like this. Same process. Different graphic. In this case, it’s literally just an orange line separating us, but it’s in the Ecamm orange, so it’s on brand. Win.
We’re here to help!
Wherever you are right now with your business, you’re not alone and we’re here to help. Go LIVE Now! is a weekly live show on YouTube and Facebook. If you join us live, you can ask your questions at the end of each episode. If there’s a subject you want us to cover, let us know in the comments below.
Want to learn more about Ecamm shows? We have lots of amazing shows to choose from so you can take your live streaming to the next level.
Or…
Join the Ecamm Live Community to network with other live streamers like you.
Snag some free Ecamm Live training with Luria.
Get help from the Live Streaming Pros in Creating Your Own Dream Studio.
Register for our FREE Leap Into Live Streaming Bootcamp and learn more about live streaming from over 40 experts.