As a podcaster, having impeccable, quality audio is crucial. If your audio isn’t perfect, audience engagement for your podcast show will drop. Ian and Mike Russell share their best audio tips for top-quality sound in this episode of The Podcaster Hour.
In this post, we’ll cover
- How Mike got into the world of audio
- How you can get started with awesome audio
- The best equipment you can use
- Top audio tips for your show
Watch the full episode
Want to learn even more?
ECAMM LIVE (Free Trial) https://iag.me/ecammlive
IAN’S GEAR GUIDE https://iag.me/gearguide
LIVE VIDEO CONFIDENCE GUIDE (opens with FB Messenger) https://confident.live/subscribe
CONFIDENT LIVE MARKETING SHOW https://iag.me/podcast
Today’s post is all about how to sound awesome on your podcast, and my guest is Mike Russell, the creative director of Music Radio Creative. Mike knows everything you need to know about audio and to set up the audio for your podcast.
He is passionate about helping you sound great, and he presents a weekly live stream and releases regular videos on his YouTube channel. His YouTube channel includes videos for producing podcasts, cleaning up audio, improving the sound of your voice, creating music, sound design, and more. Mike really is Mr. Audio.
How did Mike get into the world of audio and podcasting?
Mike: That’s a really good question. I’ve always been fascinated by audio since I was single digits in age. And I think it was actually listening to the radio stations back in the day, of course, when radio was a big thing. Now you say to kids, “radio,” and they’re like, “what’s that?”
But I used to listen to a station in London called Capitol. And they played beautiful jingles with pitch shifting and all these strange things that were happening to the voice. And it was then that I thought, “I really want to be able to do that.”
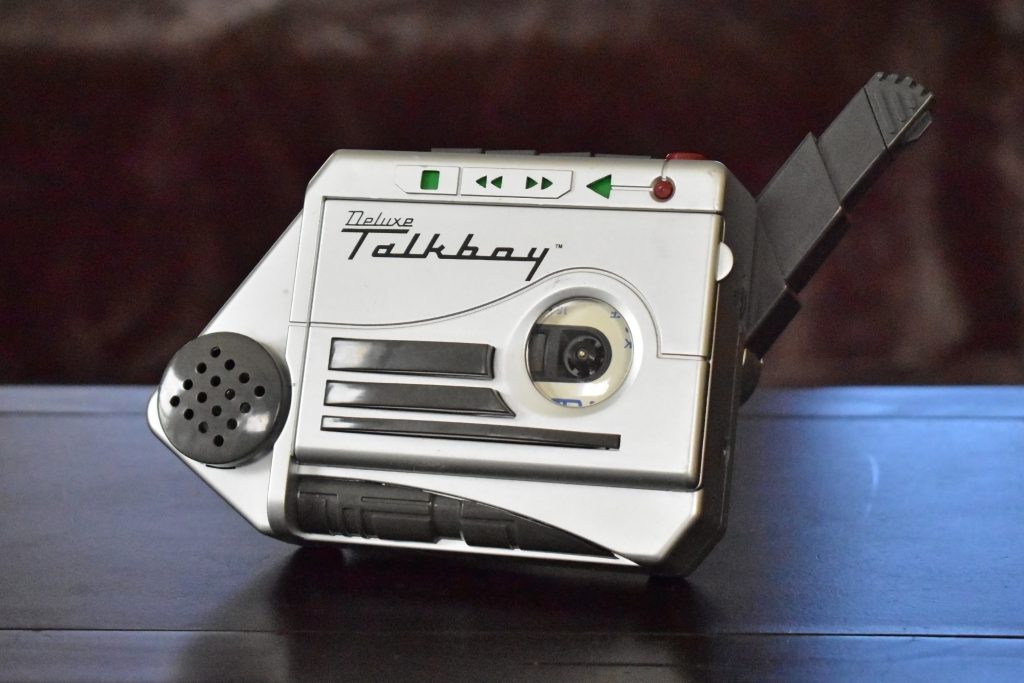
I was just like a kid who just wanted to play with and change the sound of voices a bit like Macaulay Culkin in Home Alone where he’s using the Talkboy, slowing and speeding up voices and stuff like that. Eventually, I discovered, Oh my goodness, I could actually turn this into a career.
I kind of went into radio and worked in radio for two decades. Then I started a podcast, started traveling and going to conferences, meeting lots of other podcasters. And here I am today, on a podcast. So this is like the pinnacle so far.
Ian: That’s awesome. I remember back in the day, in the ’80s and ’90s, and I had these tape decks. I would kind of record little bits and snippets. Sometimes I’d have a microphone and plug it in the left and the right and go, hello, hello. I’m such a geek, but it was just great fun to do.
And now, it’s amazing the kind of gear that we’ve got today. If we had bought the kind of stuff we have today, it would have cost… not millions, but we can get gear today so much cheaper than back then.
Before we get started, I do want to address a question right off the bat.
What is the best audio compressor?
Mike: I’ll do my best to simplify things. If you’ve never heard audio technical terms before, I can make them simple and do my best to cut them down to just the audio tips you need to know.
Audio compression takes your voice, if you’re a podcaster, and it takes all those loud bits and squashes them down a bit, so they are the same level as the quiet bits. Since it’s squashed down, you need to turn it up a bit. So you squash down the loud bits, turn it all up, and then you get a consistent waveform.
It’s the difference between hearing some speaking, and they’re getting louder and quieter as they move to and from the microphone. In radio, they use audio compression for the person speaking and for the output at the radio station because it’s consumed in many different environments (in the car, gym, etc.), and that’s how podcasts are consumed as well.
Essentially, audio compression helps you get heard in a better way.
Ian: Love that. So that’s what audio compression is. Many radio stations in the car, particularly more pop and speech ones, they compress those a lot. If you’re in the car, you don’t want the music to be really quiet because then you can’t hear it. If you put the volume up, then it blasts in your face.
To answer the question, what’s the best audio compressor, or is it a more tricky one?
Mike: Well, I would say the best audio compressor is the one that does the job for you. It depends on what you want to do. There are many different compressors or different settings on compressors for different purposes. Not all compressors have the same settings, but you want to look for a compressor that has:
- Threshold
- Ratio
- Attack and release
These are basic things you’ll find in most audio editors. If you’re doing post-production, any compressor that’s inside an audio editor now will work perfectly well. If you want to go to hardware, you can definitely use hardware.
I myself use DBX compressors, and I know Ian has one on his microphone as well. It will compress you in real-time, so rather than adding compression on later when you’re working in an audio editor, we’re doing it now. It keeps the level of our voices at a consistent volume.
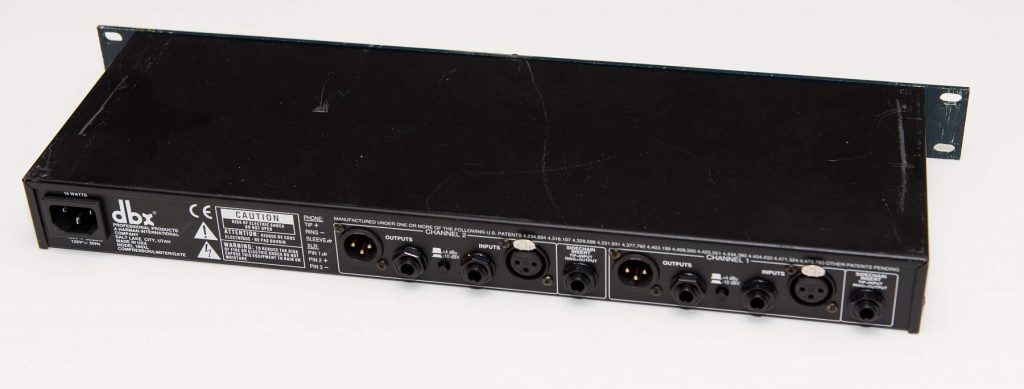
So there’s DBX, Behringer, and many other different brands out there. Go take a look at them all and see what works for you. Also, keep it simple, especially when you’re first starting.
Ian: Yeah, keeping it simple is really important with some of these. We’ll go through some of the different brands like DBX a bit later.
When we’re talking about live video, this is the pre- and post-production side of things. Obviously, if you’re doing a podcast, you can edit it afterward to compress the sound. But if you’re going live, you’ll need some special either software or hardware to do that.
Here’s another question. I’m not sure if you’ll be able to answer it. Have you experimented with Adobe Audition on the new Apple M1? To clarify, Adobe Audition is amazing editing software, and the M1 chip is the new chip in the Apple Macs, which is really cool and snazzy. Have you heard anything about weirdness happening there?
Mike: Well, that’s really strange. I have not used Audition on an Apple M1 chip, so I have no idea, but hopefully, the weirdness gets sorted out.
Ian: Hopefully, that’s the thing. I’ve actually avoided getting an M1 Mac. I’m usually an early adopter, but I think with something like this, we need to wait a bit before the kinks get ironed out.
Here’s another great question. What kind of headphones do you use and what features do you look for when buying them? Mike and I are both wearing nice, big headphones, but sometimes you’ll see live streamers who aren’t wearing headphones at all. What are your thoughts on wearing headphones?
Mike: There’s an argument both ways, I’d say. It’s a good idea to wear headphones, especially if you’re performing an audio podcast. But, if it’s just you giving a monologue, you don’t need to. I would advise it on the basis that you can hear any mistakes you make, like being too close or too far away from the mic, hearing pops. Things like that, and then you can review off-mic.
Same with if you’ve got a guest and they haven’t got a good mic technique. Better to catch it at the source rather than have to make it sound better later. Although a big style of headphones kind of looks strange if you’re on camera, it’s up to you. If you’re talking about just audio, I think it’s okay.
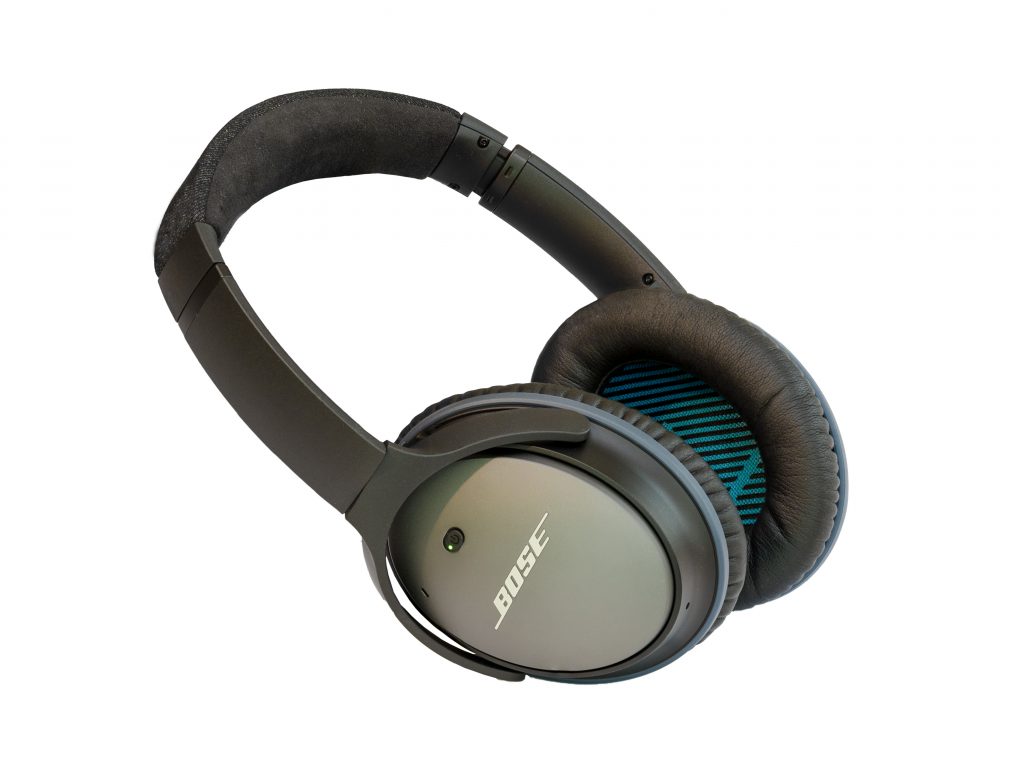
And you, Ian, look great in your Bose QuietComfort. They’re an airline pilot favorite, I believe. I’m curious if you use the noise-canceling feature when you’re doing a podcast? Can you switch it off and on? Do you have it off or on when you’re podcasting?
Ian: I haven’t quite decided yet, actually. I currently have it on, but I’ve got one ear off slightly because I want to hear myself. I’m changing things all the time and buying new gear, so I’m probably going to plug it in. Or, because I have a new Rodecaster Pro that I want to play with, I will switch it off.
I’m not convinced by having noise-canceling headphones when you’re doing a podcast because I think you want to be able to hear your own voice. Do you listen to your own voice? Do you put your mix through so you can hear yourself while you’re speaking?
Mike: Yes. So I put a real-time output through so I can hear my voice in real-time, along with any music I play and a guest as well. I was curious about the noise cancellation because I find that good, obviously, if you are traveling or on a plane, which none of us have done recently. But when we could, noise-canceling is very good for blotting out the sound of engines and things like that.
But, I think if I had the noise cancellation on, I’d feel a bit dizzy because it kind of sucks out all the outside noise. I think it’s nice to have a little bit of noise. Like you say, have one ear slightly off so it doesn’t feel disorienting.
Where is a good place to start to have awesome audio?
Ian: So, we’ve had some techie questions about compressors and M1 chips, which is great. But if someone is just getting started, it’s easy to feel overwhelmed. They think they need the latest gizmos, fancy mics, a Rodecaster Pro, maybe a DBX. But, if someone is just starting out and they’re a little worried about the tech, where is a good place to start?
Mike: I think you’ve hit the key absolutely perfectly, Ian, by saying you can start out really simple. When I look at my own audio journey and setting up my podcast studio, I didn’t start with the gear that I have in front of me now. And when you started, I know you did a lot of stuff on your phone, which is perfectly capable. Then you had the microphone and later introduced the compressor.
For those who are feeling overwhelmed, the most important of my audio tips is to get yourself a really decent microphone. And you don’t even have to worry about mixing desks, audio interfaces, XLR cables, and all of that. If you really just want to get it started and sound good, USB microphones are a great entryway to get started without feeling too overwhelmed.
Ian: Did you actually just say that? This is going live.
Mike: The technology has gotten better! A lot of the bigger companies got on board in 2020. I did a video on USB microphones, and there are a few companies out there that really hopped in and upped the game. When I was traveling back in 2019, I took a few of them with me and used them when I was on the move and they worked really well for me when I needed to record quickly in a hotel room. I just plugged the USBC socket into my MacBook, and recording was really easy.
Ian: Awesome. I started off with a Blue Yeti, which, as you know, a lot of people use it. But, a lot of people don’t like it as well. I was happy with it, but the problem is that it’s only USB. Something like the Samsung Q2U has an USB and an XLR.
Do you think getting a microphone that has both XLR and USB is a good investment because at least then you can get some extra gizmos later on?
Mike: Yeah, I mean, you can certainly leave the option open. There are a few mics like that, as you mentioned, the Samsung Q2U. I think the Audio-Technica ATR2100x-USB is another one, although the audio quality is not as good as some other mics that you can pay a bit more for, but it is at the budget end. There’s the Blue Yeti Pro that is USB and XLR, too.
It really depends on what your purpose is. If you want something simple or if you’re going to be traveling a lot, look for a USB microphone. But, if you’re going to be in a studio or a recording space week in and week out, I’d advise you to go and look at the XLR. Get an XLR cable, hook it into a DBX audio compressor, and all of that.
Ian: Awesome. Okay, here’s another question. What’s the best external mic for an iPad Pro and bonus question: since there’s only one lightning port on the iPad Pro, do you have a connector suggestion that will allow you to add a mic and a camera?
Going off of that, Mike, do you think recording on a device like an iPad Pro is a good idea, or do you always recommend doing it on a computer?
Mike: Yeah, I think it’s totally possible, certainly with the technology available today and Apple making it super easy to do those things. I’ll confess, I haven’t used Apple products for a while, apart from my trusty Macbook. I’m not very familiar with the iPad Pro and what you can plug into it or connectors.
I don’t think I can give a really good answer here right now, but if you’d like some further information on it or you’d like me to look into it and give a few suggestions, I’ll tweet about it.
Ian: I’ve played around a little bit with this. I’m not sure that I’m an expert, but I think you can buy connectors that you can plug in via lightning, and it’s got a USB and lightning. I do believe the Blue Yeti mic can work with that, but I haven’t tested it. I think the answer is: yes, it can work, but we can’t really help you any more than that.
A tour of Mike’s studio
Ian: So, Mike, I did warn you about this. I think it’s at that point in the show where you do need to give us a little tour of your studio because it is awesome. I have to admit, I have been in-person to your studio, before Covid. It looks like you’ve added a lot more. Just give us a little tour so we can have some tech envy.
Mike: Absolutely. In the last two or so years, the studio has definitely changed. I’ll give you a sky bird’s view.
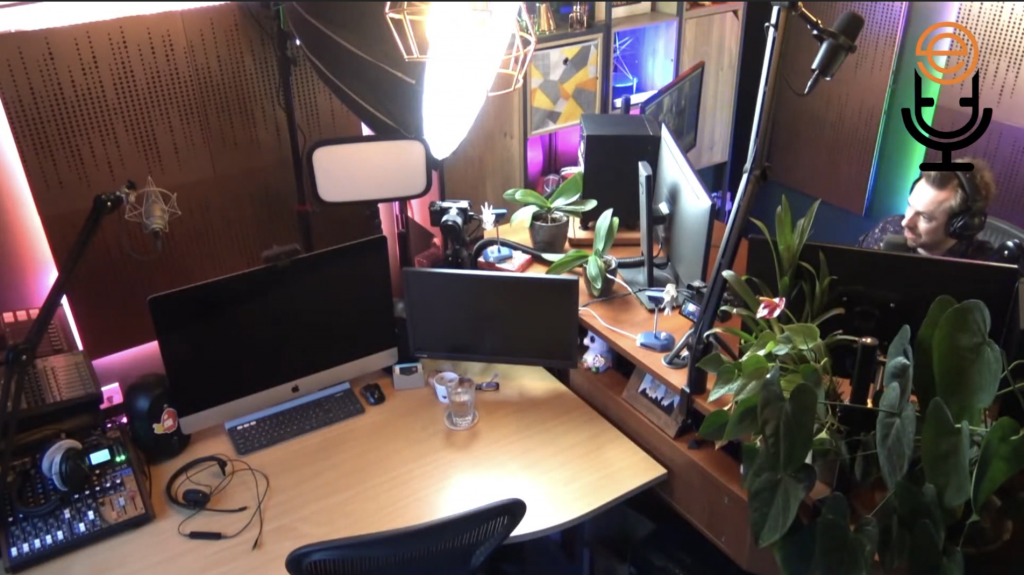
You can see the desk where my co-host and wonderful business partner, Isabella, sits. She’s got a TASCAM Model 12 there to do her mixing and recording. I also hook that into my desk to put her audio out into the live stream. She also works with a Mac.
If you have eagle eyes and look to the left of the screen, you’ll see a Soundcraft Signature 10, a Rodecaster Pro, a Neumann TLM 103, and a Logitech BRIO 4K on her desk. There’s also a Sony Alpha Camera that gets her onto the live stream and an El Gato Key Light that is remote-controlled from my computer.
There’s also an aperture that I can’t remember the exact model for right now. I favorably call it the Peter McKinnon night light because that’s what he uses. Peter is on YouTube, and he’s a fantastic film editor and photographer. It takes up about a quarter of my room still and provides amazing lighting.
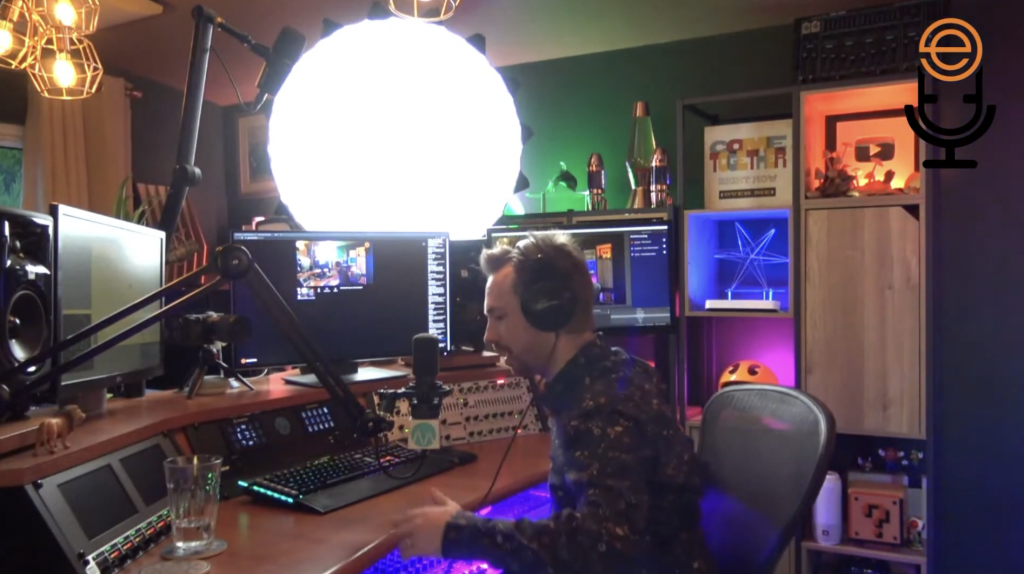
Over here, you’ll see my desk, which is a ZAOR Miza X2. It’s a beast of a desk, and I have a video about it on my channel. The desk has space for 12 different 19-inch rack units here, and I’ll walk you through it.
First, up above, I have the Shure MV7 microphone, but I’m actually speaking to you on an AKG C414 XLII. Under here, I’m mixing all of my audio on a Soundcraft Signature 12MTK, which is a multi-track desk.
From left to right, I have two screens that aren’t on at the moment. I enable those live streams, and I get confidence monitoring in front of me so I can see which camera is live. I can also quickly see a multi-view screen and the other cameras we use for our weekly live stream to podcast.
Underneath that, I have the Behringer PowerPlay Pro-8 HA8000, which is a great headphone preamp. It allows you to plug in up to eight different headphones and offers two different audio sources. When I use this, I get to listen to myself pre- and post-processing. Pre is just the raw output from my mic, and post is what you’ll hear on the live stream.
I have a custom-built rack that fits my Elgato Stream Decks, and I can push buttons on here to change the camera angles. I also have a Furman Power Conditioner here. Power conditioners are great if you are working in audio and want to have the least noise coming from your power sources.
On the right side is my rack of DBX units; I have two DBX 286s microphone processes, one for me and one for my co-host, Isabella. I run those into the Soundcraft desk, and the output goes into my DBX 215s, which has an equalization module and then into a DBX 166xs, which is a compression module, and then finally out to the live stream.
And, if you manage to follow all of that, then you deserve an award.
Ian: I think you deserve the award for remembering how all that works! If you’re like me, you spend a lot of time setting it all up, plugging it all in, and then forget how it all works.
Mike: Yeah, absolutely. Oh, also, I wanted to say. One of the best upgrades I’ve made recently is this trackball that I use for audio editing. I was a mouse user for years and refused to change. I was happy with my Apple Magic Mouse. But, now I use a Kensington trackball, and oh my goodness. I’ll never go back to using a mouse again.
Ian: You know, I shouldn’t really admit this, but I don’t think I’ve come across that before. You should have told me before we went live.
Mike, you have an amazing setup, but of course, it’s been a journey for you. You know, this is not something you’ve started off with. This is something that you’ve progressed over time. You don’t need all of that for a live show, but those are all the different elements that you can have.
Let’s answer some more questions.
What’s the best way to control audio levels for videos and music in Ecamm? Mike, you’re mainly a PC user, so you’re not able to use Ecamm regularly. In the software, we have a sound levels window panel to alter our levels and guests’ levels.
What would you suggest if you don’t have a mixer? Is there a way you can test things out? One thing that I’ve done is going live and then listening back to test it, but that’s not a great way.
Mike: Yeah, I highly recommend doing a test stream to check all your settings are good. Set up a private YouTube live stream, go live, wait for it to process, and watch the video back to see any errors. Do you get visual feedback on the levels on each audio source inside of Ecamm?
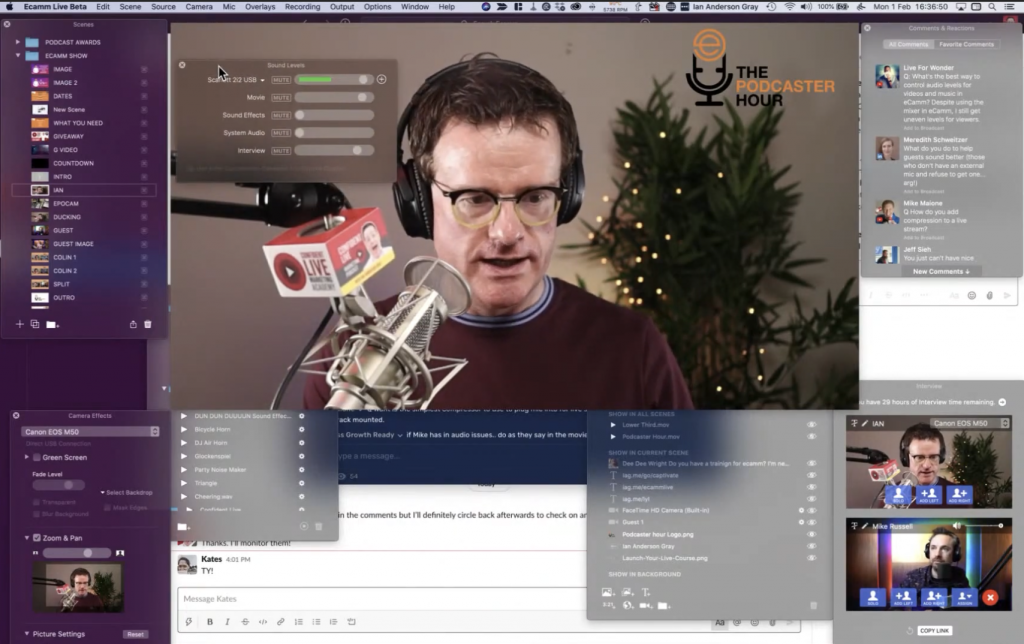
Ian: Yeah, we can. If I just go into live demo mode here, you can see I’m using my Focusrite Scarlett 2i2. So if you say something, Mike, we’ll see your levels, and I can probably boost you up a little bit just to get all levels more even. I think that’s what I would do. We didn’t do this at the start, which we probably should have done to test the levels.
Mike: Regarding that, obviously you have a super mixer and what I like about the mixer inside Ecamm Live is that you can see not only the green, which shows the bulk of your audio, but then as you go a little bit louder, you go into the yellow. If you peak, you go into the red.
You want to make sure none of your audio sources are going into the red. You want to be kind of, tickling the yellow with all of your levels and going nowhere near the red. If you can do a test on all of your levels before you get started and get them all in the same place, hopefully, you’ll be okay there.
If the sound is still uneven, that may be an issue with whatever audio is coming in. Your microphone may be completely raw and unprocessed, and then when you get loud, it gets louder. When you get quiet, it gets too quiet, and that’s what I mentioned before. Compression might be a good thing to introduce somewhere in your audio setup to level out the sound.
Ian: Here’s another question. What do you do to help your guests sound better, specifically those who do not have an external microphone? Have you had this experience where you bring somebody on, and the audio really isn’t that great?
Mike: Yes, or they’re wearing Apple Airpods, which are great for phone calls but not for podcasts. Or they’re wearing headphones, and the microphone is attached to the wire, and it scratches against their shirts. Sometimes they may even clatter against earrings. If you notice the mic is rubbing up against someone’s shirt or there’s some jewelry jangling around, hopefully, you can just ask them to change or move the mic.
There’s not really much you can do; you’re at the mercy of the best kit that your guest has. Something I’ve known other podcasters to do is they’ll mail out an audio setup or recommend one to their guests. If it’s not going to cost them major money, maybe for a $20 or $30 headset, they’ll just get them the audio they need.
I’ve got a Sennheiser headset that I use for Zoom calls that I bought during the lockdown. While I wouldn’t use it to record a podcast, if a guest of mine was using it, I prefer it much more to Air Pods or computer microphone solutions. So maybe something like that.
Ian: Okay, next question. How do you add compression to a live stream? We talked a lot about compression already, and you mentioned the DBX 286s, which I also have after you recommended that I get it. The DBX 286s is one way you can add compression to the mix. What are some of the settings here, and what we need to think about?
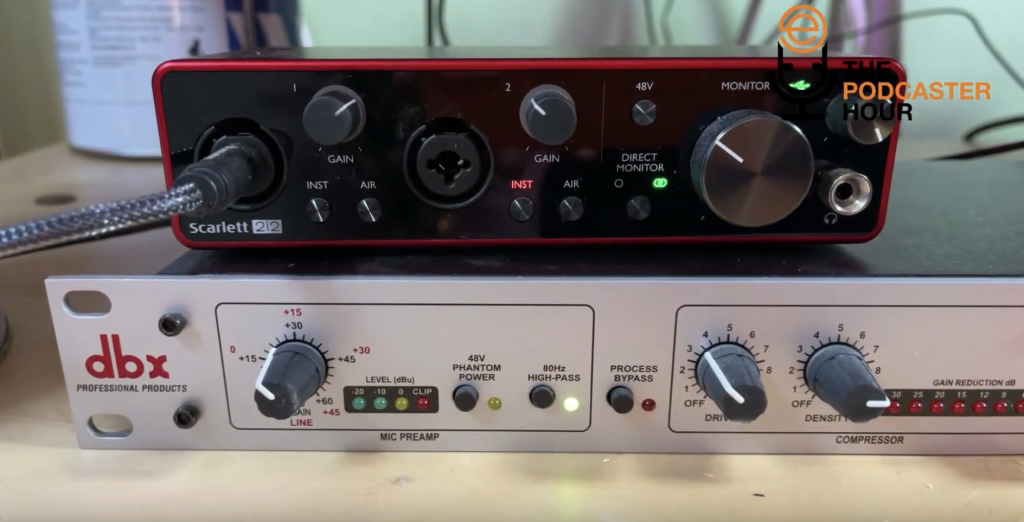
Mike: Of course. If you have a DBX 286s, the first thing you’ll do is plug your microphone in at the back. The first dial you can see is labeled Mic Preamp, which is essentially the microphone level you’re sending into the processor to be compressed and enhanced. You want to twist that dial so you can go nicely into the yellow. If you speak, we’ll see the lights light up.
Next to that, you’ve got a 48V Phantom Power light. You’ll only need this if you’re using a condenser microphone. The 80Hz High-Pass filter is a really good idea. It cuts off any low-end frequencies, so if you’re recording near a busy road, switch that on, and it’ll filter stuff out without affecting your voice.
Process Bypass you definitely want off. If it’s on, it bypasses all of the dials that go further down on the DBX. Then you have the Compressor box, which has drive and density. That might be confusing because compressors usually have threshold and ratio. You want the drive on a lower point because the further you turn it up, the more it pushes the microphone signal into the compressor. Keep it below a 4, but the density can go up a bit.
Essentially what you want to aim to do is get one light coming on, maybe two lights if you’re talking loud there. That positioning is a good place to start with and then twist them around until you get the desired result.
Moving on, you have the De-Esser, which removes ‘s’ sounds and piercings sounds that treble can produce. You can choose a frequency, and then the threshold is how much de-esser you do. You probably want to just go “sss” into your mic and then twist more frequency around until you start to get a light coming on and then push the threshold up.
Next to that, you’ve got an Enhancer, which is essentially EQ dials. LF Detail is bass, and HF Detail is treble. LF will beef up your voice and make it sound bassy, and HF makes the voice crisper and more clear.
The Expander/Gate will be red if you are not speaking and turns green when you are speaking. The red means no audio is being heard. This is great if you are in a noisy environment or have fans going on and off.
Finally, at the end is the Output dial, which selects how loud your final output will be. Because we’ve done some compression, you’ll need to increase the gain. Compression, by its nature, crushes down the audio.
So, that’s a very brief overview.
Ian: Wow, that’s very, very helpful. So the DBX kind of sits in between your microphone and your audio device. Obviously, you need to plug it into some sort of audio device, as I have for my Focusrite Scarlett 2i2.
To some people watching, all of that might sound a bit complicated. Are there any simpler solutions that you recommend?
Mike: Absolutely. Well, the good news about setting up a compressor like that is you can set it up once and forget about it unless you move rooms or change microphones. Some audio interfaces have a bit of built-in compression as well, so maybe lookout for those. And, some USB mics are also coming out with compression settings now, but I think they’re more software-focused than hardware built into the mic.
If you are live streaming, you won’t have the time to post-produce with an audio editor. But, you may be able to use a VST or AU (audio plugins) for Mac users. Some audio plugins are compressors. Sometimes software also allows you to do that natively when you’re streaming. On Mac, software like Audio Hijack lets you redirect audio sources plugged into your computer.
Ian: Yeah, I’ve played around with Audio Hijack. I’ve also used Loop Back. They’re both from a company called Rogue Amoeba.
Alright, this question asks, what mics do you recommend for video if you want the mic out of frame? It’s probably a good idea to talk about different types of microphones. I’ve already shown my Blue Yeti, but what would you recommend?
Mike: There’s a couple I’ve had success with. If you want the mic to be out of shot, generally, people tend to opt for shotgun microphones. So, there is a long thin tube that you hang off a boom pole and point it as close as you can to use it. If I had my boom mic here coming on my camera, I’d have it just there and pointing toward my mouth. Wherever it is pointed, it will pick up the audio and reject any audio from outside the area.
It won’t be as good as talking directly into a microphone like Ian and I are doing, but it’s definitely the way to go for being out of shot. I’ve also had great success with condenser microphones like the AKG P120. It’s very cheap, about $99, and it’s a great mic. You can put it on a boom arm and put it just out of shot.
With the microphone I’m currently using, I could probably put it out of shot if I tweaked my audio levels a bit. However, I’ll lose the proximity effect, which means the closer you get to the mic, the more frequencies that are heard and the better your voice sounds. The further away you are, the thinner your voice becomes and the more background noise that gets picked up.
Ian: What is the simplest compressor you can use to plug a mic into a live stream? Are there any other solutions besides the DBX that don’t need to be rack mounted?
Mike: It is pretty simple once you set it up. I also like to use a German site, Thomann, for reviews on what to buy. I don’t necessarily buy from them, but they have a lot of great information. What you can do is look for compressors and other equipment and take a look at the popularity, prices, and reviews. There’s a lot of other compressor solutions on there.
If you’re in the US, check reviews and buy from your favorite retailer: BNH, Amazon, Sweetwater, etc.
Ian: We’re pretty close to the end, and there are so many questions, so many things to talk about. We’ve talked a lot about tech, but there’s more to it than just that in terms of how you can sound awesome.
With your company, Music Radio Creative, you do a lot of audio production, but you have loads of voiceover artists as well. Do you have any tips on how to approach sounding awesome from an audio-wise, non-technical point of view?
Mike: Yes, if you want to sound better and make your voice sound better, just practice as much as you can. Don’t be afraid to put on headphones and monitor what you’re saying and how you’re sounding. It can be really awkward at first because nobody likes the sound of their own voice, but after a while, you get used to it. You can tweak your style until it’s perfect, and always do warm-up exercises before you start.
Ian: So often, I think we focus on sound from a tech point of view, but you can also make your voice sound a bit more interesting. We can often sound very boring and speak monotone. Using different pitches, making our voices go up and down helps. I think breath control is very important as well.
Another question I just saw come in, what is the advantage of the Rodecaster Pro?
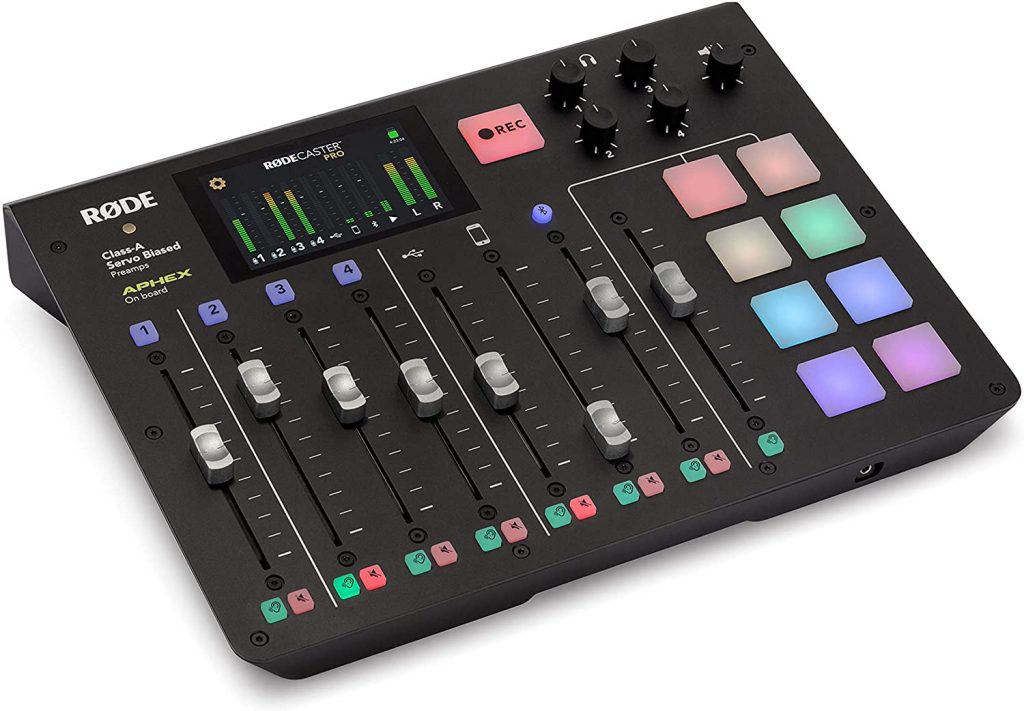
It’s basically a mixer. I suppose we could talk about whether you need a mixer or not. I just got mine yesterday because everyone’s talking about it. Although I’m really happy with my setup, I wanted to play around with it. I think there are some real advantages to this. Maybe tell us a little bit more about your view on the Rodecaster Pro and mixing desks in general.
Mike: For podcasters looking for an all-in-one solution and who maybe wants to travel and have something portable, the Rodecaster Pro is brilliant. If you don’t want all the technical stuff or a studio that takes up half a room, check it out. Basically, they said, what is everything that a podcast could ever want, and can we fit it into one desk?
And they did it. It has sound pads, Bluetooth connections, USB connection, compression and other settings, and more. It’s as complex or as simple as you like. On the simple end, just plug in a microphone, hit a pre-set, and it works. Or, if you want to delve in, you can plug in, change all the settings and set it up to your own taste.
Ian: It is an awesome piece of equipment. The other alternative is a mixing desk and a DBX. What would you say, which one is better?
Mike: There are benefits to each scenario. I like my setup with a Soundcraft desk because I have more granular control over settings and features. The APHEX processing in the Rodecaster Pro is good, but I prefer DBX processing.
Ian: Okay. We’ve got some more technical questions, but unfortunately, we don’t have time to answer all of those. But, I want to end with this question from someone who is still confused about which microphones and headphones to use.
We’ve talked about a lot in this show, and we got quite geeky, but to recap. I prefer dynamic microphones because they’re better if your room is relatively noisy or you don’t have soundproofing.
Mike: Yes, absolutely. Dynamic microphones are a great way to start. The Heil PR 40 or the Shure SM7B are two solid mics. If you really don’t want technical worries, get yourself a USB microphone and plugin with headphones, which are great for monitoring how the audio sounds.
Any kind of headphones will do. Closed-back is best if you’re doing a live show so that the audio doesn’t leak out. Ian has the Bose QuietComfort, and I’ve used the beyerdynamic DT 770 PRO for years; they’re excellent.
Wrapping Up
That’s all the time we have today. Remember, Mike does many amazing things on his YouTube channel, and if you have other questions, you can reach out to him personally via Twitter.
We’re here to help!
Wherever you are right now, you’re not alone, and we’re here to help. You can watch all episodes of The Podcaster Hour on YouTube and leave us any questions that you have in the comments.
Or…
Join the Ecamm Live Community to network with other live streamers like you, grab Ian’s live streaming and podcasting gear guide, and try out his live video confidence guide.
And if you need another podcast to listen to, may we humbly recommend the Confident Live Marketing Show.