Let’s face it – live streaming can be difficult and overwhelming. These pro tips from Live Streaming Pros expert, Luria Petrucci, will help make your live production run smoother.
Have a pro tip? Share it with us in the comments below.
Watch the full video
Go LIVE Now! is a weekly live video show hosted by Luria Petrucci of LiveStreamingPros.com. You can catch new episodes each week on Facebook and YouTube.
Want to know what gear Luria is using? Check out the full Go LIVE Now! gear guide.
7 Pro Tips Streamers Should Consider
1. Remove any cameras you don’t need.
If you don’t usually use your built-in webcam, virtual cameras, or other cameras you have connected into your computer, then remove them from Ecamm Live by going into the Cameras menu and unselecting them.
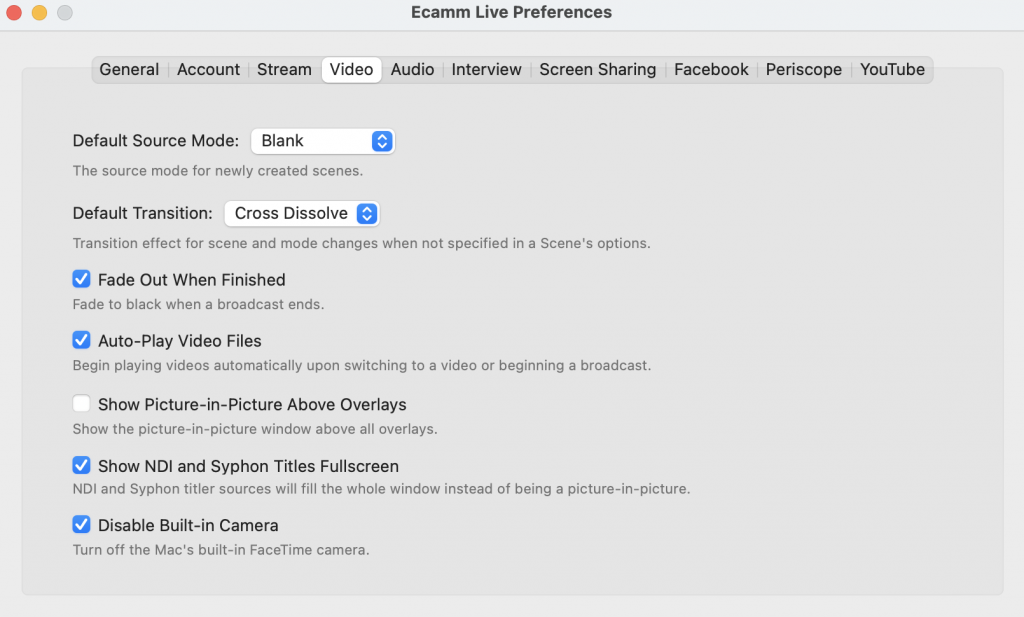
You can also go into Ecamm Live’s Preferences menu and under Video settings, you can check to disable your built-in camera.
Removing and disconnecting cameras helps your computer’s bandwidth and ensures a smoother production.
2. Start with blank scenes.
In Ecamm Live, we use Scenes to plan out our run of show and storyboard our content. The best way to keep things running smoothly is to start with blank scenes. This helps give you a blank slate to start your planning with and helps you leverage Ecamm’s overlays to layer on all of the content that is “Youniquely You.”
You can set your default source mode to “blank” in the same Preferences menu as above.
3. Layer on Camera Overlays.
Ecamm Live’s Camera Overlays let you create whatever customized layout you want. You can choose the size and shape that works for you, select the video feed, and position your video wherever you’d like.
Add in background images, drag and drop in frames and graphics to finish the look. Instant credibility!
4. Convert your large files to a smaller size.
If you’re using Apple Pro Res 4444 files as overlays and animations in your broadcast, you can use this step-by-step process to convert those files into HVEC using QuickTime so that they are a smaller size and can be handled better by your computer.
Using smaller files helps to improve your computer’s performance and is a great way to ensure a smoother production and a better experience for your viewers.
5. Understand the limits of your computer.
Your computer is what is powering your production, so make sure that you know its limitations. If you’re on an older Mac, you are not going to be able to do everything that you see the pros doing in their videos.
Live streaming is one of the toughest tasks that you can ask your computer to do.
If your computer can’t handle everything that you’re throwing at it, make a production priority list. What are must haves? What are nice to haves? Test live streaming with just one camera and one microphone. If that works, add another camera. If that works, add screen sharing, and so on. Learn what your computer can handle and what it can’t. This will help you ensure your broadcasts look their best and will help you plan for when you need to upgrade your machine.
Thankfully with the introduction of the Mac Mini M1, it’s more affordable now to get better results.
6. Consider a dedicated live streaming computer.
This is another investment, but you’ll always get better results if you can commit to having a dedicated live streaming computer. A dedicated machine means that it is clear of all other applications, files, and work that can bog down its space and bandwidth.
Pro tip! If you can’t swing a dedicated machine right now, then make sure you turn off all background syncing apps like Dropbox and Google Drive so that your computer isn’t trying to do everything at once.
Pro tip #2! Never update your apps (even Ecamm Live) right before you plan to go live. It may take more time than you think!
7. Use a second computer to bring your presentations in via a capture card.
Connect a second computer via a capture card and bring your presentations in as a camera source rather than sharing your screen.
This lets you have more control over the size, shape, and positioning of your presentation and lets you leverage your overlays and branded graphics. It improves your presentations and gives you a lot of control.
Pro tip #2! You can use gear like the ATEM Mini to free up some of your computer bandwidth. Let the ATEM do the work. Here’s more on the ATEM Mini and Ecamm Live.
8. The Elgato Stream Deck will always help you run a smoother production.
OK, we’re sharing eight tips instead of seven, but this one is a fun bonus!
Using a tool like the Elgato Stream Deck with Ecamm Live can help you change scenes, trigger sound effects, change camera views, and more with the push of a button – letting you focus on your content rather than on the production.
Here’s how to set up your Stream Deck with Ecamm Live.
You’ve got this!
Remember that practice makes perfect and it takes time to build a better production. Keep at it! We believe in you.
Want to get more involved? Consider joining LEDA (Live Every Day in April). Sign up to join the LEDA challenge with Luria today.