Here at Ecamm Live, we get a lot of questions about what the differences are between OBS Studio and Ecamm Live. Is one easier than the other? Why does Ecamm Live cost a subscription fee versus OBS Studio’s free access? Rather than tell you our own feelings, we had Ian Anderson Gray from the Confident Live Marketing Podcast share his experience setting up a show using Ecamm Live versus setting up the same show in OBS.
Which live streaming tool was easier to use? Which was faster? How did the show’s turn out? Here’s Ian with the answers (and more!)
TL;DR
This is an in-depth comparison of OBS Studio and Ecamm Live, but do you want to know the short story?
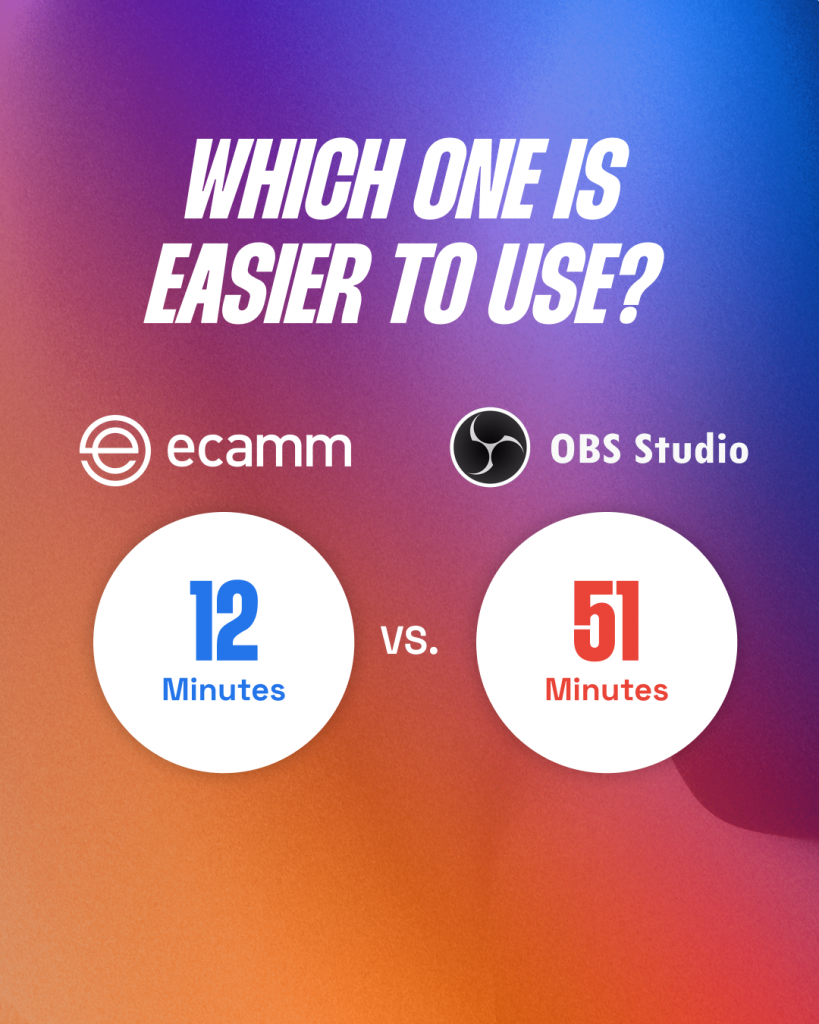
Ecamm Live only took me between 12 and 15 minutes from start to finish and was really simple to set up my show. Setting up the same show with OBS Studio took me over 51 minutes and I had to use extra plugins, which ended up being pretty complicated. Sometimes free isn’t really free.
Ecamm Live vs. OBS Studio: Let’s Do a Comparison
When you want to start live streaming, there are so many different types of live streaming tools.
A live streaming tool allows you to broadcast live video to a platform such as YouTube, Facebook, LinkedIn, Twitter, Twitch, and more. The tool also acts as a switcher – so you can switch between different types of “scenes” or “sources”. That could be cameras, remote guests, videos, screen shares, and more.
In this blog post, we will be comparing two of the most popular live streaming and video production tools: OBS Studio and Ecamm Live. I’m looking at two specific metrics while comparing these two:
- How long does it take to create a live show from scratch?
- How easy is it to do?
For our test, we’ll be setting up a live show with each tool and doing a side-by-side comparison.
I’ve used both tools since 2016. OBS Studio is how I first started with live video. And I started using Ecamm Live in late 2016 when I bought my first Mac.
First of all, let’s compare Ecamm Live and OBS Studio at the 20,000-foot level.
Ecamm Live
Ecamm Live was first released in September of 2016 and has quickly become one of the most popular live video tools available.
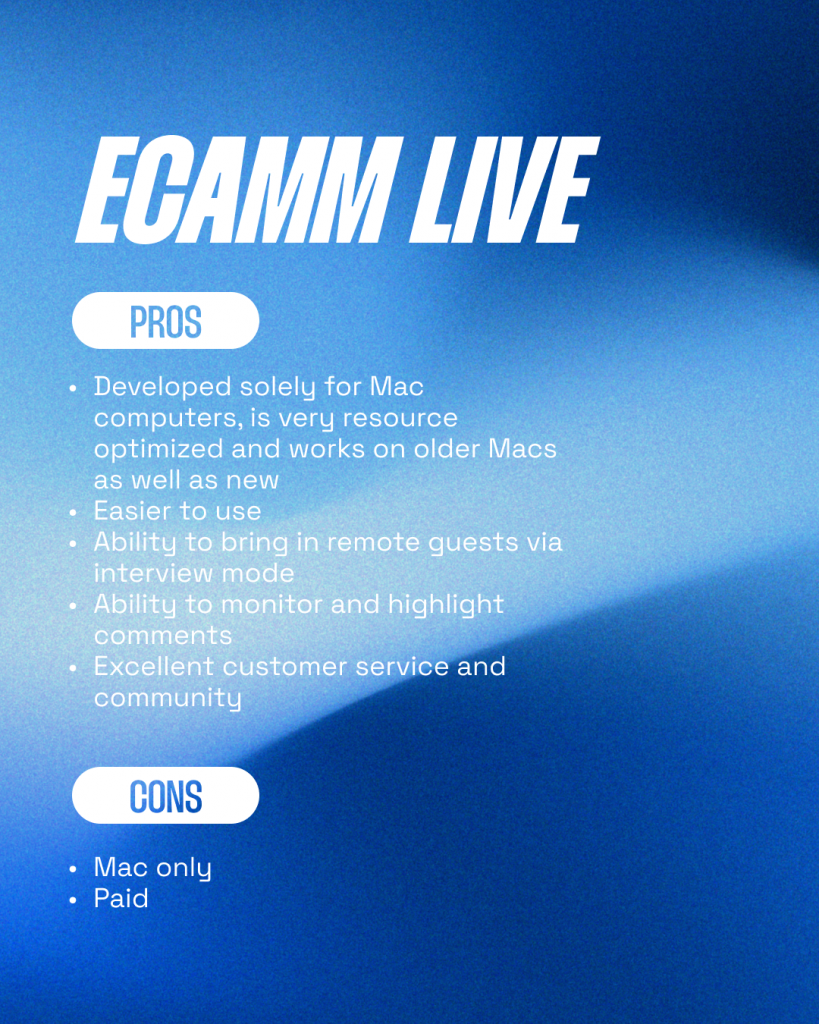
Pros
- Developed solely for Mac computers, is very resource optimized and works on older Macs as well as new
- Easier to use
- Ability to bring in remote guests via interview mode
- Ability to monitor and highlight comments
- Excellent customer service and community
Cons
- Mac only
- Paid
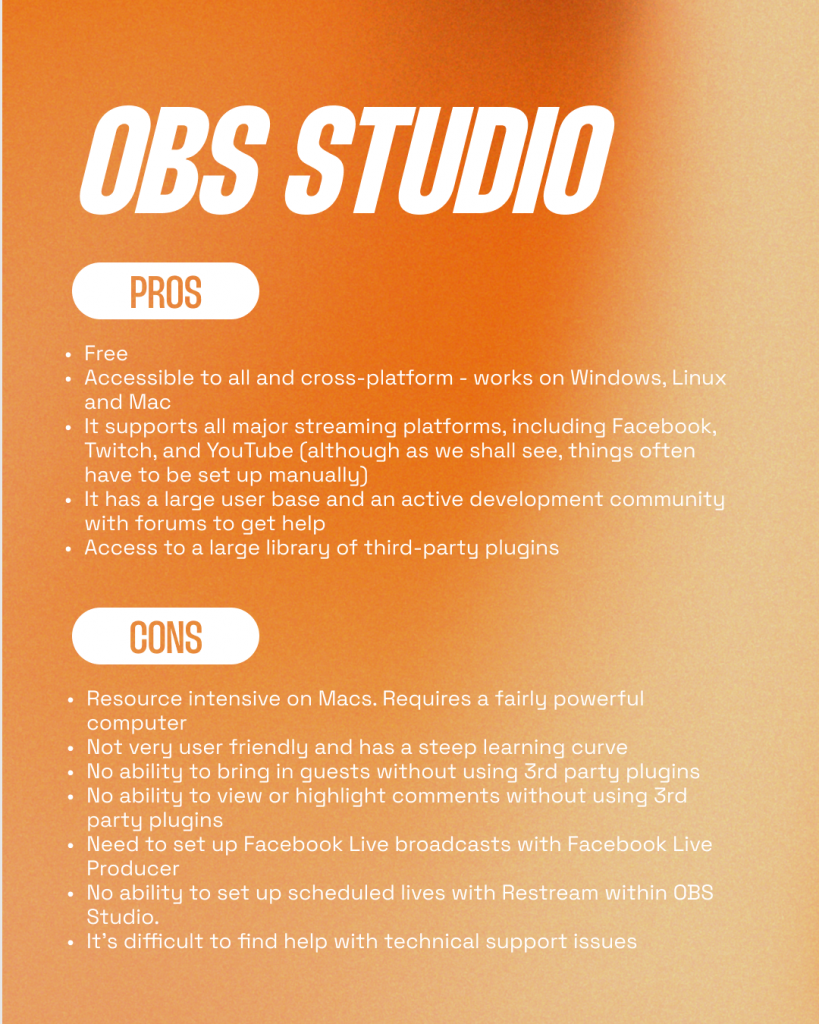
OBS Studio
OBS Studio is an open-source and cross-platform live streaming tool for PCs (Windows or Linux) and Macs. It was first released in October 2011. It’s free.
OBS is how I started my live streaming journey, back in 2016. It was the only free tool at the time that offered live streaming to Facebook Live and other platforms.
The obvious advantages are that it’s free and cross-platform. It’s also incredibly powerful and flexible. But, in my experience, it’s a little clunky and difficult to use – especially for beginners. And, although it is free, to get some of the functionalities that Ecamm Live has, you’ll need to pay for extra software or services, such as Loopback.
But OBS Studio has done a lot of growing up since I first started using it, with extra features added. I was really interested to put it through its paces for this article.
Pros:
- Free
- Accessible to all and cross-platform – works on Windows, Linux and Mac
- It supports all major streaming platforms, including Facebook, Twitch, and YouTube (although as we shall see, things often have to be set up manually)
- It has a large user base and an active development community with forums to get help
- Access to a large library of third-party plugins
Cons:
- Resource intensive on Macs. Requires a fairly powerful computer
- Not very user friendly and has a steep learning curve
- No ability to bring in guests without using 3rd party plugins
- No ability to view or highlight comments without using 3rd party plugins
- Need to set up Facebook Live broadcasts with Facebook Live Producer
- No ability to set up scheduled lives with Restream within OBS Studio.
- It’s difficult to find help with technical support issues
Time & Ease of Use
When comparing different tools, it is common to look at features and prices.
It’s much more difficult, however, to compare how much time it will take to use the tool and how easy it is to set up. That is unless you actually take the tool for a test drive. That’s what we’re doing in this article.
The Show
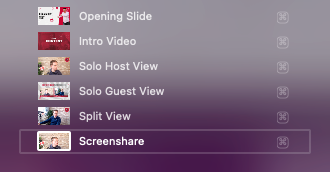
For our comparison, we’ll create 7 scenes for our show in both Ecamm Live and OBS Studio:
- Opening Slide
- Intro Video
- Host solo view
- Guest solo view
- Split view (solo and guest)
- Screenshare (with solo and guest)
- Outro Video
In addition, we will be…
- Recording the broadcast
- Using 1 camera and microphone as the host
- Bringing in 1 remote guest
- Play intro and outro videos
- Sharing our screen (a browser window)
- Highlight comments on the screen
We’ll be doing 3 test broadcasts:
- Set up a scheduled live broadcast to Facebook Live (a group)
- Set up a scheduled live broadcast to YouTube
- Set up a scheduled live stream to Facebook, YouTube, and LinkedIn (multistreamed)
Ecamm Live
So let’s take a look at how to set up our show with Ecamm Live.
The Ecamm Live Interface
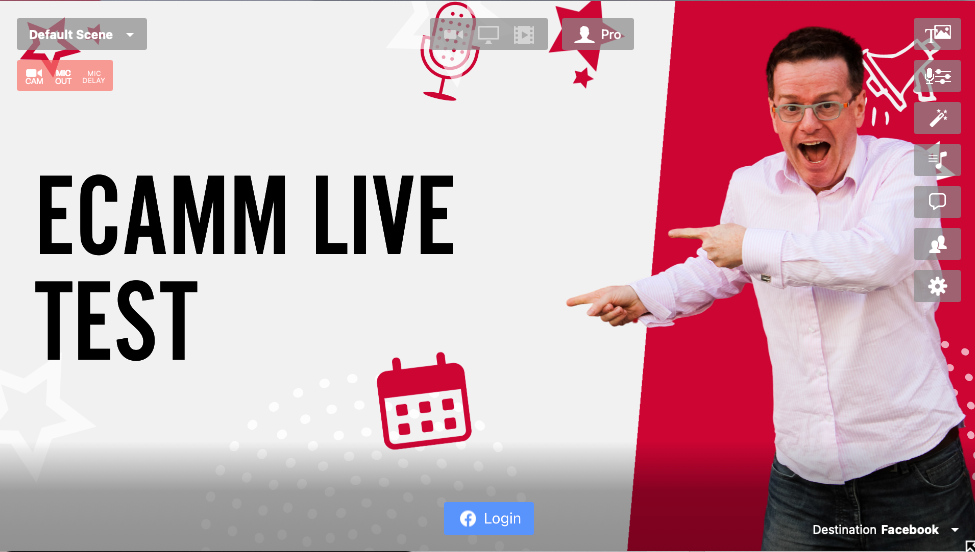
Once you’ve installed and opened up Ecamm Live, you’ll be presented with the Ecamm Live interface. You get a number of different windows:
- Main Window – Displays the main view of your show
- Scenes – Lists all your scenes
- Comments – the live comments on your live broadcast
- Camera Effects – This allows you to control the look and feel of your cameras including green screen, zoom and pan, brightness, color and more
- Overlays – add images, videos, text, countdowns, web widgets, cameras, screen shares and more
- Interview – Bring in remote guests to your show
- Sound Levels – Adjust the sound levels of microphones, guests, videos and sound effects
- Sound Effects (not on screenshot) – Play audio sound effects or music on your show
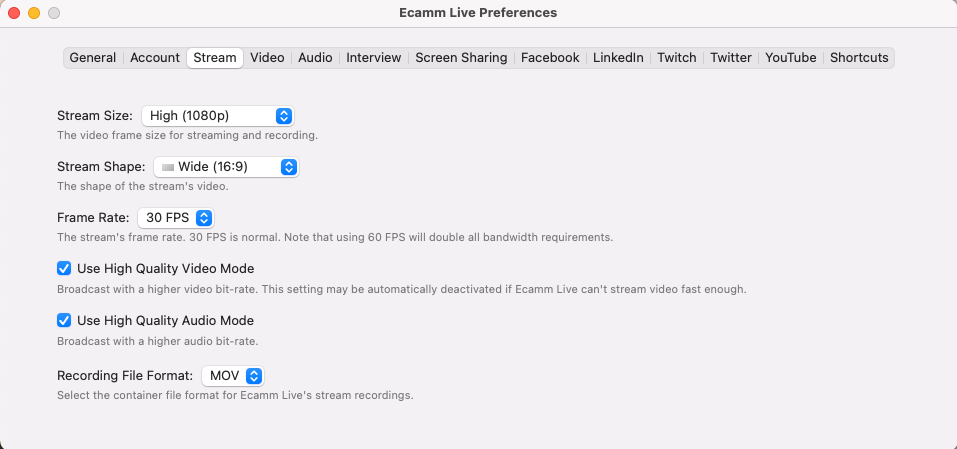
There’s also the Ecamm Live Preferences window. You don’t need this open all the time, but there are a few settings I recommend looking at before we create our live show.
I’m changing the stream size to high, which is 1080p (high definition). Facebook doesn’t always output in 1080p (unless the Facebook gods have shined down favorably upon you). But since we want to have a recording in full HD for repurposing and because YouTube does support 1080p, it’s good to have. Of course, this will also depend on a few things – how powerful your computer is, and how good the upload speed is on your internet connection. I’ve also switched on high-quality video and audio mode, but again you’ll need to see if this works with your computer. We’ll keep the framerate to 30 frames per second.
I also like to check the option for “Record All Broadcasts” which can be found in the top menu under “Recordings”. That way all broadcasts will be recorded, which is helpful, if like me, you tend to forget to press the record button!

Connect to Facebook
Approx 3 minutes
Difficulty Level: Easy
Since our first broadcast will be to Facebook, let’s connect to Facebook within Ecamm Live. Unlike OBS Studio, you don’t need to fiddle around with stream keys and Facebook Live Producer. You can do everything from within Ecamm Live.
At the bottom right of the main window, select Facebook from the destination dropdown. Then click on the Login button (if you’ve not connected to Facebook before).

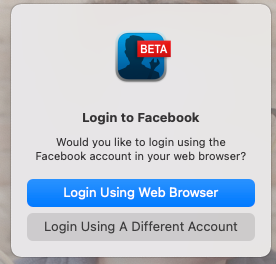
You’ll then need to connect Ecamm Live to Facebook. Click on Login Using Web Browser.
Go through the steps on Facebook to give permission to Ecamm Live. This is required so that Ecamm Live can post and broadcast to your Facebook profile, groups and pages.

That’s it! You shouldn’t need to do this again unless Facebook has logged you out or changed privacy settings.
Now you can choose whether you want to broadcast to your Facebook profile, page or group. If you post as yourself you have the choice of posting to your profile (publicly, to friends only or only to yourself) or to one of your groups. Or you could post to your page.

In my case, I’m going to broadcast to one of my Facebook groups – the Confident Live Marketing Academy.
Once you’ve selected the destination, you can choose to go live straight away (unscheduled) or set up a scheduled broadcast for later.
We’re going to schedule our broadcast.
To do this, select New Scheduled Live and the schedule dialogue box will pop up.
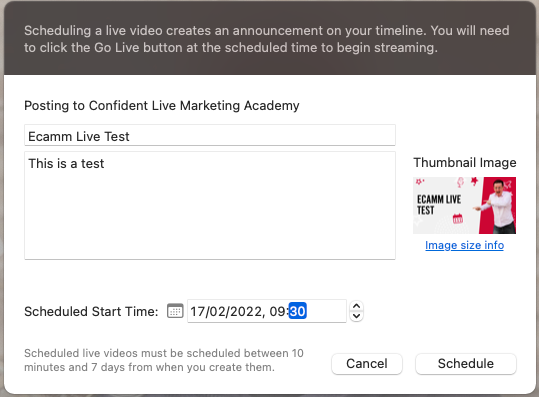
Enter your title (optional) and post description. This will be posted as an announcement post on your group’s feed. I also recommend adding a thumbnail image (1920×1080 pixels is best).
Finally, add the date and time of your broadcast. As I write this article, Facebook allows you to schedule a broadcast any time between 10 minutes in the future and 1 week.
Click the Schedule button and Facebook will create the scheduled broadcast and post the announcement post to your feed.
Now it’s time to create our show in Ecamm Live.
Scene 1: Opening Slide
Approx 1 minute
Difficulty Level: Easy
I like to create an opening scene with my thumbnail slide to start my shows. I often add some music in the background, but we’re keeping it simple today.
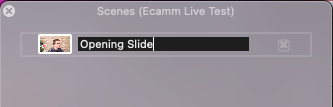
Ecamm Live has already created a scene called “Default Scene” so let’s rename it to “Opening Slide”. To do that just double click on the name, and change the text.
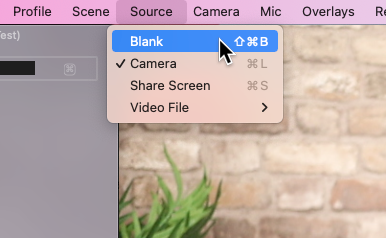
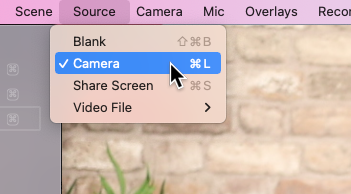
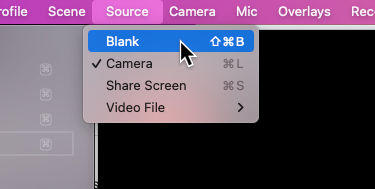
We don’t want any cameras or microphones in this scene – just the thumbnail image. So, let’s change the scene to a Blank one. Click on Source in the top menu and select Blank.
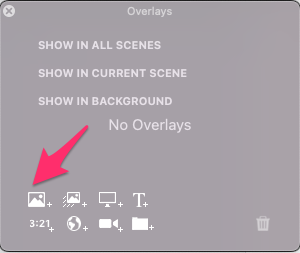
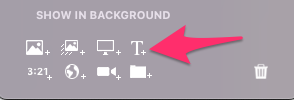
Now, in the overlays window, click on the New Image Overlay button on the bottom left and select your thumbnail image from your computer.
You should now see the thumbnail image filling the main window. You can always resize it by clicking and dragging the bottom right-hand corner.
Scenes 2 & 3: Intro + Outro Videos
Approx 2 minutes
Difficulty Level: Easy
Now it’s time to add our intro and outro videos. This is how we’ll start and end our show.
Intro and outro videos are totally optional. But I like them as they add more cohesive branding and are fun!
First of all, we’ll add our intro video. Let’s create a new scene by clicking on the + button at the bottom left of the Scenes window. Then name it “Intro Video”.

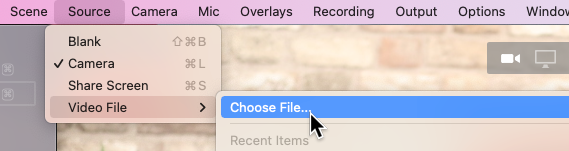
We’ll change the main source type to Video File in the Source option in the top menu. Then select the intro video from your computer.
The video will start playing in the main window.

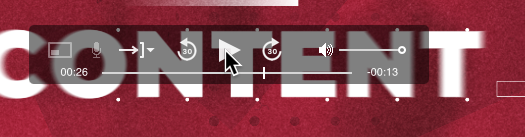
You can pause the video by clicking on the video controller which appears when you hover over the main window.
Here you have a few extra options. You can choose to loop the video and adjust the volume as well as a few other options. We’ll just leave it as it is.
Now that you’ve added the intro video scene, add the outro video scene by repeating the above.
Scene 4: Host Solo View
Approx 1 minute
Difficulty Level: Easy
Now it’s time to showcase you – the host of the show!
Create a new scene and give it the name “Solo Host View”.

Since we want your camera to be the main source, click on Source on the top menu and select Camera.
If you have more than one camera, you can select the correct camera by choosing it from the camera switcher on the main window, or by selecting it from the camera menu.
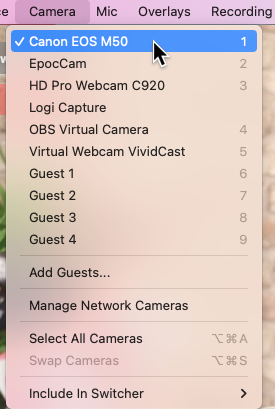
One cool thing about Ecamm Live is that I can use my Canon mirrorless camera just by plugging it into my computer via USB. Ecamm Live turns my camera into a webcam, which is great because I can use a much better quality camera with my computer.
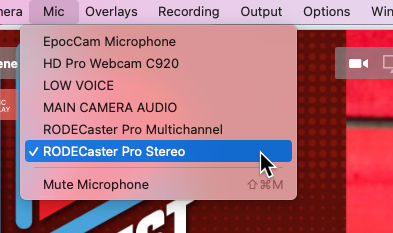
Ecamm Live automatically makes sure your microphone is used on scenes with cameras. But do check that you’re using the right camera by clicking on Mic in the top menu and selecting the correct microphone.
Now, to add a bit of color and branding, I’m going to add my logo on the top right of the screen. To do this, click on New Image Overlay in the Overlays window.
And then select the logo from your computer. Then drag and resize the image on the main window to the top right.
Scene 5: Remote Guest
Approx 1 minute
Difficulty Level: Easy
Now we want to add our remote guest.
In Ecamm Live Pro, we have a built-in interview system called “Interview Mode”. This makes bringing in up to 4 remote guests really easy. Ecamm’s Interview Mode is only included in their Pro level.
First of all, let’s create a new scene called “Solo Guest View”.

Now switch on interview mode on the “Interview Mode” window. If you don’t see the Interview Mode window, click on Window->Interview Mode in the top menu.

You’ll see your camera at the top. This is the host camera. At the bottom, you’ll see a link. This is the interview mode link that you need to give to your guest. Click on it to copy it to your clipboard.
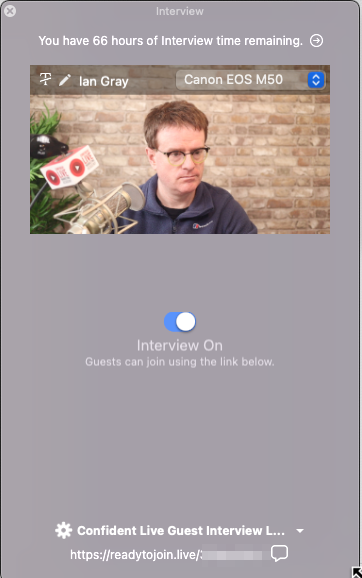
Normally, you’d send this link to your guest. But for this article, I am going to bring myself in as the guest. That way, I can show you what the guest will see as they come onto your show as a guest.
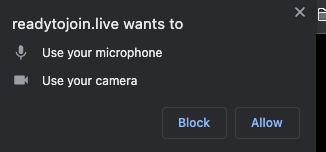
When the guest clicks on the link, they’ll need to give permission for their browser to use their camera and microphone. They should click on the Allow button in the dialogue box that pops up.
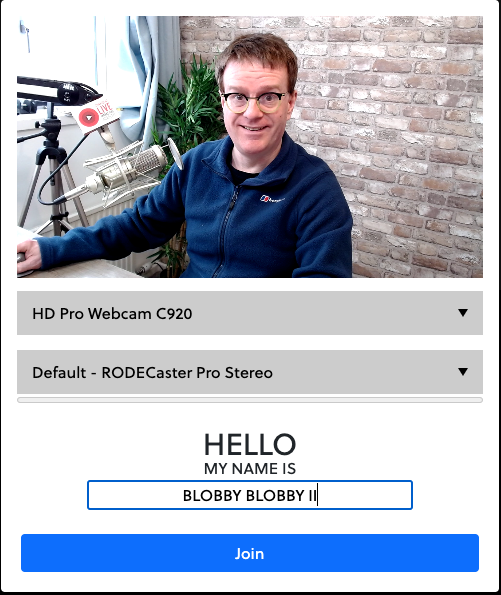
They can then choose which camera and microphone they want to use as well as enter in their name.
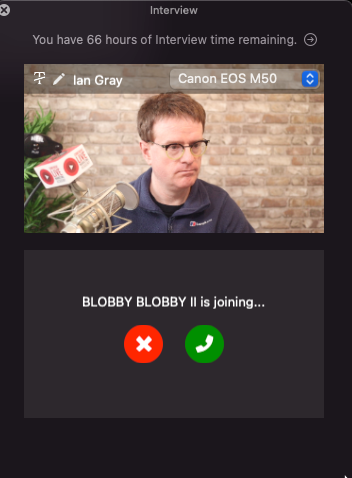
When the guest clicks on Join, you’ll get notified in Ecamm Live with an alert sound and it will show that they are joining. You can then decline or accept.
Obviously, we’re going to accept!
Once they’ve been accepted, you should assign them to one of the guest slots. To do this, click on the assign button and select Guest 1.
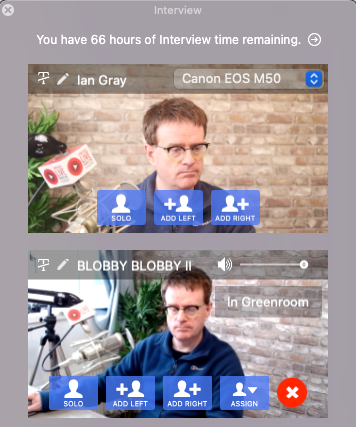
We’re now going to add the guest to the scene. This only needs to be done once. In the future, guest 1 will always appear in this scene. Or if you don’t have a guest, it will just display a placeholder.
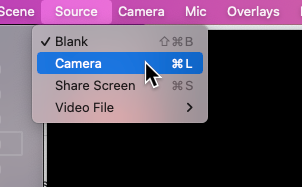
Let’s select Camera as our source.
Then in the camera option in the top menu or the camera switcher, select Guest 1.
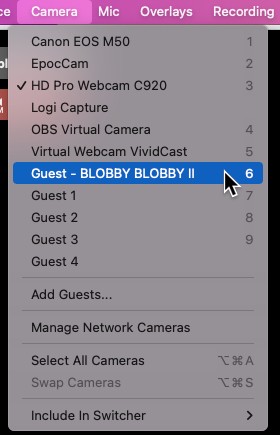
Your guest’s camera will now appear full screen.
You won’t need to select their audio. Your microphone and your guest’s audio are automatically selected.
Once you’ve done this, add the logo bug on the top right by following the steps in the previous scene.

Scene 6: Split View
Approx 2 minutes
Difficulty Level: Easy
So, we’ve got a scene for your full screen, and a scene for your guest full screen. But it’s important to have a scene where you are both on the screen – side by side.
Create a new scene and call it “Split View”.
There are a number of ways to add two or more camera sources on the screen. I prefer to start from scratch and use a blank scene.
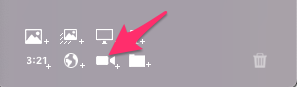
Now we’re going to add two camera overlays – one for you as host, and the other for your guest. Click on New Camera Overlay at the bottom of the Overlays window.
Click on the edit button and make sure you have selected the correct camera for you as the host. You can then choose rounded corners or not, and then resize and move it to the left of the screen.
Now add a New Camera Overlay, and change it to guest 1. As before, resize the camera overlay and in this case, move it over to the right.

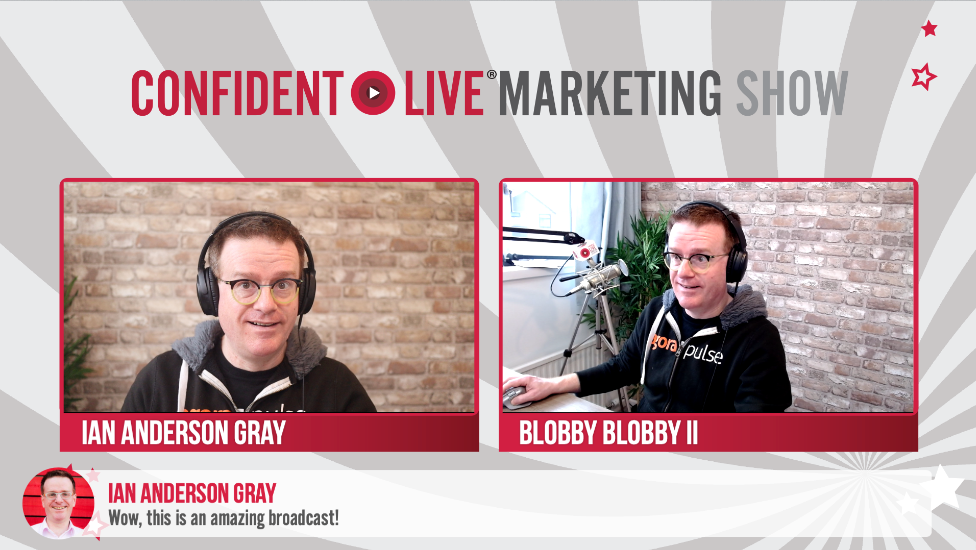
My designer created an overlay image with transparent cutouts for me, so I’m going to add this as a new overlay.
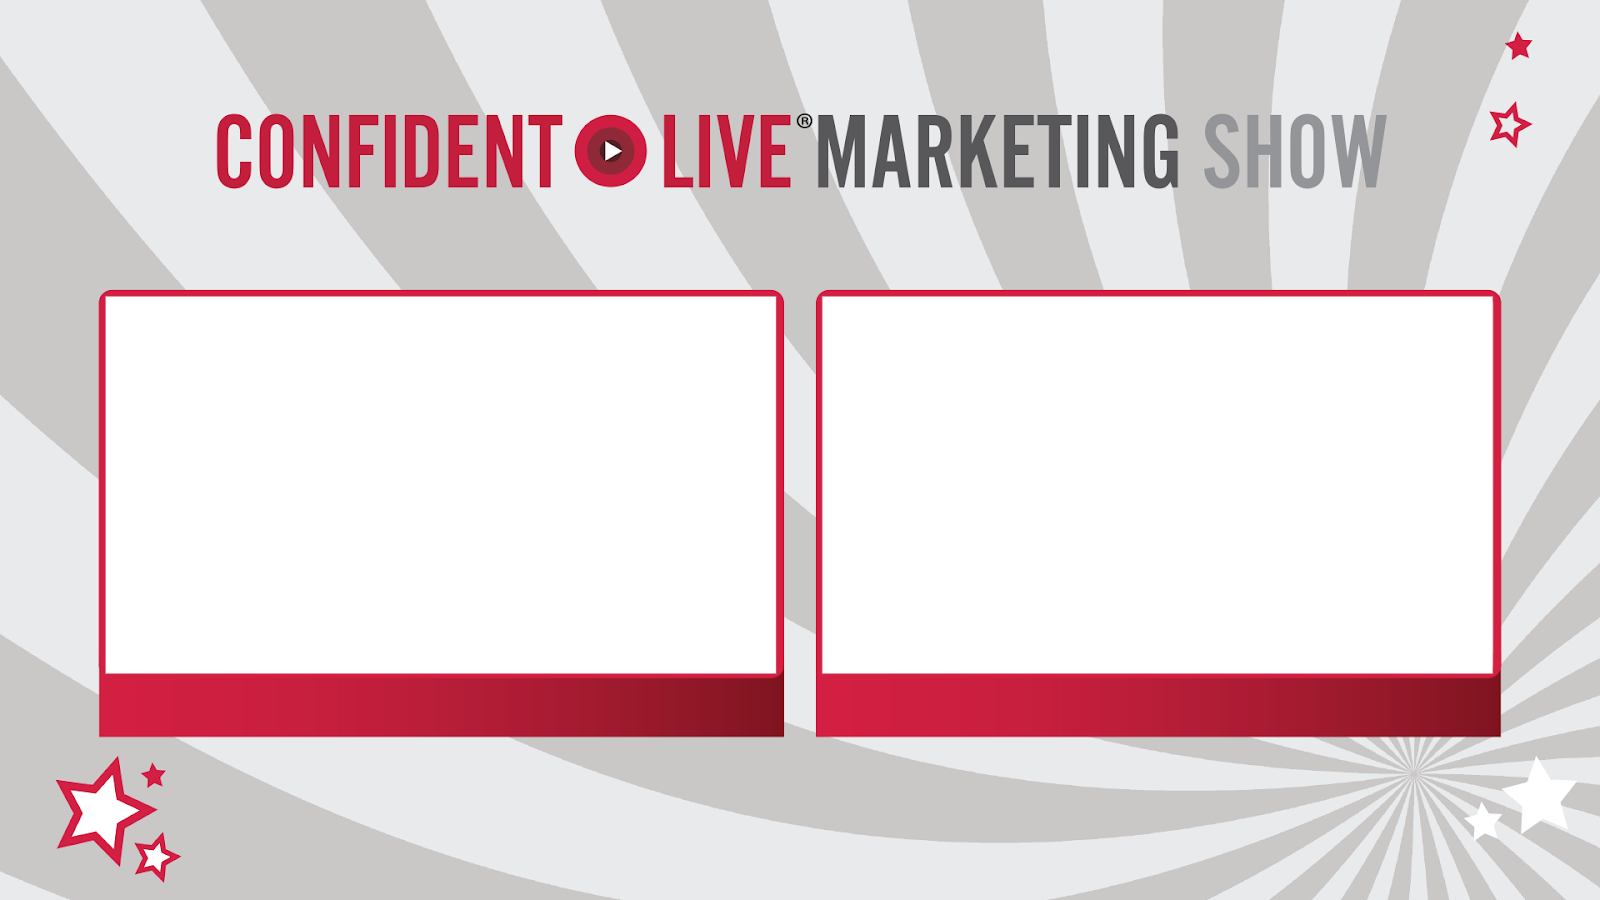
Now let’s add the names of the host and guest. We can do this by adding a text overlay by clicking the New Text Overlay button.
In the Text Overlay dialogue, type the name of the person. You can change the font and the color of the text and the background. You can also add a shadow effect and more options.

Adjust the size and click Add.
You can duplicate this text layer by holding down the option key and clicking and dragging it. Do this, and move it under the guest’s camera.
Then edit the text and change it to the name of your guest. I’m adopting the name Blobby Blobby II, because, well, why not?!

Scene 7: Screenshare
Approx 2 minutes
Difficulty Level: Easy
For our final scene, I want to share my screen. This is useful if I want to do a “how-to” tutorial, share a website or something else. In this scene, we’ll also include the host’s and guest’s videos as well so that viewers can see us as well.
Let’s create a new scene and give it the name “Screenshare”.
As before, we’re going to make it a blank scene and add everything manually. Once the scene has been created, click on the New Screen Share Overlay button in the overlays window.
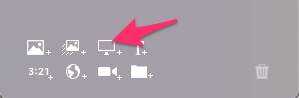
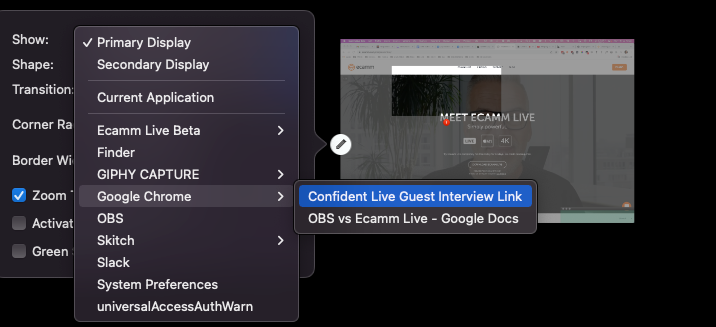
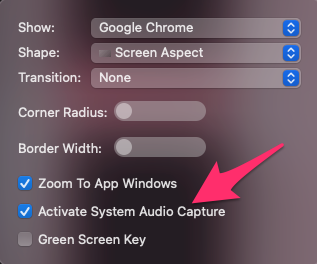
You can share the whole display of your monitor, or a particular window. We’re going to share my Google Chrome window. Select the window you want.
You can also easily share the audio of the display or window by checking the “Activate System Audio Capture” checkbox. You don’t need to use any extra software for this.
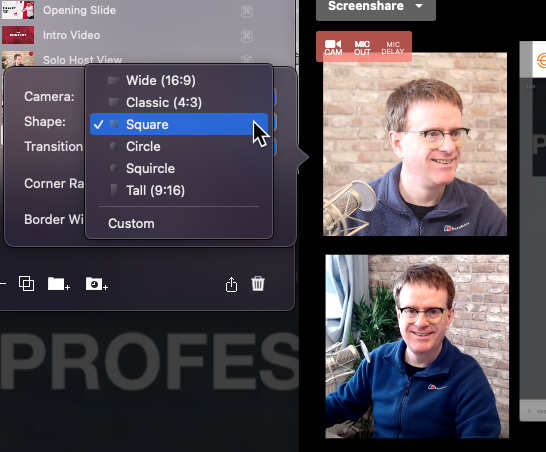
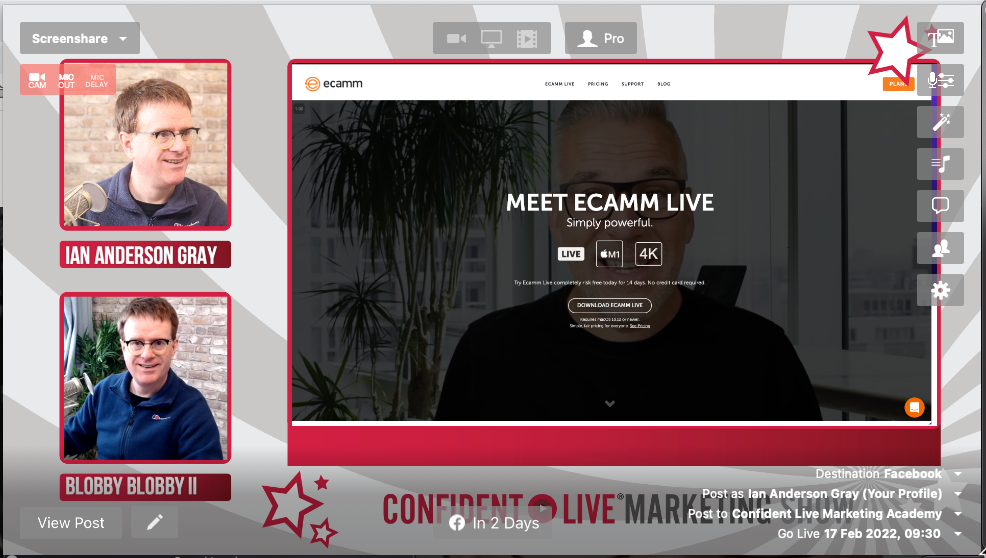
Now add two camera overlays as we did in the split view scene. This time, we’re going to change the shape to square.
I’ve got an overlay graphic that I use for screen shares, and I am adding this as a new graphic overlay.

You may need to resize and move the different overlays around, but this is very straightforward.
And that’s it, all of our 7 scenes completed. We’re nearly there!
Comments
No time at all
Difficulty Level: Very easy
Monitoring and highlighting live comments on the broadcast is an important feature in most live broadcasts.
First, it’s important to see what your live audience is saying and have the ability to answer questions.
And second, highlighting comments on the screen makes your audience feel part of the community and feel loved!
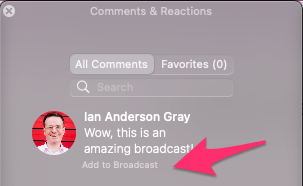
We don’t need to set up comments ahead of time. They’ll start appearing in the comments window when we’re live and get comments. We can then choose to highlight them on our broadcast or not.
To add them to the broadcast, simply click on the “Add to broadcast” link below the comment.
They will then appear at the bottom of the screen. You can adjust the position and change the text and background color as well as the fonts.
Broadcast to Facebook
No time at all
Difficulty Level: Easy
Ecamm Live will show you when your broadcast start time is and will display a countdown.
You can start the broadcast early if you want to. But we’re going to start after the countdown reaches zero.
When it’s time, the button at the bottom of the main window will display “Go Live”. To go live, click the button!
After a second or two, it will display “Live” and you are Live!
To end the broadcast, simply click the End Broadcast button. That’s it!
Your recording will be added to the recordings folder.
Broadcast to YouYube
Approx 1 minute
Difficulty Level: Easy
YouTube is very similar to Facebook. Just select YouTube from the destination dropdown.

Log into your Google account and select your YouTube account.
You can then create a new scheduled broadcast. Fill in the title, description and select your thumbnail.
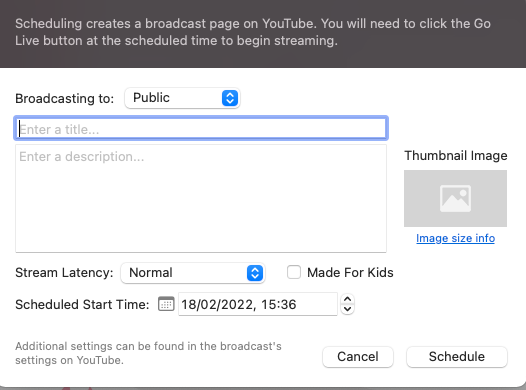
With YouTube, you have the option of making your broadcast public, unlisted, or private and whether your broadcast is “Made for Kids” or not. And a more advanced option of the Stream Latency (especially important for gamers).
Broadcast through Restream to multiple destinations simultaneously
Approx 3 minutes
Difficulty Level: Easy
Like OBS Studio, you can’t multistream from within Ecamm Live. Multistreaming is the ability of broadcasting to more than one destination at the same time. For example Facebook AND YouTube or Facebook, YouTube, Twitter AND LinkedIn Live.
However, Ecamm Live has an amazing integration with the multistreaming service Restream. As well as allowing you to broadcast to scheduled live broadcasts, it will even allow you to view and highlight the comments from all the destinations. As far as I am aware, Ecamm Live is the only live video tool with that level of integration.
Obviously, you need a Restream account for this to work. So, once you’ve created a Restream account (they also offer a free plan), you should select Restream from the destination dropdown in Ecamm Live. Then click on the Log in button and enter your Restream username and password.
You can then choose whether to go live straight away or schedule a new broadcast. We’re going to create a new scheduled broadcast on Restream.
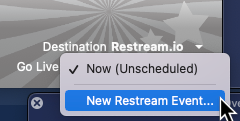
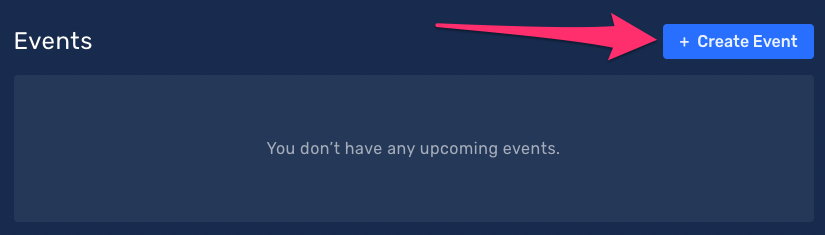
When you do this, you’ll be taken to Restream Events where you can create a new scheduled broadcast. Click on the Create Event button on the top right.
You now have an option of broadcasting via Restream Studio, an encoder or a video file.
It technically doesn’t matter whether you choose Restream Studio or the Encoder option, because we can still use Ecamm Live to broadcast. But let’s choose Encoder.

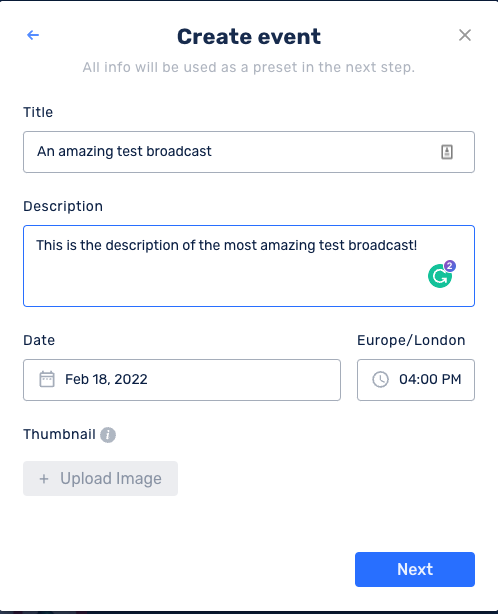
Now enter the title and description of your scheduled live, and add the thumbnail. Then choose the date and time of your broadcast.
Finally, click Next.
Then you can choose which destinations you want to broadcast to. Restream integrates with around 30 different destinations including Facebook, YouTube, Twitter, LinkedIn Live, Twitch and more. You can customize each destination and have a different description and thumbnail for each one.

Once you’re happy, click Create Event.
Restream will schedule broadcasts to the destinations that support scheduling (Facebook, YouTube and LinkedIn). For other destinations, it will start broadcasting when you hit the Go Live button.
Let’s head back to Ecamm Live.
Now, when you click on the scheduled broadcast dropdown, you’ll see a list of all your scheduled broadcasts from Restream.
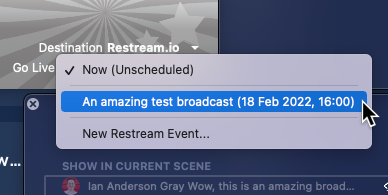
Just select the scheduled live you want to broadcast to. Then click on the Go Live button once you’re ready.
And comments from all the destinations that support it will be sent via Restream to Ecamm Live. Amazing!
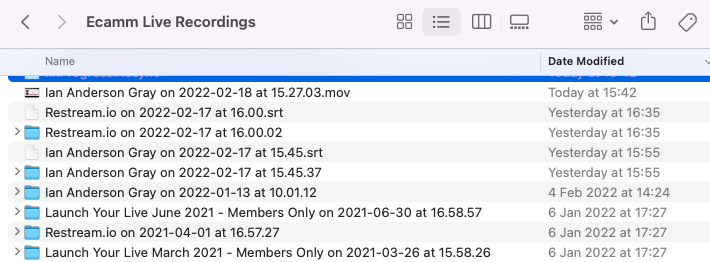
Recordings
Because we selected Record All Broadcasts, all our broadcasts will have been recorded. They’re in our recordings folder.
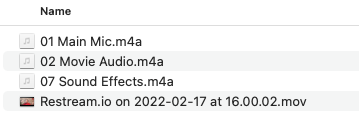
Also, because I selected Record Isolated Audio Tracks in the preferences (under audio), the audio from me, my guest, and my videos will all be saved as separate audio files. This is perfect for creating audio content from your live broadcasts (such as podcasts). This feature is available in Ecamm Live Pro.
OBS Studio
It’s time to set up our show in OBS Studio and see how it compares with Ecamm Live.
Although OBS Studio is very powerful, we’ll need to rely on third-party tools for some of the features.
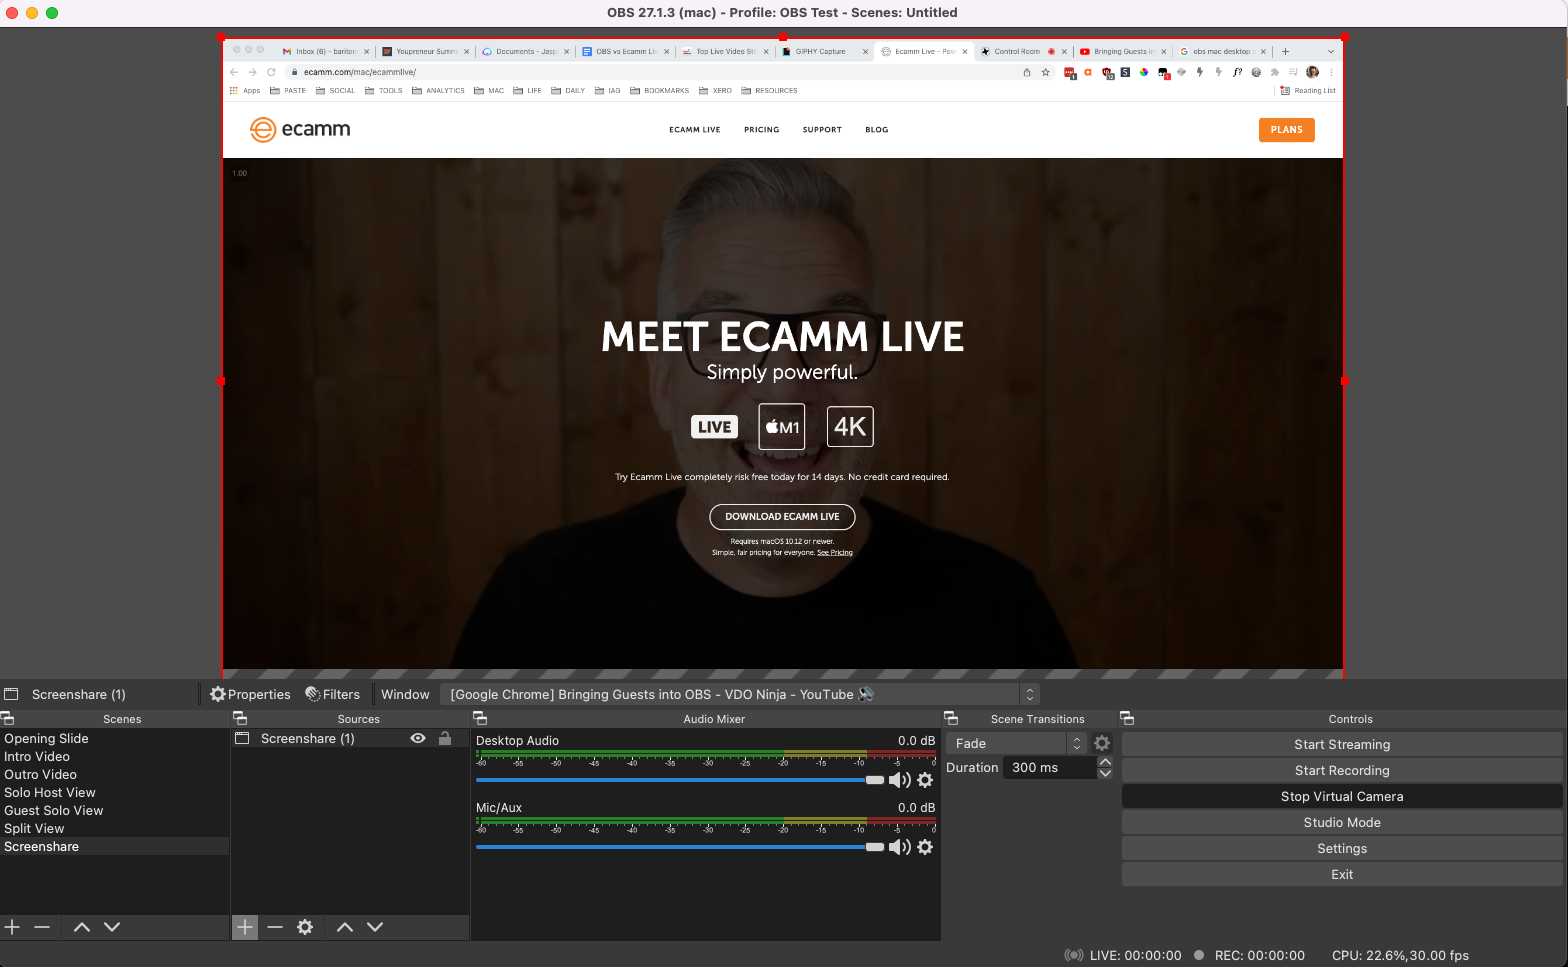
The OBS Interface
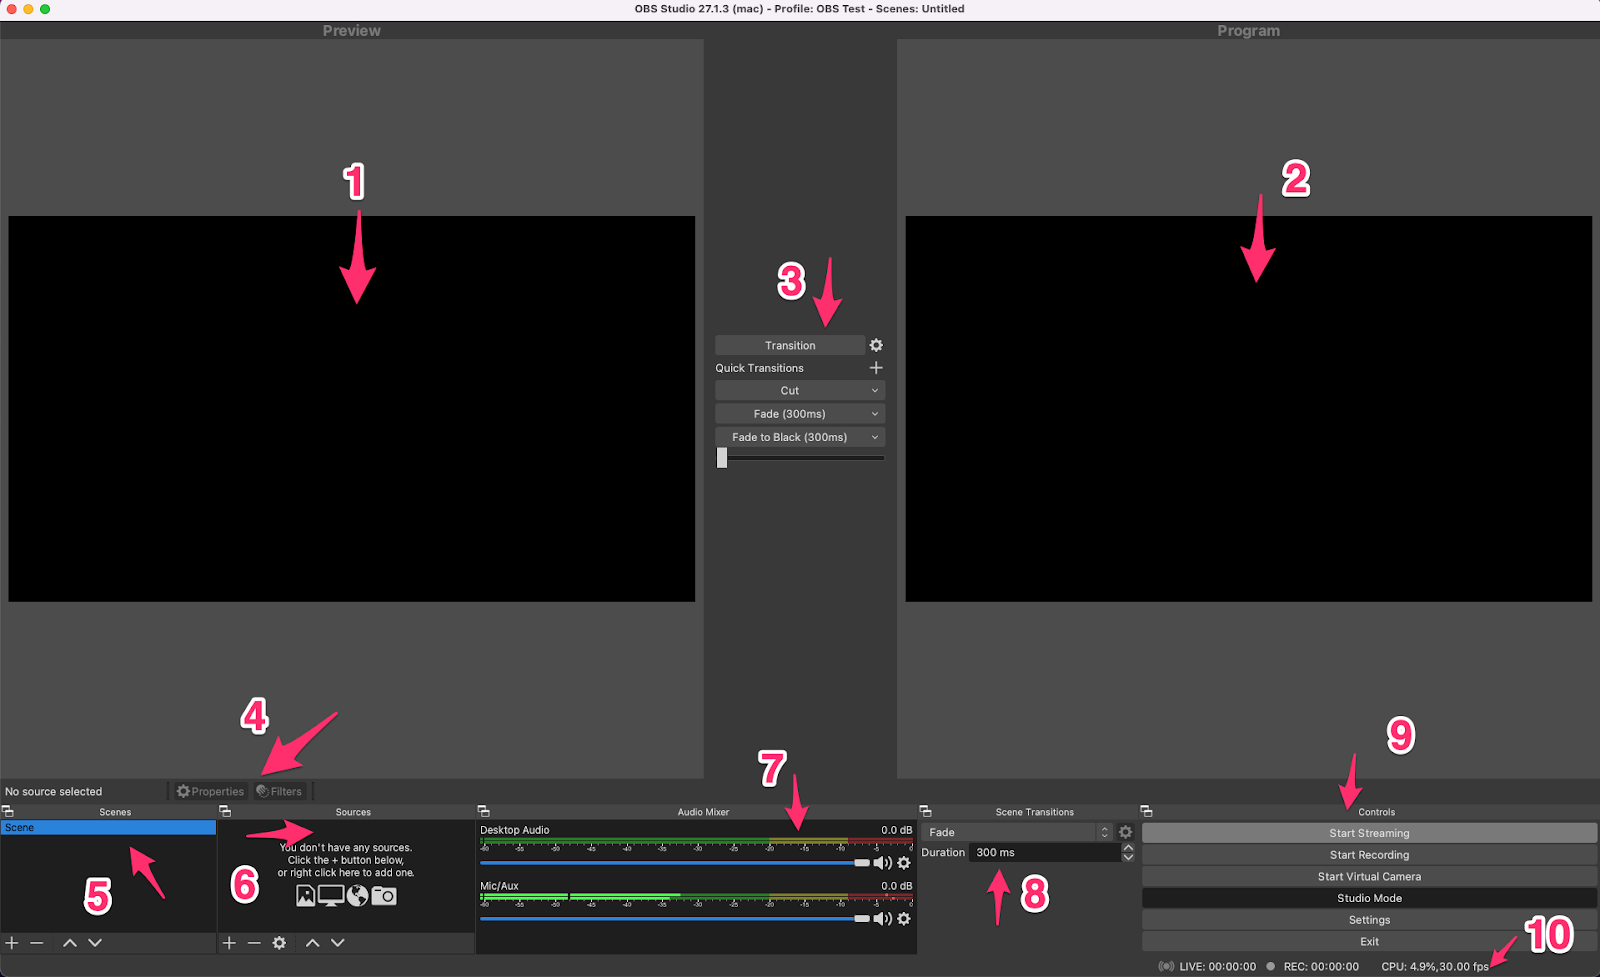
The OBS Studio interface is not too dissimilar from Ecamm Live. You have a preview window, a list of scenes, sources and an audio mixer.
- Preview Window
- Program (or Live) Window
- Transition options
- Properties & Filters
- Scenes
- Sources
- Audio Mixer
- Scene Transitions
- Controls
- Status
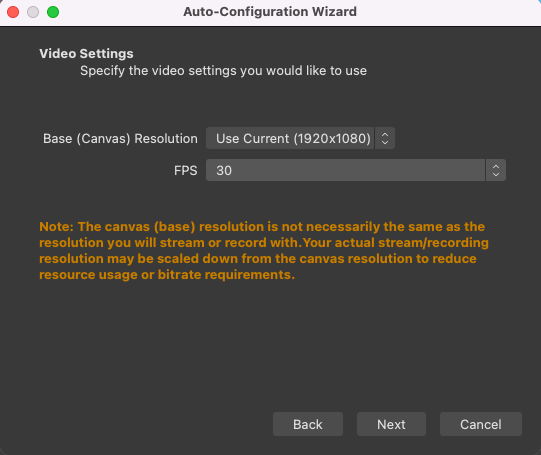
After you’ve downloaded OBS Studio from obsproject.com and opened it, you’ll be presented with the auto-configuration wizard. This helps you create the basic settings for your show.
We’re going to choose the first option on the Usage Information section since we want to use OBS Studio to stream and record.
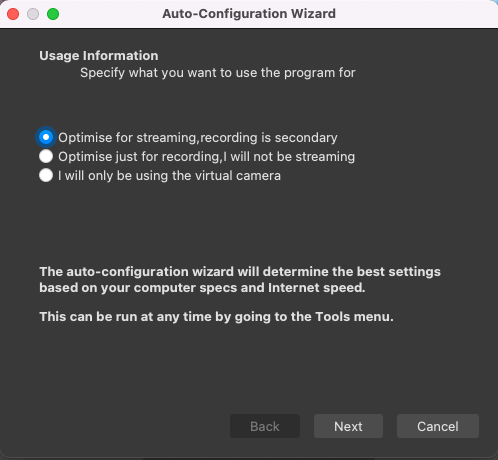
As before, we want to stream and record in 1080p. You also have the option to set the frame rate of our stream. It will default to Use 60 or 30, but prefer 60 where possible, but we only need 30.
Connect to Facebook
Approx 8 minutes
Difficulty Level: Moderate
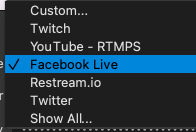
Now we want to connect OBS Studio to Facebook. As before, our first test broadcast will be to Facebook Live. In the dropdown box on the Stream Information page, select Facebook Live.
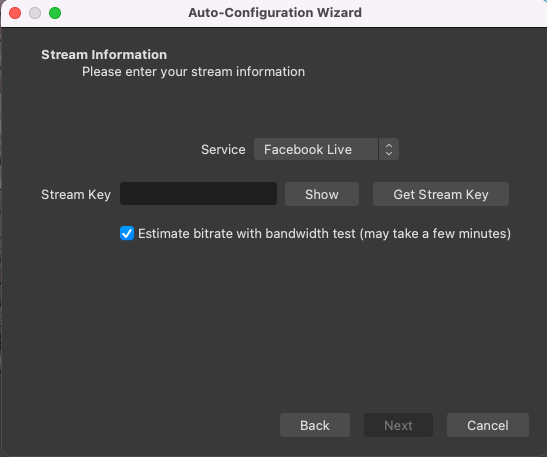
Unlike Ecamm Live, you can’t connect OBS Studio directly to the Facebook Live API.
That means you can’t schedule or manage any broadcasts from OBS Studio. It also means you’ll need to create the broadcast on Facebook Live Producer, grab the stream key, and paste it into the Stream Key box. You’ll need to do this again for every broadcast to Facebook Live. Each new broadcast will have a different stream key.
We’ll be setting up YouTube later on, but for now, let’s set up Facebook by clicking on the Get Stream Key button.
When you do this your browser will open Facebook Live Producer, which is Facebook’s place for setting up and managing live streams.

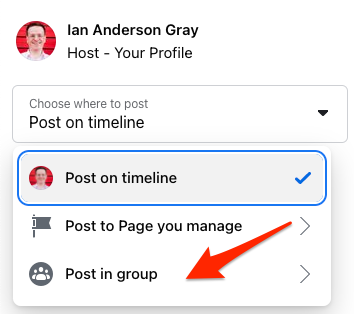
On the left-hand menu, you’ll need to select where you want to create the broadcast. We’re selecting a group.
Click on Post in group and then select the group you want to broadcast to.
Next, you need to choose when you want to go live. You have two options:
- Go Live – choose this if you want to go live straight away or within the next 24 hours. If you schedule the event within the next 24 hours the broadcast will be scheduled behind the scene and no post will be posted to your feed.
- Create live video event – choose this if you want to schedule your broadcast more than 24 hours in the future and want Facebook to schedule the broadcast on your feed. This will also create an event.
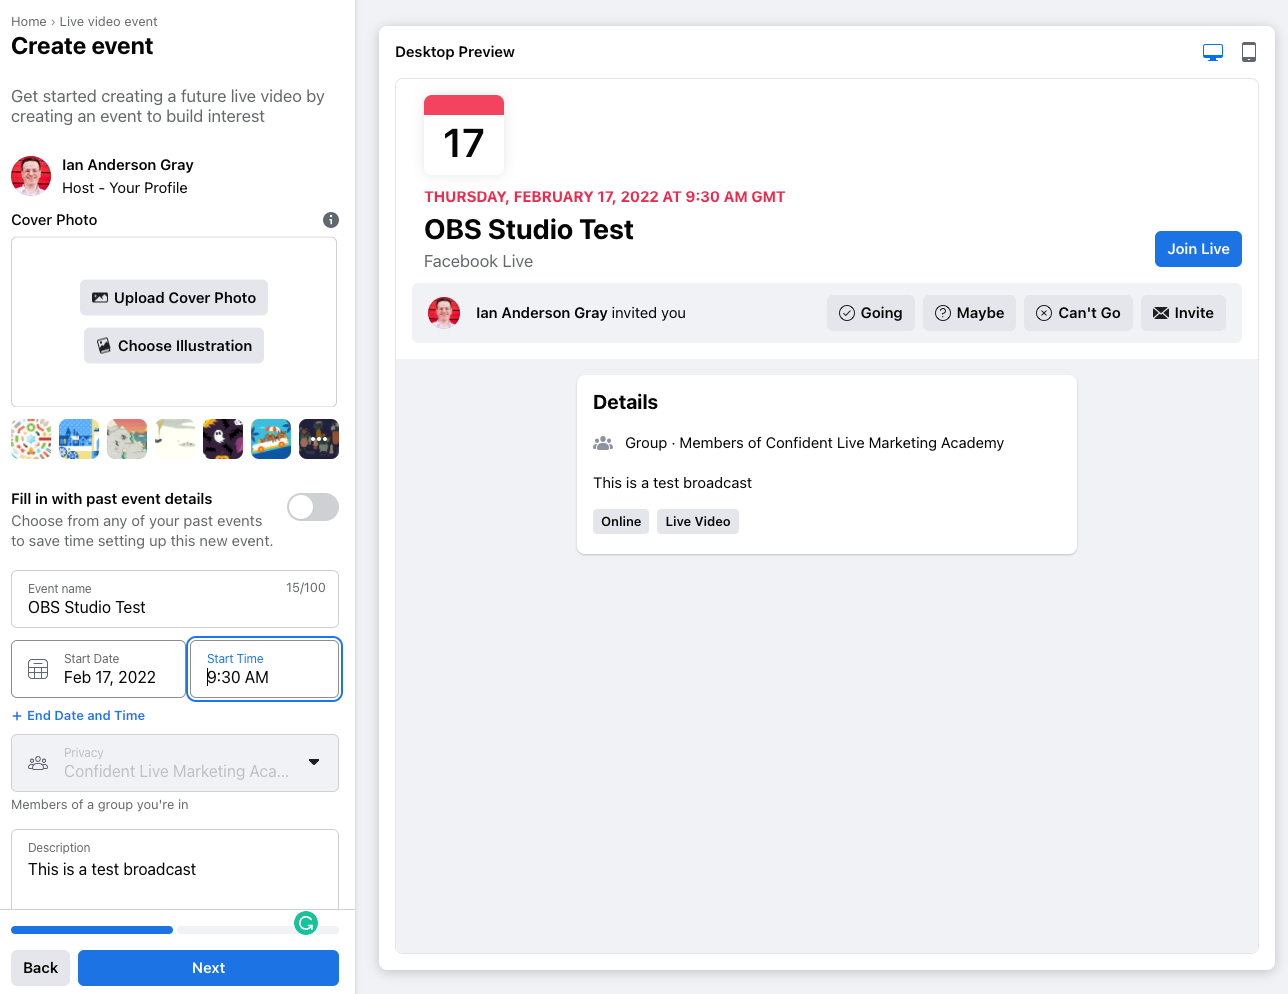
We’re going to select Create live video event since we want to properly schedule the broadcast.
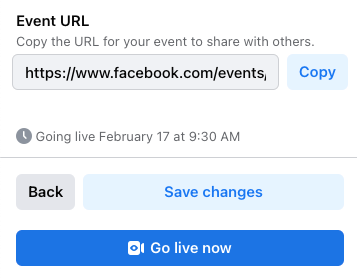
Once you select that, you need to fill in the event details. Add the thumbnail, title, date/time and description and click next.
Under Settings->Stream, you’ll see the Stream Key on the bottom right. Click the copy button to copy this to the clipboard.
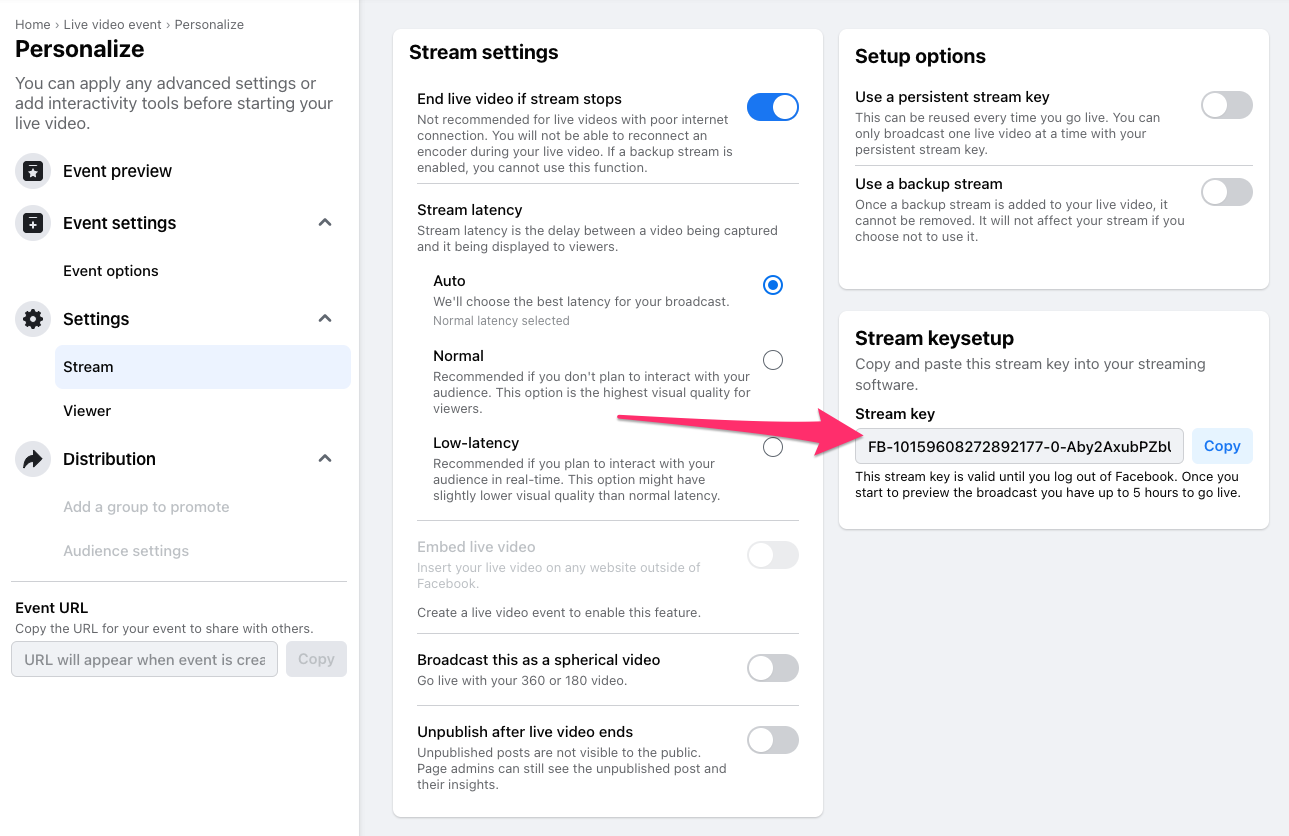
Once you’re done, click on Create Event.

You are now presented with the live event dashboard. It displays the video preview, the stream key and more. Make sure you have Streaming Software selected as the video source.
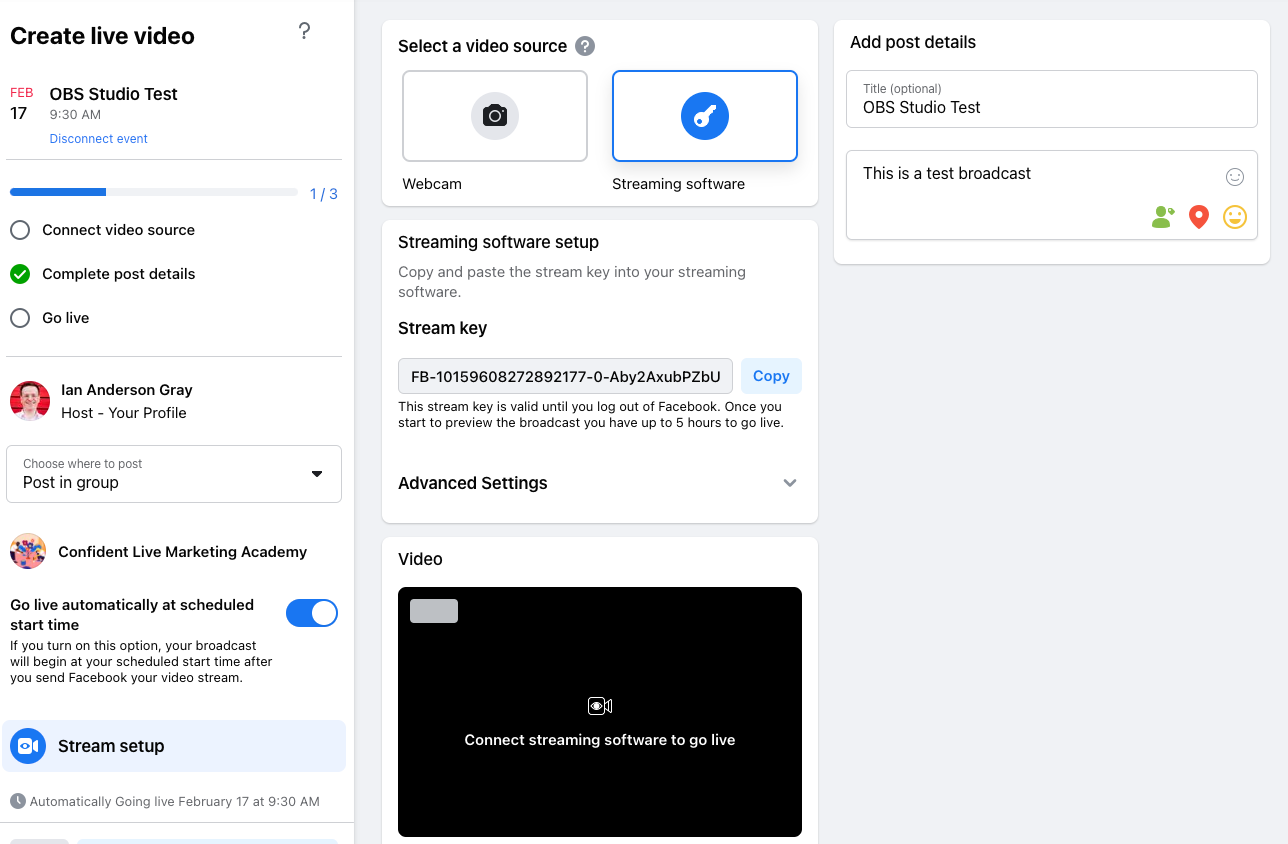
Back in OBS Studio, paste the stream key into the box and click next.

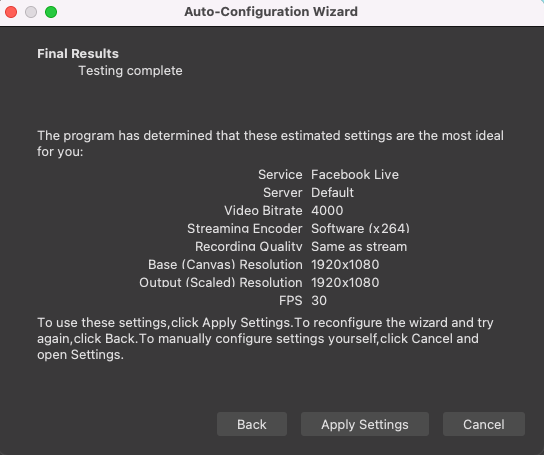
OBS Studio will now do a bandwidth test to check whether your computer and internet connection can cope with broadcasting at 1080p.

Your results should be in shortly. If all is OK, click on Apply Settings.
It’s now time to set up our show in OBS Studio. As before, we’ll set up our 7 scenes and then do test broadcasts to Facebook, YouTube, and Restream.
Scene 1: Opening Slide
Approx 2 minutes
Difficulty Level: Easy
OBS Studio gives you one scene to get started. Let’s rename it by right-clicking on it. We’ll change the name to “Opening Slide”.
Now, let’s add our image. To do this, we need to create an Image source. Just click on the + button at the bottom of Sources and select Image.
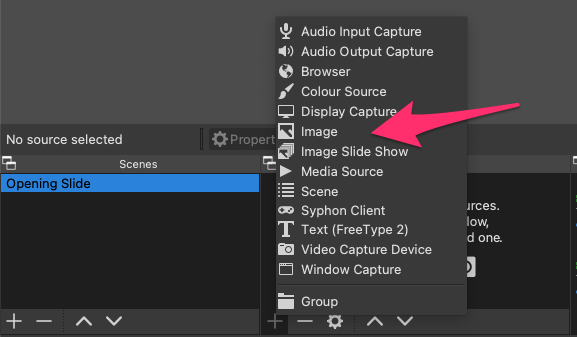
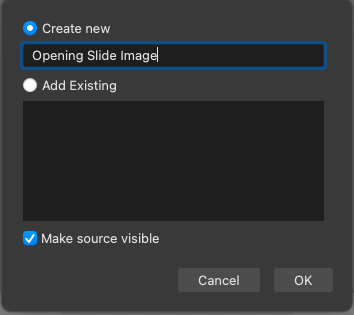
Then give it a name. I’m calling it “Opening Slide Image”. Be aware, all scene and source names need to be unique.
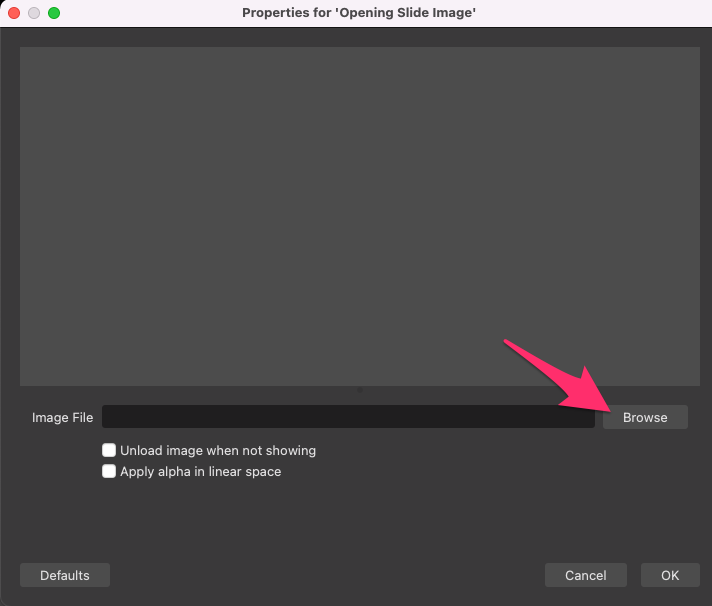
Now, click on Browse in the Image File box and select the image on your computer.
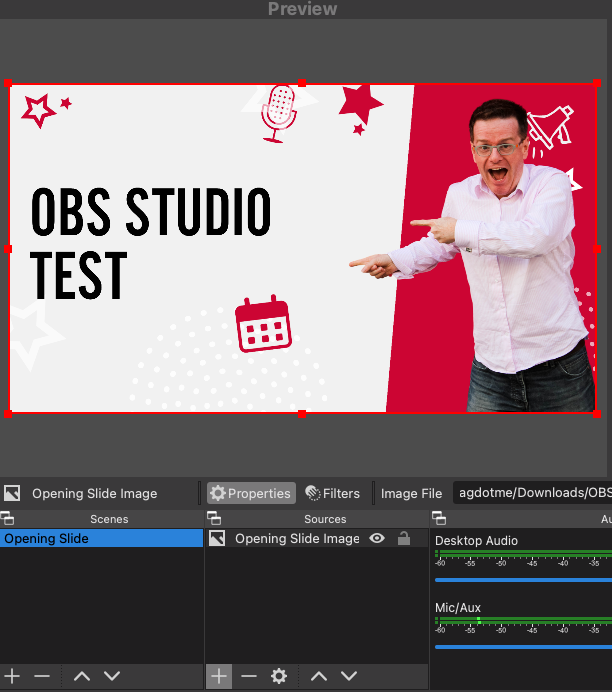
After you click OK, your image will be displayed in the preview window. You may need to resize the image. To do this click the image and drag the corners until it fills the preview window.
Congratulations. You’ve created your first scene in OBS!
Scenes 2 & 3: Intro + Outro Videos
Approx 3 minutes
Difficulty Level: Easy
Let’s create two more scenes – one for our intro video and the second for our outro video.
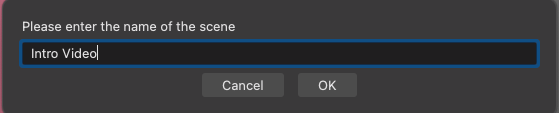
To create a new scene, click on the + button underneath Scenes.
We’re going to call it “Intro Video”
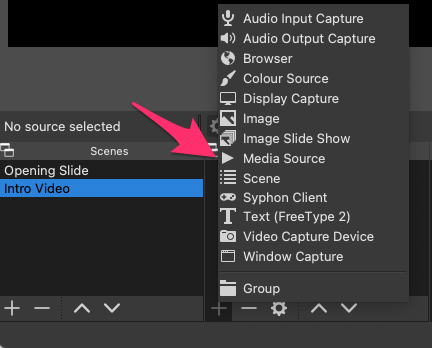
Now, click on the + underneath the Sources section, and click on Media Source.
Media Sources are what OBS uses for playing video and audio files.
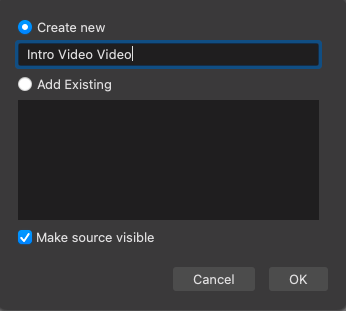
Give it a name. I am calling it “Intro Video Video” because I’ve already given the scene the name “Intro Video”. As I said before, all scenes and sources need to have unique names in OBS Studio.
To add the video, click on the browse button by the Local File box and select your video.
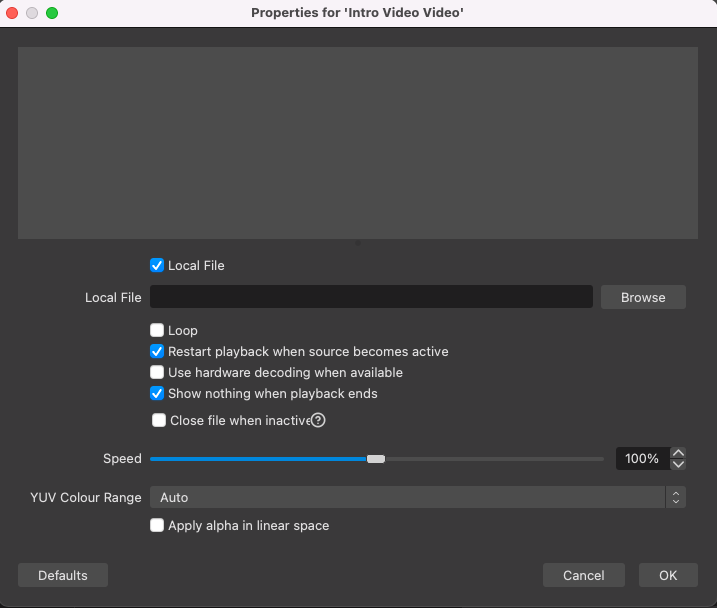
You have a number of extra options, and I’ll cover a couple of them.
Loop will restart the video once it reaches the end. We don’t want this, so we’ll leave this option unchecked.
Restart playback when source becomes active will restart the video when we switch back to this scene. We want OBS Studio to do this, so we’ll leave this checked.
Click OK to add the source to the scene and you’ll see the video on the preview window.
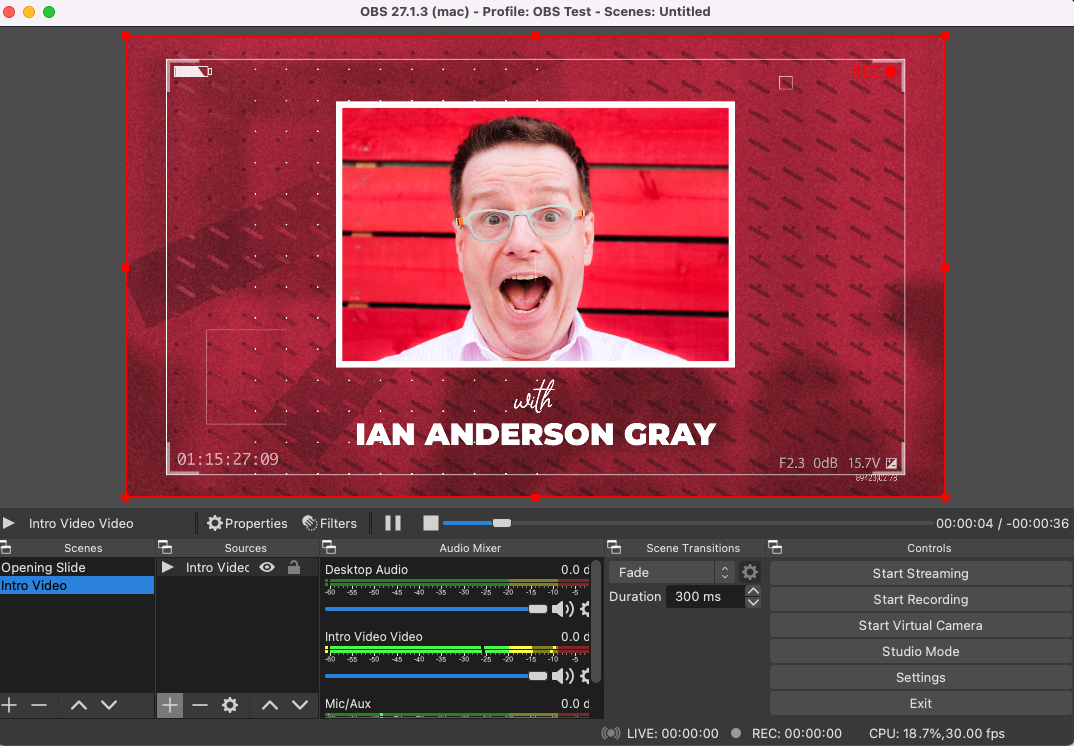
You probably won’t hear the audio at this point. To hear the audio, you’ll need to switch audio monitoring on for this source.
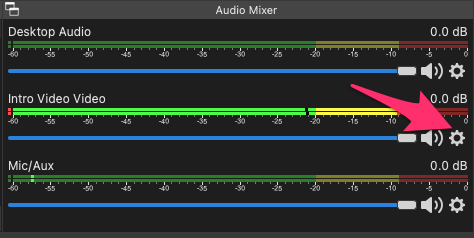
To do this, click on the cog to the right of the “Intro Video Video” source in the audio mixer.
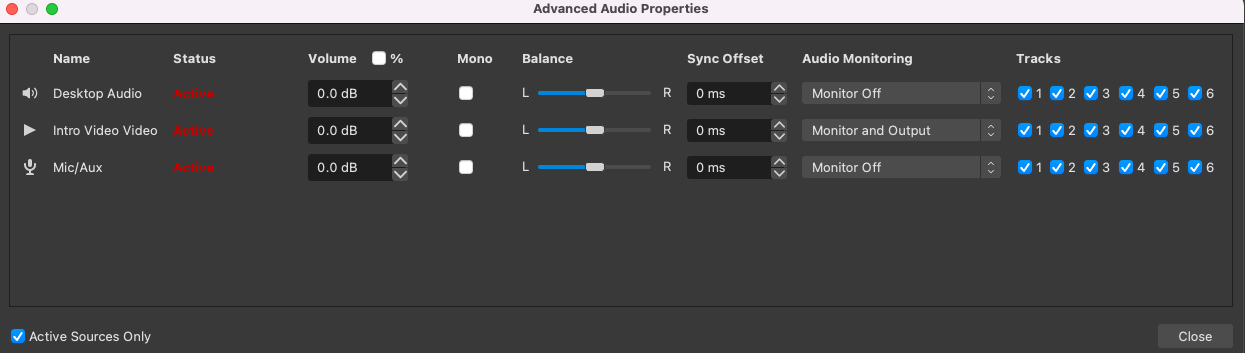
Then click on Advanced Audio Properties.
In the Audio Monitoring dropdown box for “Intro Video Video” select Monitor and Output.
This will allow you to hear (or “monitor”) the audio of the source and it will be sent to the final stream too.
Now it’s time to create another scene for your Outro Video. Follow all the steps above, and create a scene called “Outro Video”.
Scene 4: Host Solo View
Approx 3 minutes
Difficulty Level: Easy
Now we need to create a scene for your solo view.
This will be our camera on the screen.
OBS Studio doesn’t have the same feature as Ecamm Live to bring in Canon DSLR and mirrorless cameras. So, I can’t use my Canon M50 camera as a webcam in OBS Studio unless I use a third-party tool.
So, I am going to use my Logitech C920 webcam.
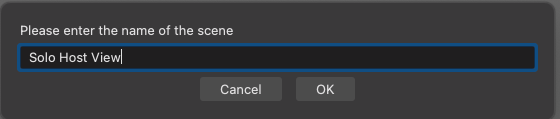
Firstly, create a new scene and call it “Solo Host View”.
Then add a new source and select Video Capture Device.

I’d give this the name of your camera – either “webcam” or something more specific like “Logitech C920”.
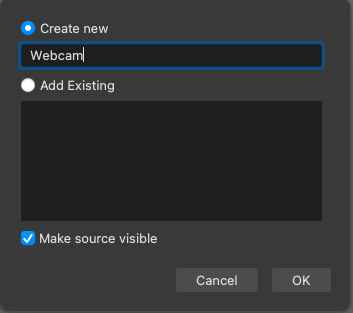
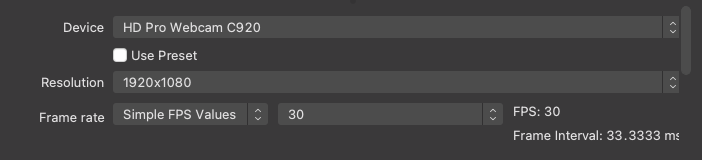
Then select your webcam in the device dropdown.

Although my webcam can output full HD, OBS chose a preset of 720p. To get the full HD experience, I needed to uncheck the Use Preset checkbox, select my webcam again, and then choose 1920×1080 from the Resolution dropdown. I then selected 30 for the frame rate.
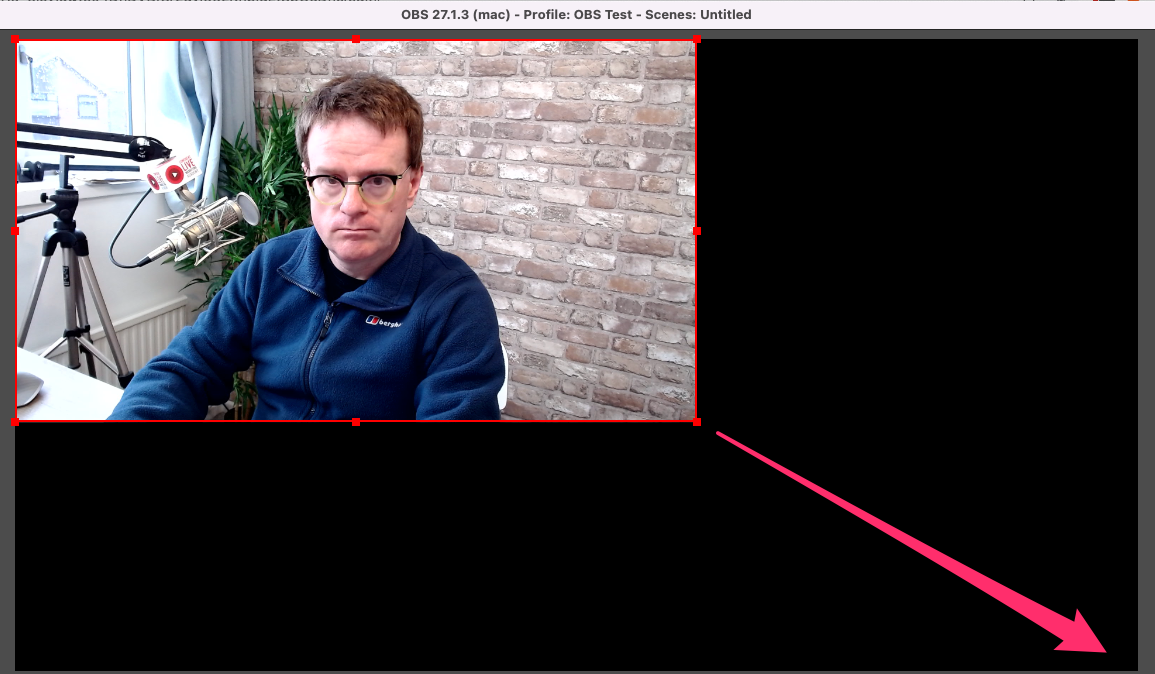
Click on OK and your camera will be on the preview window.

Our camera fills the entire screen or “canvas”. That’s because the camera is 1920×1080 and the canvas is 1920×1080. However, if your camera is a lower resolution (for example 720p), you’ll need to resize the camera to fill the entire canvas by clicking it and dragging the bottom right corner.
To add some branding, I’m going to add a logo on the top right corner.
Click on the + underneath sources and click on Image. Give it the name “Logo bug”.
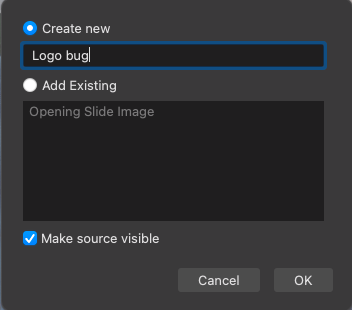
We’ll need to resize it and move it over to the top right. Just click on the image on the preview window and drag it over to the top right, and resize it.
We’re not done yet!
We’ve just added our video, we now need to add our microphone so our viewers can hear us. While Ecamm Live adds our microphone to camera-based scenes, OBS Studio doesn’t. We need to do this manually.
To add our microphone, add a new source and select Audio Input Capture.
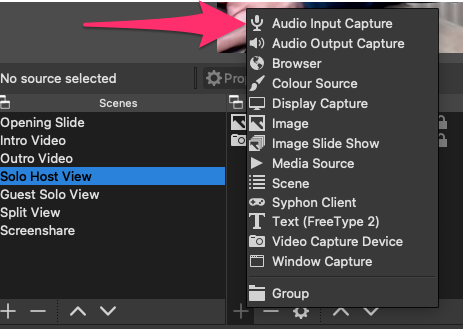
Name your source and give it a name such as “Microphone” or the name of your actual microphone.

Since I am using my RodeCaster Pro, I’ve selected that in the Device dropdown.
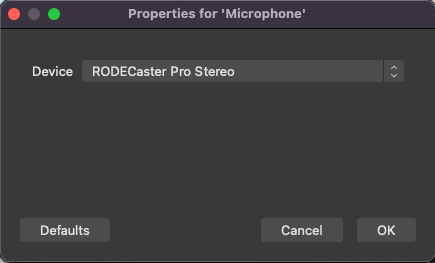
Click OK, and you’ve created the scene.
Scene 5: Remote Guest
Approx 15 minutes
Difficulty Level: Difficult
Now it’s time to bring in your remote guest.
OBS Studio doesn’t have the ability to bring in remote guests, so we’ll need to rely on a third-party service.
One that’s used frequently by those in the OBS Studio community is a service called VDO Ninja (previously known as OBS Ninja).
There are pros and cons to using VDO Ninja.
Pros
- It’s free
- Extremely customizable
Cons
- Tricky to set up the first time you use it.
- Confusing user interface
- It’s extra tricky because it’s a separate tool, so you need to switch between OBS Studio and VDO Ninja.
To get started, head on down to VDO Ninja and click on Create a Room. This will be the “room” that your guest joins.
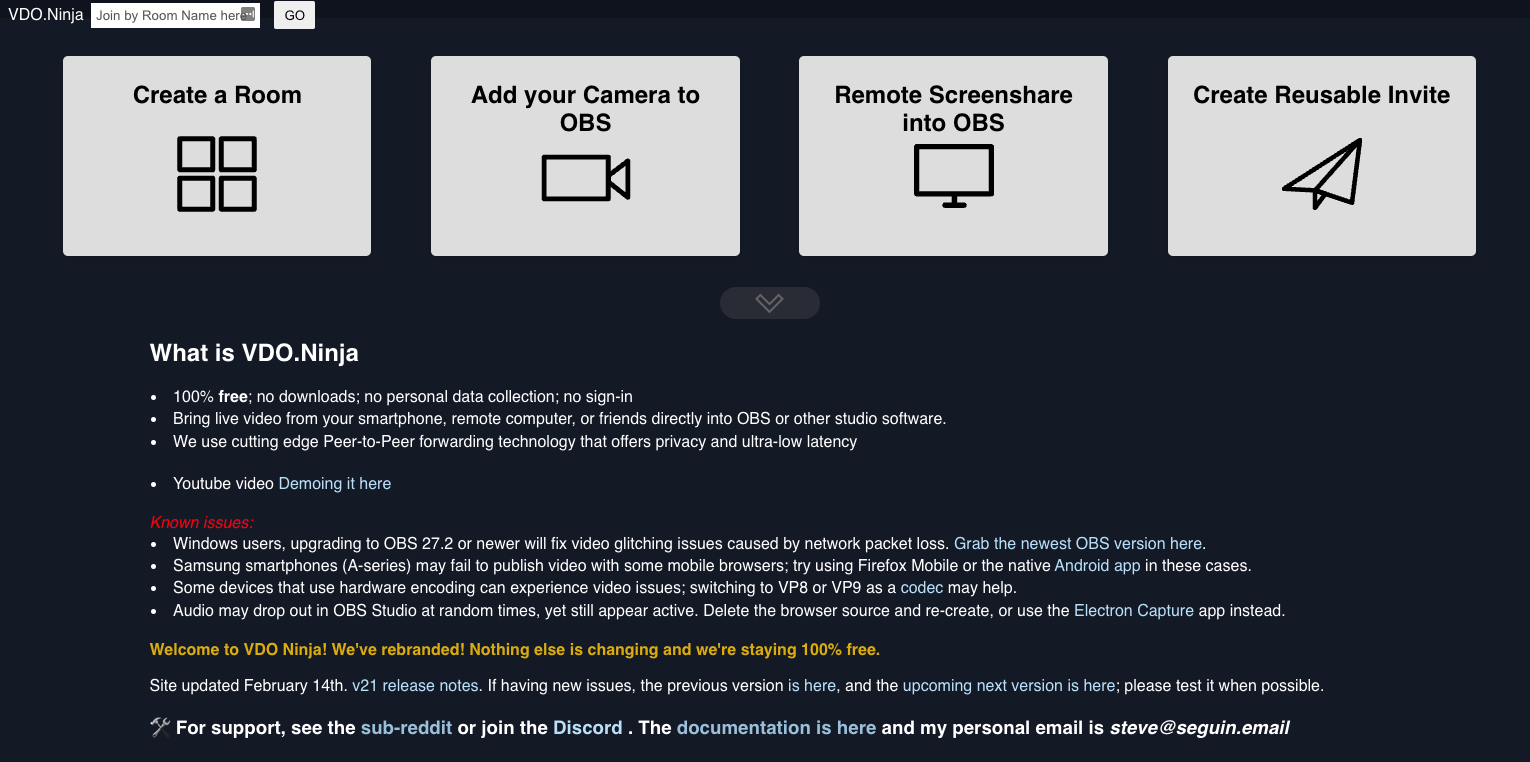
Enter your room name. We’re giving it the name “OBS Studio Test”. Then enter a password. This is the password that your guest will need to enter to join the room, so make sure you make a note of it.
There are a few other options, but we don’t need them this time.
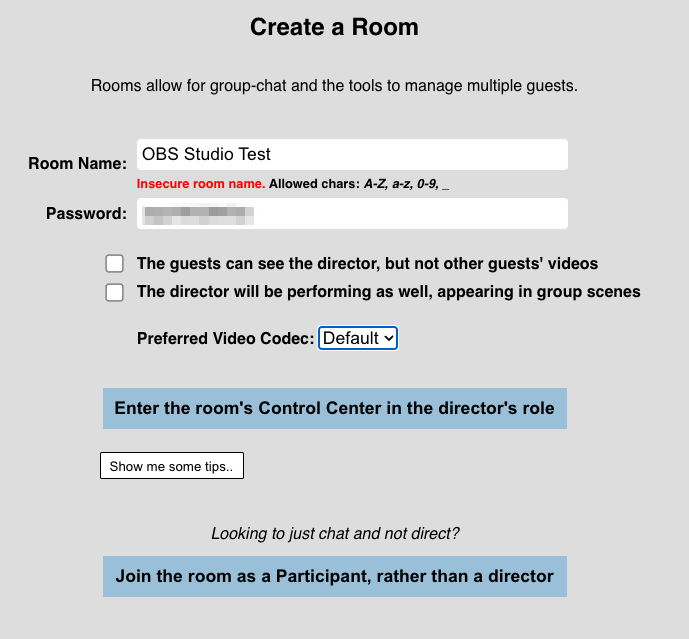
Click on Enter the room’s Control Center in the director’s role. The Control Center will then load on the screen.

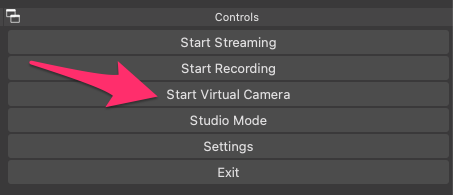
At the moment, the guest will not see anything when they join. We need to enable the Virtual Camera in OBS Studio so we can output the display of our show into VDO Ninja.
In OBS Studio click on Start Virtual Camera.
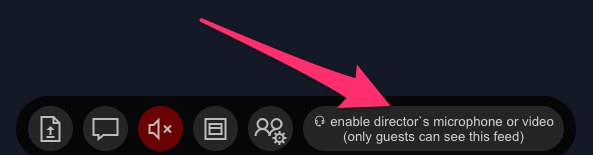
Then back in VDO Ninja, click the enable director’s microphone or video option on the bottom right.
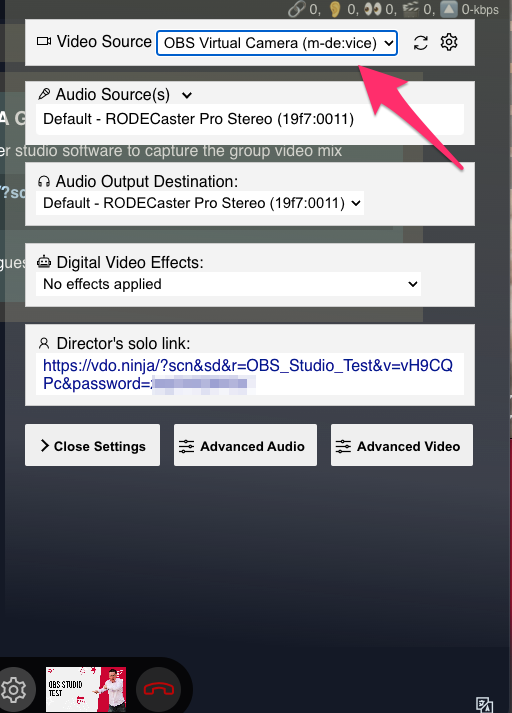
In the dialogue box that opens, change the Video Source to OBS Virtual Camera. This will allow the guest to see the output of our show. If you don’t see the OBS virtual camera, you may need to restart your browser.
For the Audio Source, choose your microphone. On a Mac, there’s no option in OBS Studio to output the audio of your show, so your guest will only hear your microphone. That means any other audio or the sound from videos won’t be heard by your guest.
Click on Close Settings.
In the main window, copy the guest link and give it to your guest. As we did last time, I’ll be bringing myself as the guest for this test.
When the guest clicks on the link, they’ll be asked to enter the password.

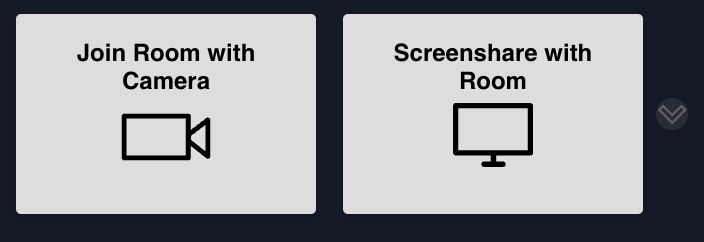
They then have the choice of sharing their camera or sharing their screen. You’ll need to let your guest know they should click the Join Room with Camera option.
The guest then needs to give permission for their browser to share their microphone and camera.

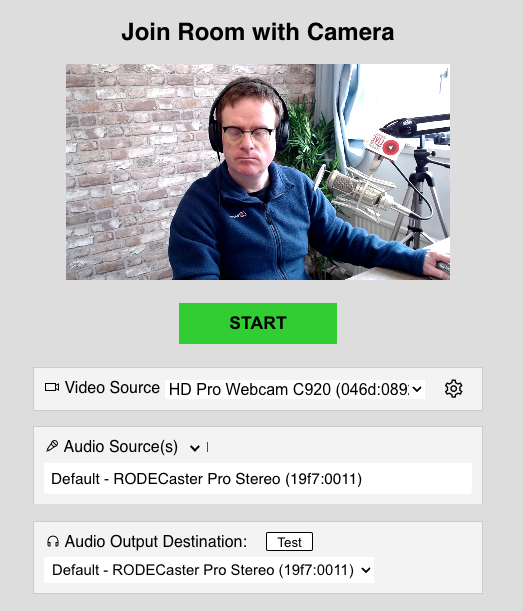
On the next screen, they can select their camera (under Video Source) and microphone (under Audio Source(s). Then they should hit START.
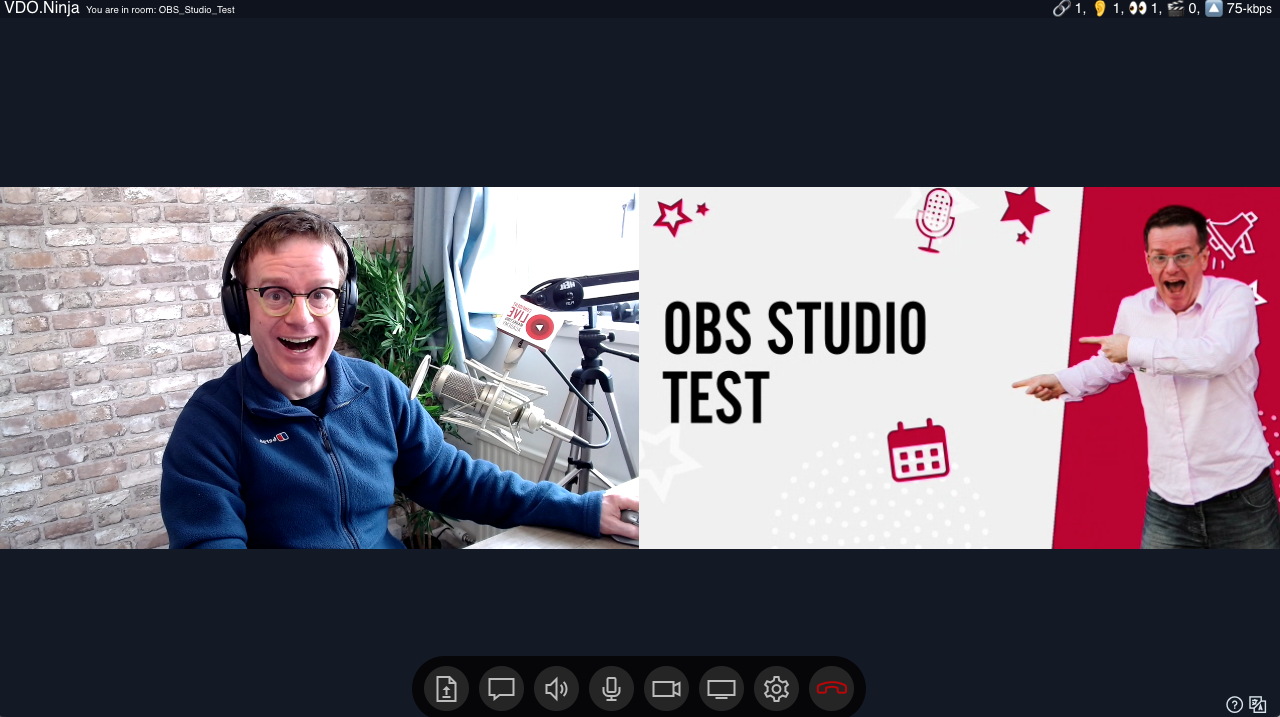
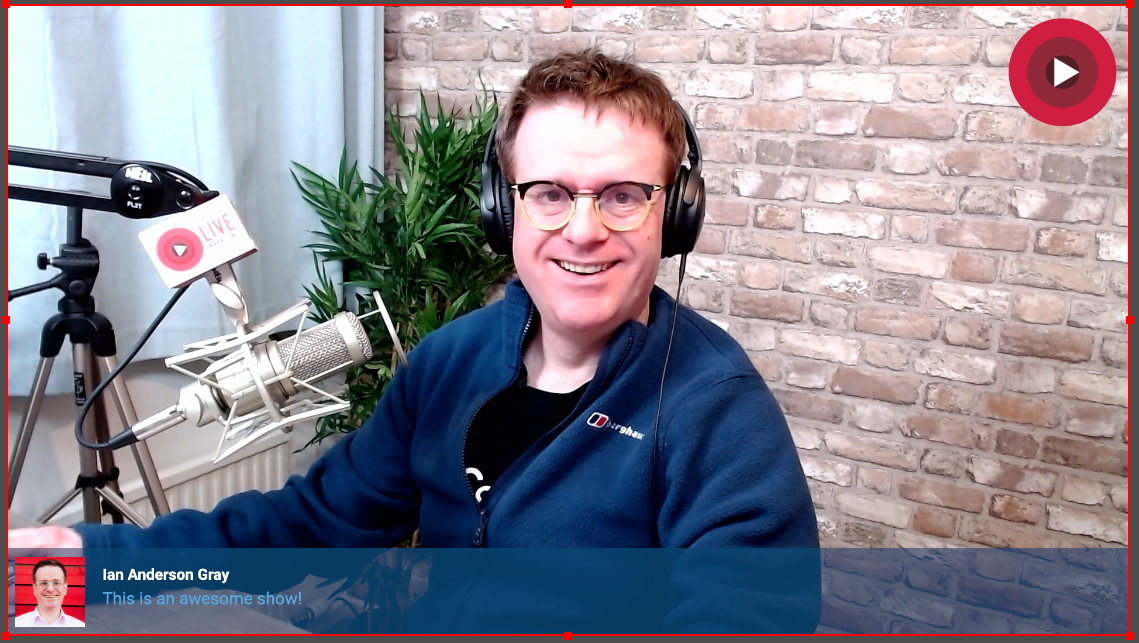
On the screen, your guest will see themselves on the left, and the output of your broadcast on the right.
It’s now time to bring on your guest onto your show.
Click on the copy solo link button. We need this to add the guest’s camera and microphone as an overlay.

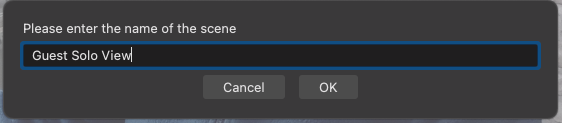
In OBS Studio, create a new scene and give it the name Guest Solo View.
Now, create a new source and select Browser.
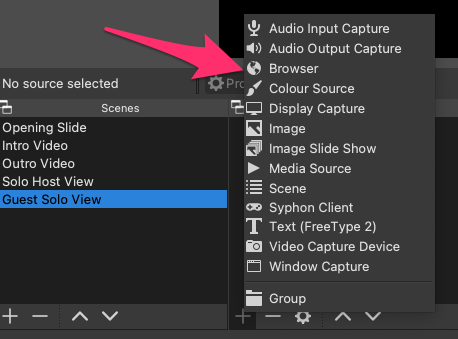
Give it the name “Guest Solo View (VDO Ninja)”.
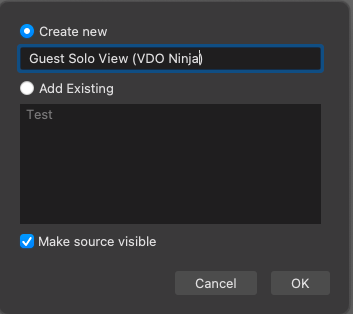
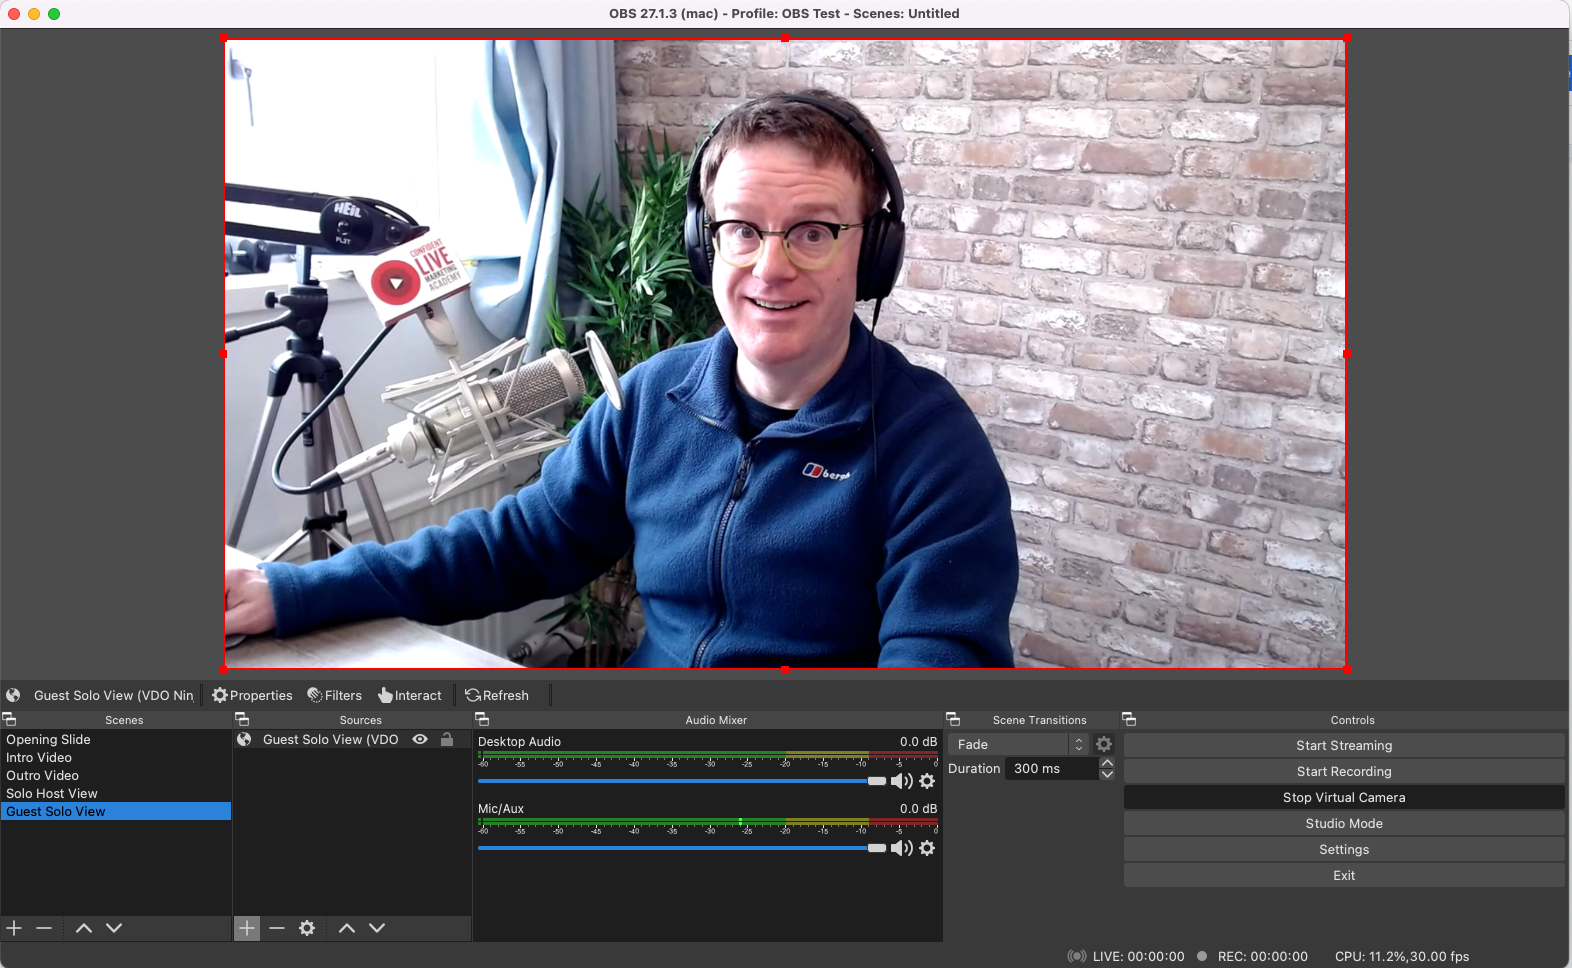
In the dialogue box, paste the solo link into the URL field. Change the width to 1920 and the height to 1080. You don’t need to change any of the other settings. Click on OK.

Your guest’s camera and audio will then appear full screen.
Add your logo bug on the top right hand of the screen by adding a new image source and selecting your previously made “Logo Bug”.

Phew! We’ve brought our remote guest onto our show.
Scene 6: Split View
Approx 4 minutes
Difficulty Level: Moderate
But now we need to create the split view and add our camera and our guest together on the screen.
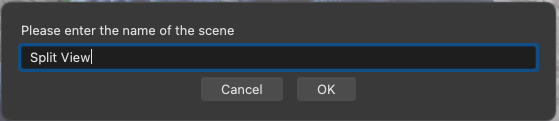
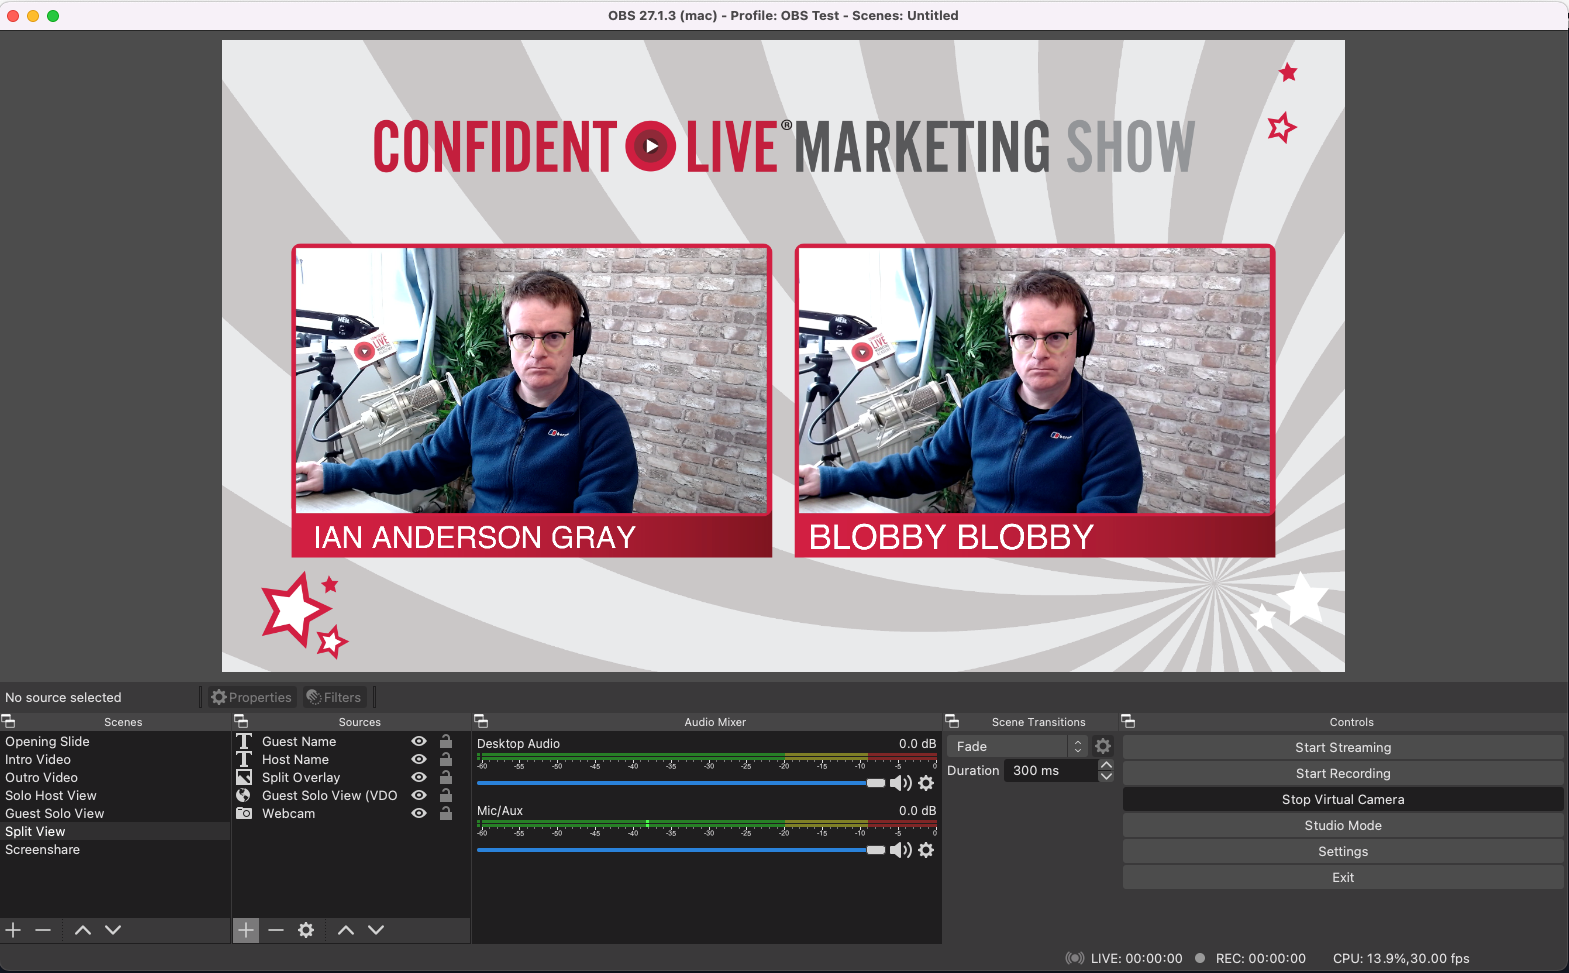
Create a new scene and give it the name “Split View”.
To add your camera, create a new source and select Video Capture Device. Select your previously made “Webcam” source.

Resize and move your camera so it’s smaller and on the left of the preview.

Now add a new source, choose browser and select your previously made “Guest Solo View (VDO Ninja)” source.
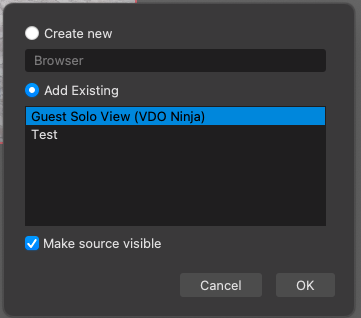
Again, move and resize this so it’s to the right of your camera.
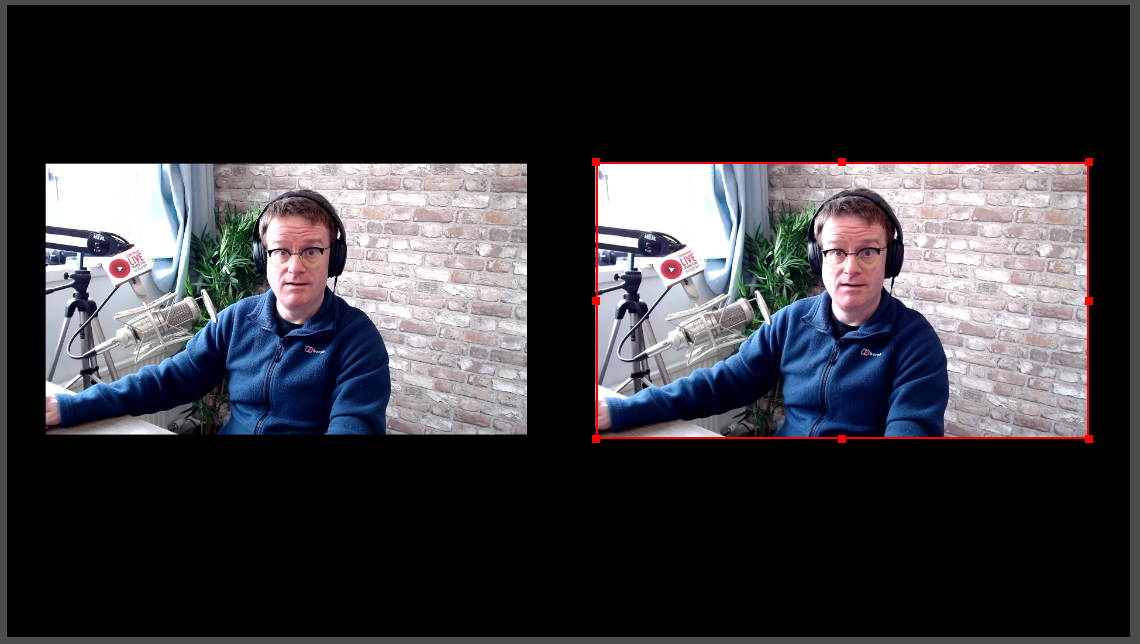
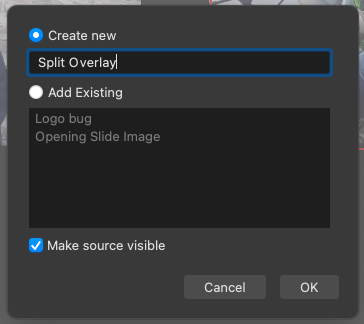
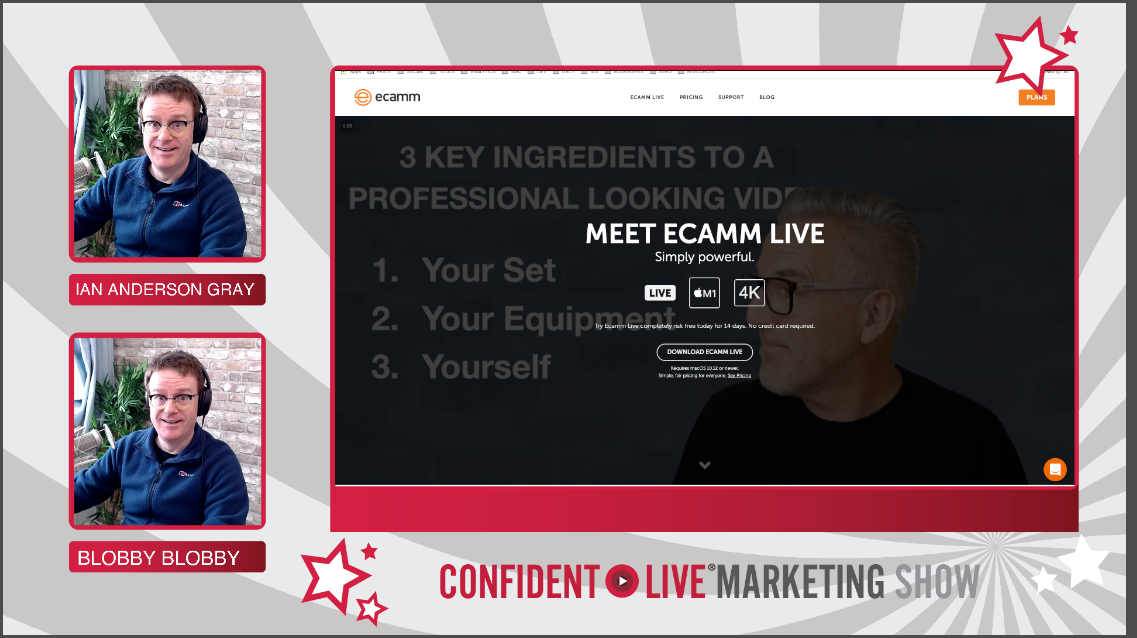
Now we need to add the split-screen overlay. To do this add a new graphic source and give it the name “Split Overlay”.
You’ll need to adjust the position and sizes of your camera and your guest’s on the screen, so it looks something like this:

Now we want to add the names of the host and guest on screen.
To do this, we need to create a new source and select Text.
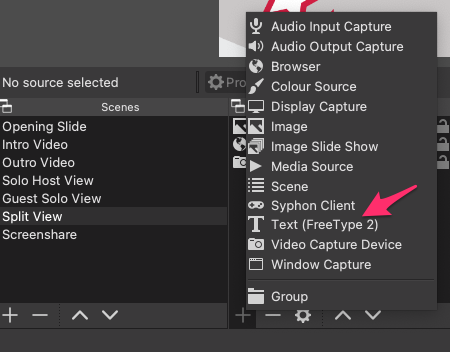
Give it the name “Host Name”.
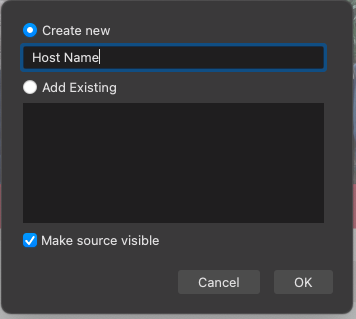
Change the font type to whatever you want and type in your name into the text box. You should also check the color.

You’ll need to move and resize the text overlay so it looks right on the screen.
Do the same for your guest’s name by creating a new text source.
Your guest’s audio will be brought in automatically from VDO Ninja, but we need to add your audio. As before, add a source and select your microphone.
Scene 7: Screenshare
Approx 4 minutes
Difficulty Level: Easy to Moderate
Now it’s time to create a scene that displays our screen. As we did with Ecamm, we’ll be sharing a browser window and also include the host’s and guest’s cameras.
One thing to note with OBS Studio for Mac is that it doesn’t capture the sound from a screen share. You’ll need another app for that such as Loopback. This will create a virtual microphone that you can add to OBS Studio. You’ll need to route the audio from your browser into the virtual microphone.
I won’t be covering how to do this in this article as we’re just sharing a browser window without sound.
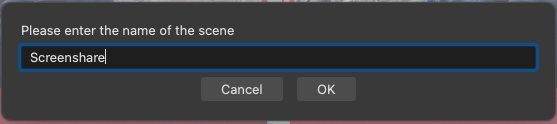
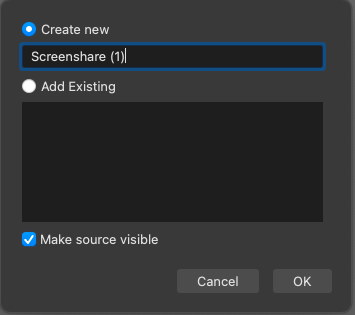
Create a new scene and give it the name “Screenshare”.
There are two options when sharing your screen. To share your entire screen you should select Display Capture. However, since we just want to share our browser window, we are going to select Window Capture.
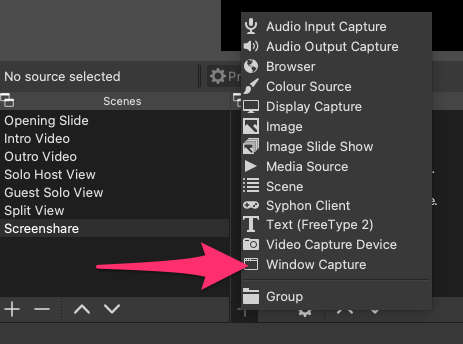
Give it a memorable name. We’re giving it the name “Screenshare (1)”.
If this is the first time you are doing this and you are on a Mac, you’ll need to give permission for OBS to share your screen.
Select your Google Chrome window in the Window dropdown.
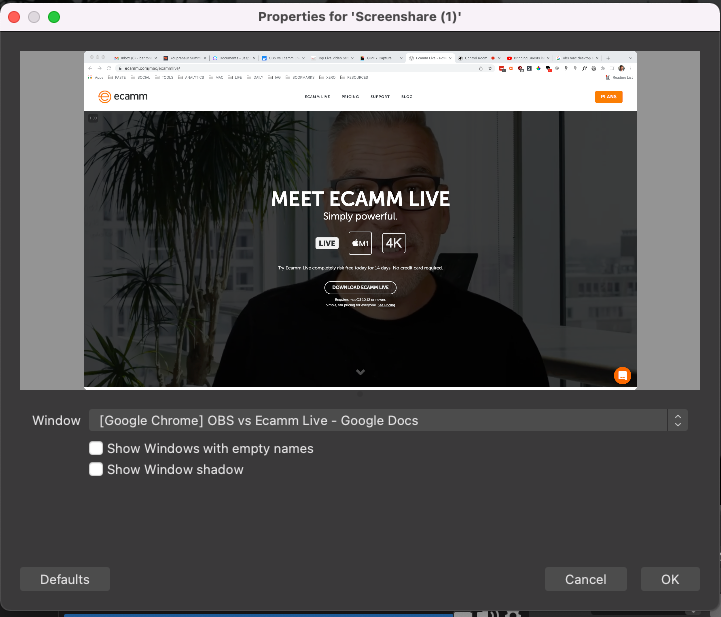
Your browser window will then appear in the preview window. Resize it so it’s slightly smaller.
Add your webcam and your guest’s camera on the screen and resize so they are smaller and on the left.

Add a new image source, give it the name “Screenshare Overlay”. Then adjust all the layers so everything looks good.
You’ll then need to add your microphone source so that your viewers can hear you.
Comments
Approx 10 minutes – Facebook Live only
Difficulty Level: Difficult
As I mentioned before, monitoring comments and highlighting them on the screen is important in most live broadcasts.
Unfortunately, there is no comments facility within OBS Studio. There are plugins, workarounds and hacks, but they are all pretty cumbersome and don’t really do what Ecamm Live does.
For monitoring comments, OBS Studio opens up windows for YouTube and Restream for you to follow your comments. For Facebook, you’ll need to view them on another window or device (such as a phone or tablet).
For highlighting comments on your broadcast, you’ll need to use a service that adds them via a browser source.
There’s a service called Effi which is cross-platform, and Twidget which is a downloadable app that only works on PCs.
In this article, I’ll explain how to use Facebook Live producer to add comments to your Facebook Live broadcast. However, unfortunately, you can’t highlight comments in Facebook Live Producer if you are broadcasting to a Facebook Group. In this example, I’ll be broadcasting to a Facebook Page.
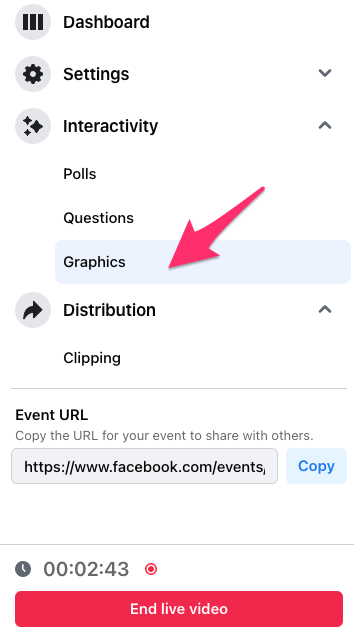
In Facebook Live Producer, you’ll see the option Graphics under Interactivity. Click this.
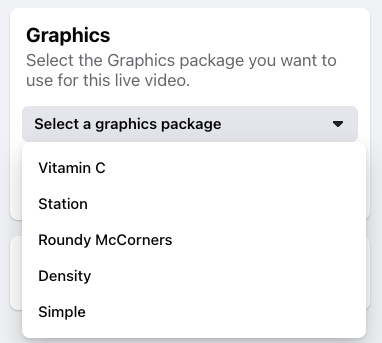
Then select a graphics package. This is how your comments will look.
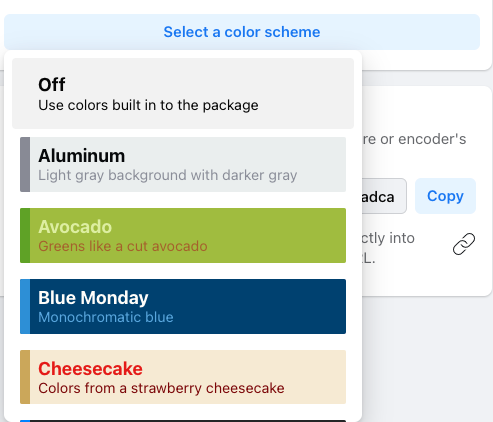
Then you can select a color scheme.
You’ll then see the Graphics URL. Click Copy to copy the link to your clipboard.
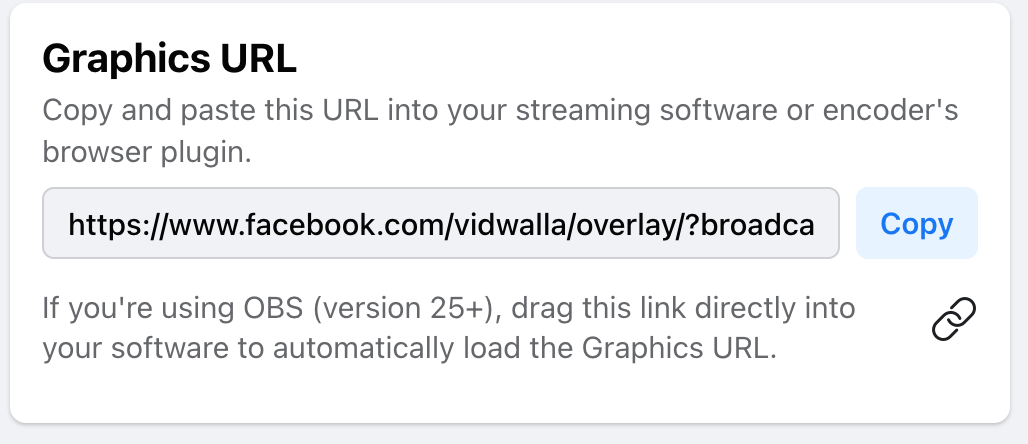
Then you can add this as a new browser overlay on the scenes where you want to display your comments. We’re going to add this to our split-screen scene.
When you are broadcasting live, you’ll be able to see live comments on the right-hand side of the screen in Facebook Live Producer. To add the comment to the stream, click on the 3 dots to the right of the comment. Then click on Public to Graphics.

After a bit of a delay, the comment will appear on the screen via the browser overlay.
Broadcast to Facebook
Approx 2 minutes
Difficulty Level: Moderate
It’s now time to do our Facebook Live test.
In Facebook Live Producer you can have the broadcast start automatically if you select the Go live automatically at scheduled start time option. For this to happen you’ll need to have started streaming to Facebook from OBS. Then Facebook will make the broadcast live at the appointed time.
The problem with this option is that you won’t know exactly when you’ll be live. It should start at the exact start time, but it’s never exact.
So, I recommend unchecking the Go live automatically option.

Then, when the broadcast time is close, click the Start Streaming option in OBS Studio. You’ll also want to hit the Start Recording button too if you want to save a recording for later.

Once you see the preview of your broadcast within Facebook Live Producer, you can then start the broadcast. Click on the blue Go live now button within Facebook Live Producer.
After a few seconds, you’ll be live.
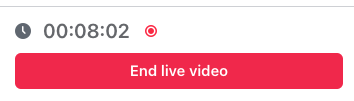
To end the broadcast, click the red End live video button in Facebook Live Producer. After a short delay, the broadcast will have ended.
You’ll now need to click the End Streaming and End Recording buttons in OBS Studio.
Broadcast to YouTube
Approx 3 minutes
Difficulty Level: Easy
To broadcast to YouTube, you’ll need to go to Settings and choose Stream from the left menu. Select YouTube – RTMPS from the destination dropdown.
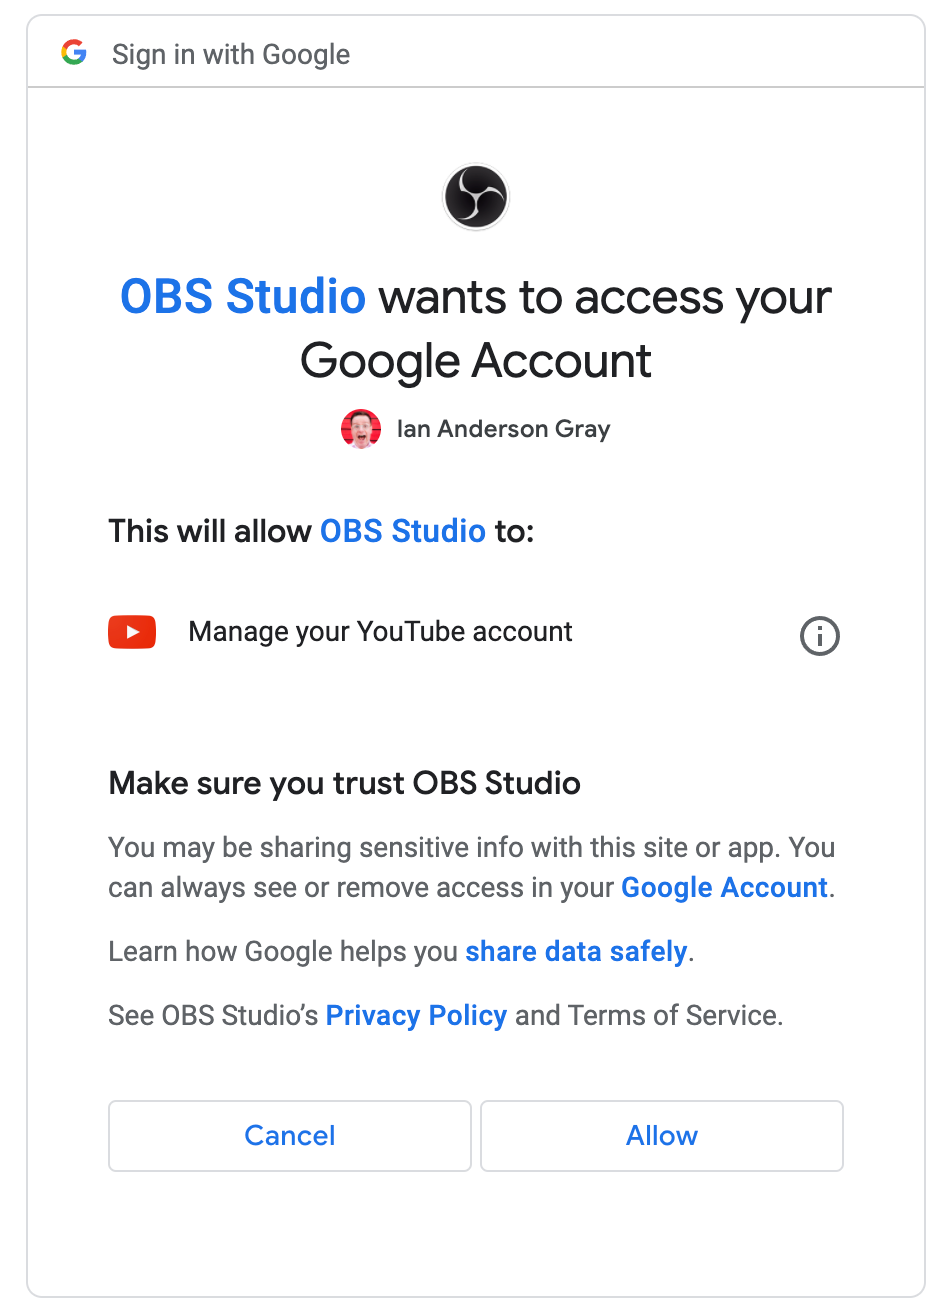
Unlike with Facebook, OBS Studio connects directly to YouTube. Click on the Connect Account button. Your browser will open and it will ask you to log in to your Google account, select your YouTube account and give permission for OBS Studio to connect to your YouTube account.
Once you’ve connected your YouTube account, close down the Settings window.
You now have a new option Manage Broadcast next to the Start Streaming button. Click on it.
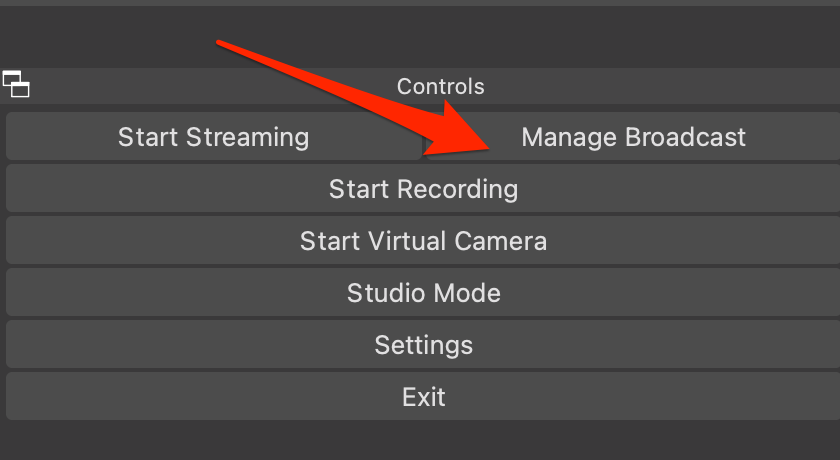
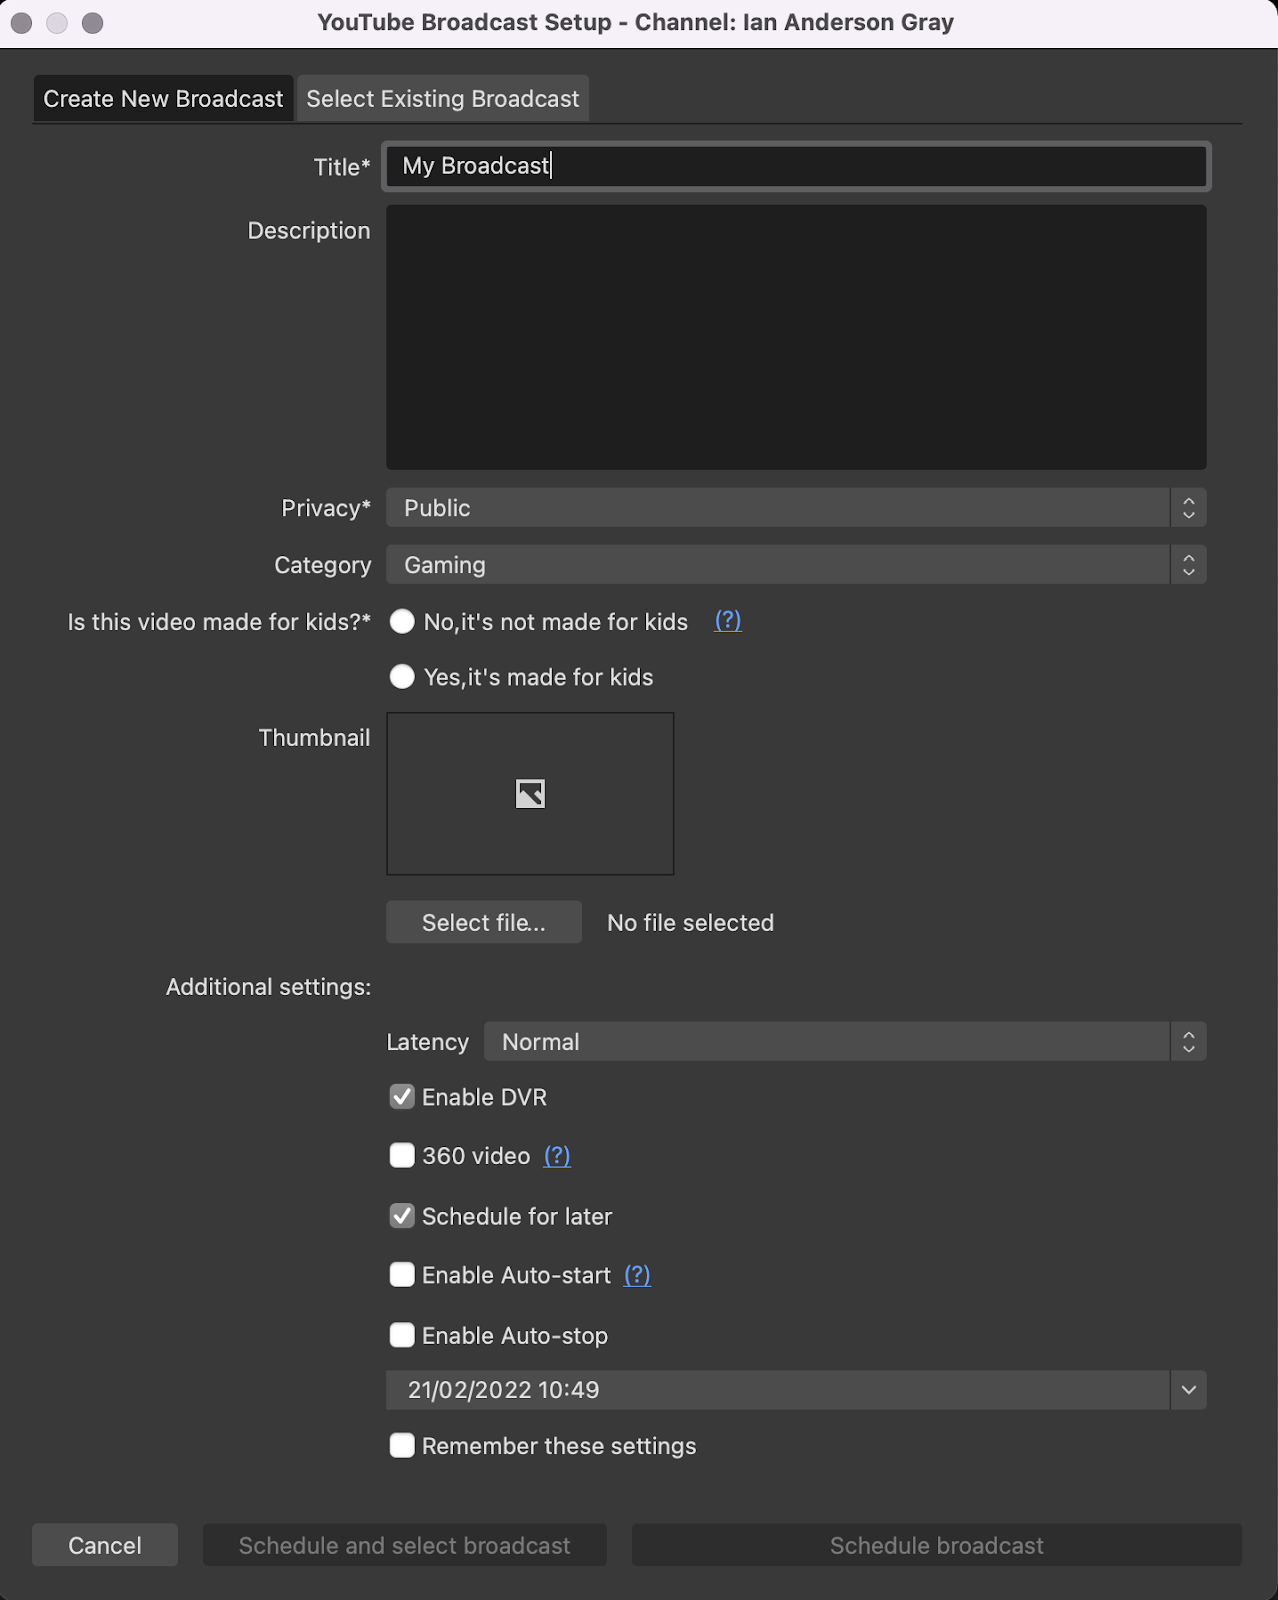
OBS Studio now allows you to create a new YouTube broadcast – whether it’s live straight away or a scheduled broadcast.
Enter the broadcast name and description. You can select the privacy option (public, unlisted, private), add the thumbnail, whether it’s “made for kids” or not and a few other options.
If you want the broadcast to start and end automatically when you start streaming to YouTube from OBS Studio, check those options. Finally, click on Schedule broadcast.
Broadcast with Restream to Stream to Multiple Destinations Simultaneously
Approx 5 minutes
Difficulty Level: Easy (for going live straight away) or Difficult (for scheduled lives)
Like Ecamm Live, OBS Studio doesn’t have the ability to broadcast to more than one place at the same time. But it does integrate with the multistreaming service, Restream.
For our multistream test with Restream, we’ll need to change our destination in settings to Restream.io.
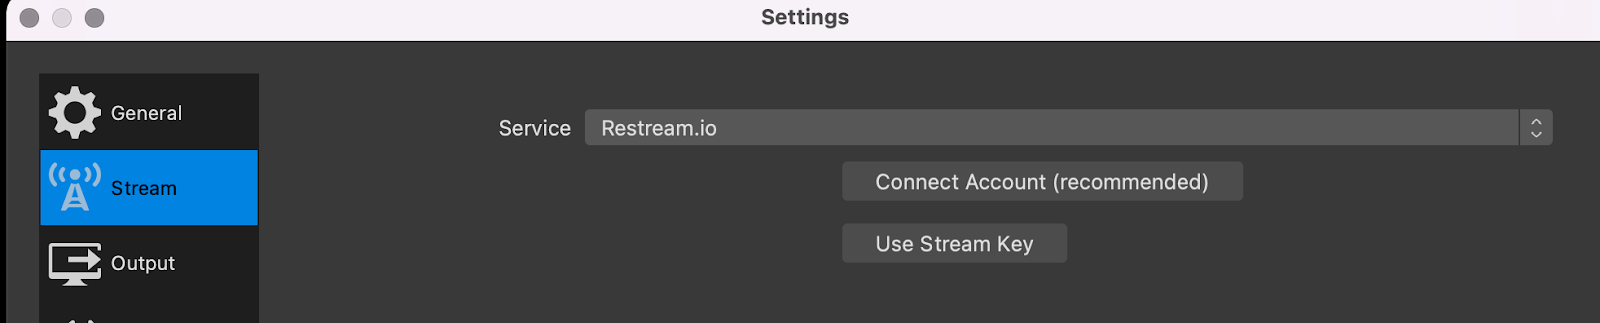
Then you should connect to your Restream account, by clicking the Connect Account button.
Once you’ve logged in and given permission for OBS Studio to use Restream, 3 browser docks will open. The Stream information for Restream, your destinations list and chat.
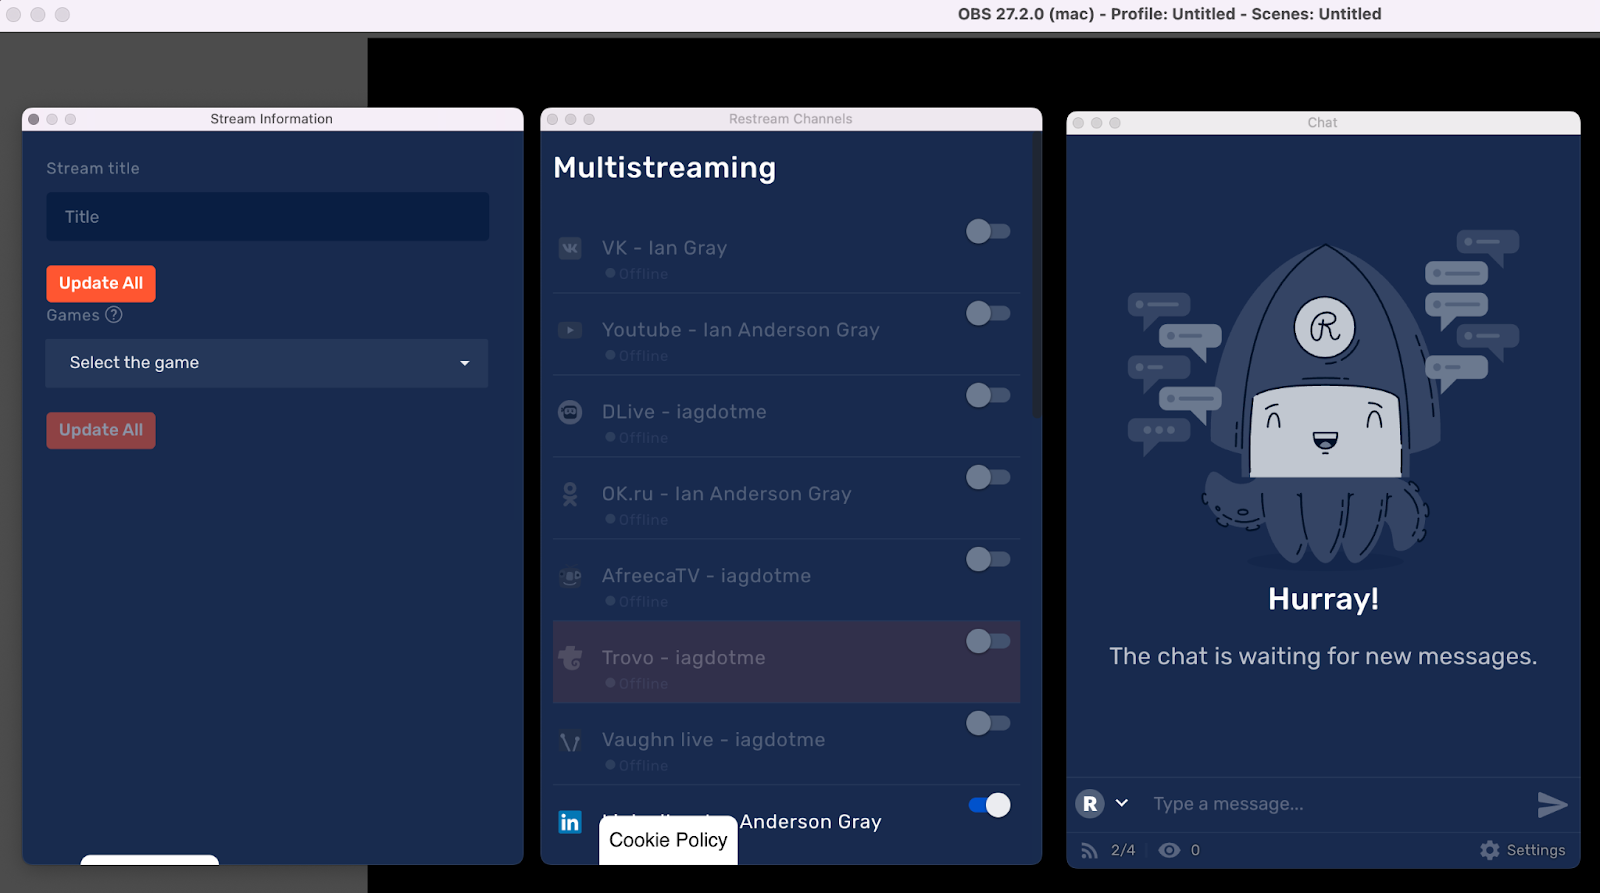
Immediately, you’ll see that you do not have the ability to schedule any events from OBS Studio in Restream.
OBS Studio only has the ability to broadcast straight away. There’s no integration with Restream Events.
To go live straight away with OBS and Restream, enter your stream title. You don’t have the ability to change the post description.
Then select which destinations you want to broadcast to.
To start broadcasting your show, click on Start Streaming in OBS Studio and your show will start.
If you want to create a scheduled show with Restream, it’s more complicated. As we did in our Ecamm Live test, you’ll need to schedule the show within Restream Events.
Then you’ll need to grab the stream key and URL from Restream.

Once you’ve clicked on the RTMP Settings button, your stream key and URL will be on screen.
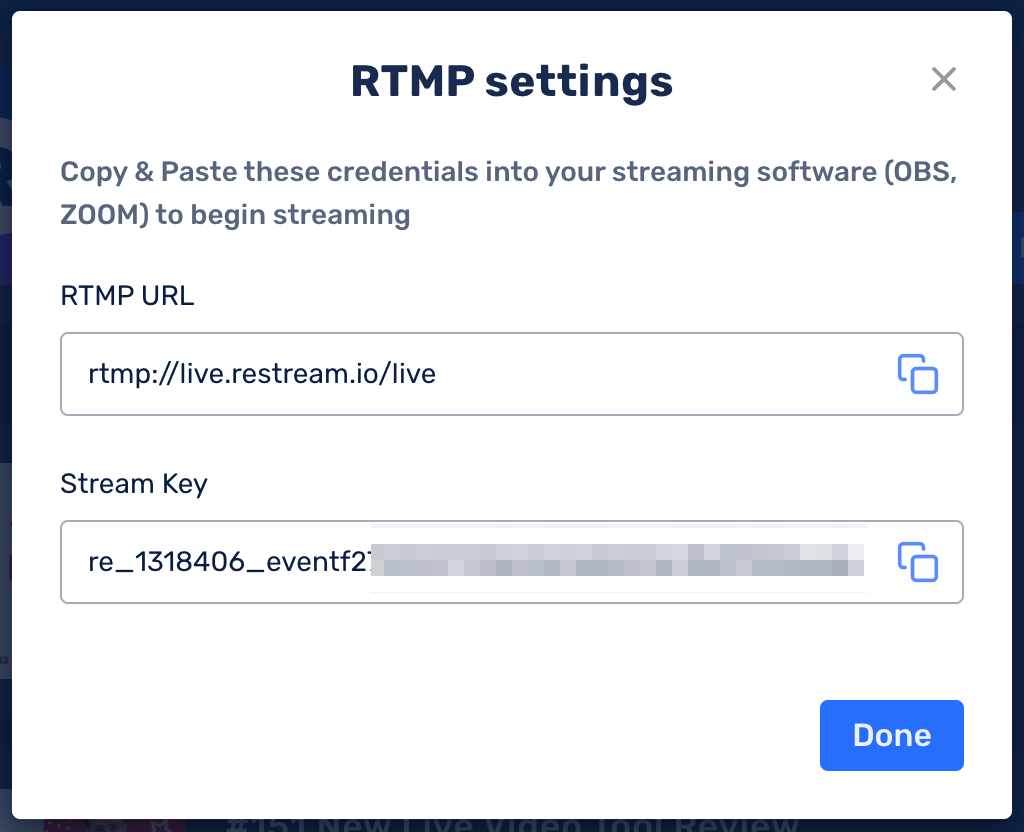
Then, in OBS Studio, instead of connecting to your Restream account, click on Use Stream Key.
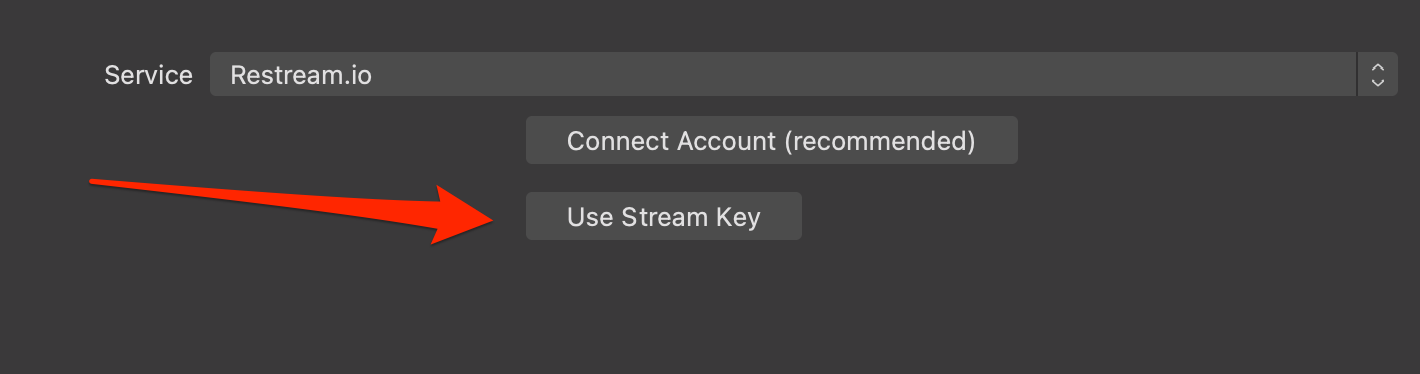
And paste your key into the box.
Recordings
There’s no Save all broadcasts option in OBS Studio. You’ll need to remember to click on the Start Recordings button each time you start broadcasting.
You’ll also want to check the recording settings. These can be found in Settings->Output and selecting the Recordings tab.
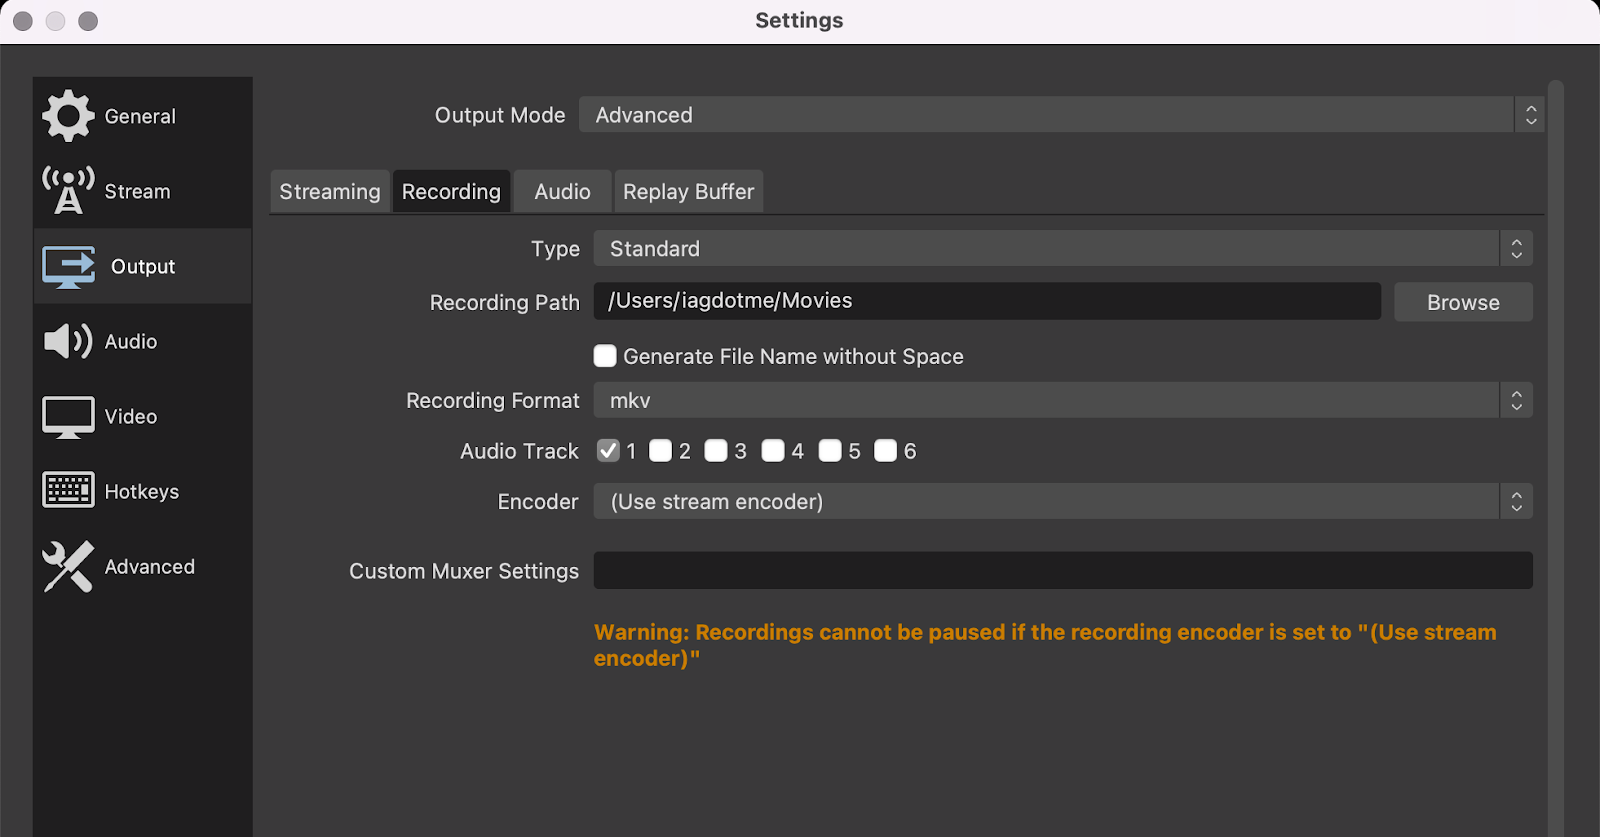
Change the Recording Path to the folder you want your recordings saved to. Change the Recording Format to the type of video files you want saved as. This might be mov or mp4 files.
Summary
So, how long will it take you to set up your live show in OBS Studio and Ecamm Live?
That will depend on how technical you are, and how familiar you are with the tools.
However, I’m very familiar with both OBS Studio and Ecamm Live, and in my testing, I found the following:
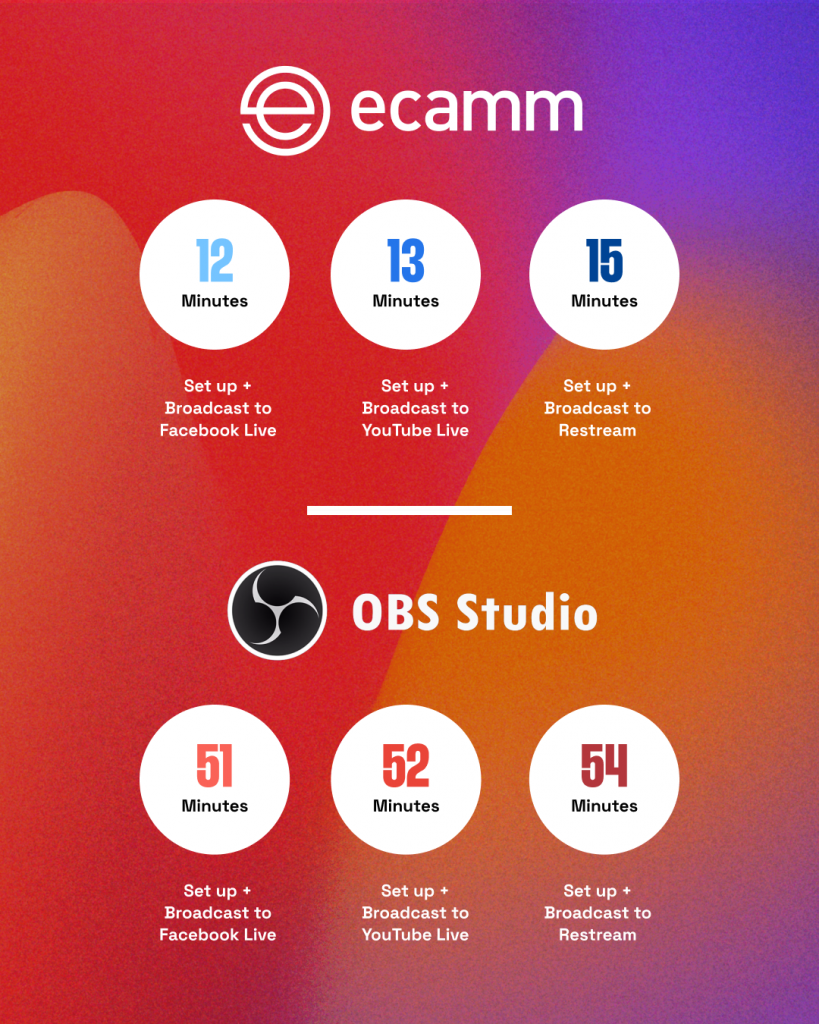
Ecamm Live:
- 12 minutes (Set up + Broadcast to Facebook Live)
- 13 minutes (Set up + Broadcast to YouTube Live)
- 15 minutes (Set up + Broadcast to Restream)
OBS Studio:
- 51 minutes (Set up + Broadcast to Facebook Live)
- 52 minutes (Set up + Broadcast to YouTube Live)
- 54 minutes (Set up + Broadcast to Restream)
In terms of ease of use and speed in setting up, there’s no question, Ecamm Live wins.
In terms of features, it depends. OBS has some big missing features such as highlighting comments, bringing in remote guests, true Facebook Live integration, scheduled Restream live broadcasts and DSLR & mirrorless camera via USB. But OBS Studio has a few very niche features that Ecamm Live doesn’t have.
Also, OBS Studio is free and it works on both PCs and Macs.
Ecamm Live is not free, but it does save a huge amount of time when compared to using OBS Studio. It’s a lot easier to use as well. And of course, you have the ability to highlight comments, Interview Mode, and more, which is a huge advantage.