Yay! You did it. You’re jumping into the world of live streaming and we know you’re going to be incredible. Live streaming is an amazing way to increase your reach, grow and foster a community, and build content that you can repurpose. Live streaming can easily be the center of your Marketing plan, allowing you to create content once that you use in a plethora of ways.
Ecamm Live makes it easy for you to look your absolute best while live streaming by doing things like connecting in pro-level cameras and microphones, adding graphics and animations, and even bringing comments on screen.
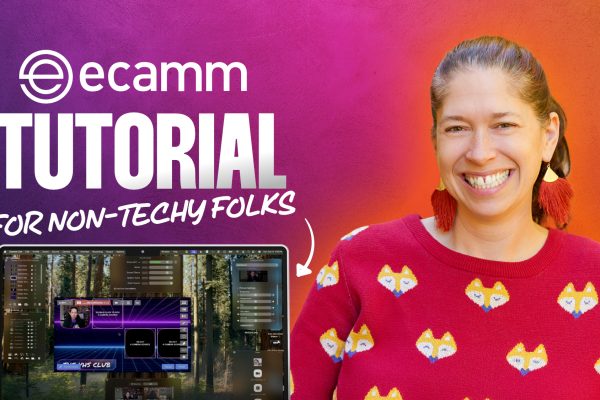
For a full walkthrough of Ecamm Live, check out our Ecamm Simplified training series and follow it up with the Ecamm Challenge
Let’s Go Live!
In this guide, you’ll find everything you need to know to get started with live streaming along with some tips and tricks to using Ecamm Live.
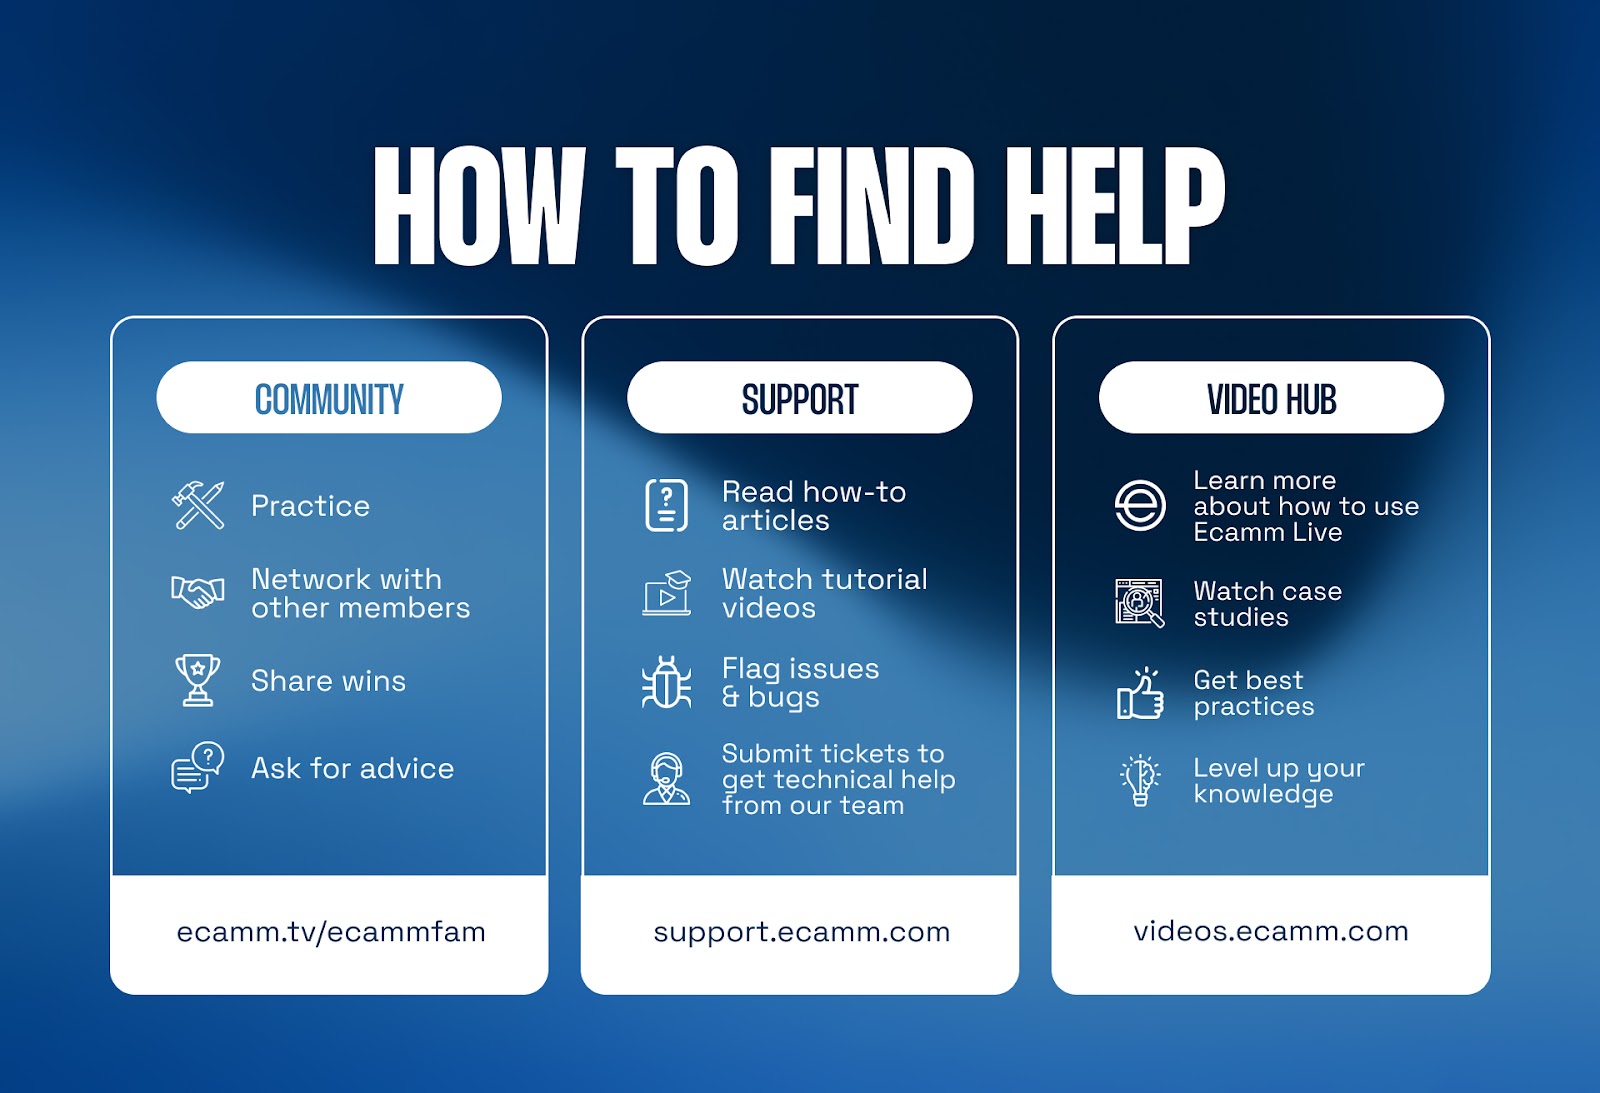
Before we get into it, please remember that we’re always here to help. Our Community is a great place to practice and you can find articles and video tutorials on our website using the links below.
Content First – Always
Before you even open up Ecamm Live or touch any of your gear, you should make sure that you have a really good understanding of your content.
What is your show (event, video…) about? What are the elements that make up your show?
Here are some of the types of live streams that you create with Ecamm Live:
- Interview shows
- Panel discussions
- Tutorials, trainings, & workshops
- Open Q+As
- Video podcasts
- Religious services
- Live events (magic shows, concerts, fundraisers, sports)
- Live shopping
- And so much more…
No matter what your show is about, you’ll need the same elements to get you from beginning to end. These elements make up a storyboard for your show (or what we call a Run of Show).
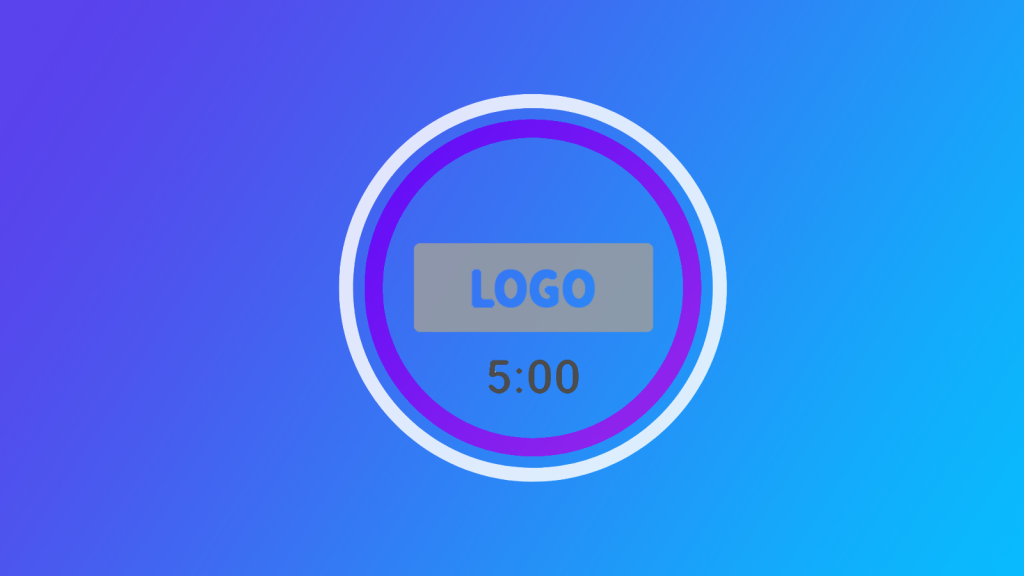
- Intro video or countdown timer
- This is used to introduce the show
- Countdown timers can be built right in Ecamm Live
- Main camera shot
- Split screen with one guest
- Split screen with multiple guests
- Screen share
- Closing screen / credits / video
You may also want to consider some additional options like a “be right back” or waiting screen.


Time to Add Overlays
Now that you have an outline or storyboard for your show, you’ll need to find or create the elements (we call these Overlays) that go into it. These are things like:
- Your logo
- Lower thirds (your name/title, guest names)
- Background images or video
- Any videos or images you want to share
- Music & sound effects
- Choose copyright-free music or sounds that you own; tools like Epidemic Sound are always a great choice
You can design Overlays in apps like Canva, Photoshop, Final Cut Pro, Keynote, or even natively in Ecamm Live using our Text Overlays tool.
Checkout Uno Overlays for a ton of templates or purchase an overlay pack from one of our partners
Build the Show
With your Run of Show in hand (or mind) and your elements created and ready to go, you’re all set to open up Ecamm Live and start building everything out. With Ecamm, you can build your show in advance so that you have the opportunity to:
- Practice
- We always recommend actually going live in advance to see how everything looks
- You can practice into our Community or go to an unlisted YouTube or private Facebook group if you don’t want your viewers to see you practicing
- Share
- You can export Profiles, Scenes, and Scene folders to send to a colleague or friend
Start by creating a Profile.
A Profile in Ecamm Live holds all of the elements of your show (event, production…) including settings, preferences, scenes, and scene folders. Even if you don’t plan on having multiple shows or videos, leveraging Profiles is just a good best practice and a great way to keep organized in case you decide to add on more content in the future.
Once you’ve created your Profile and named it accordingly, you’ll want to set up Scenes. Think of a Profile as a book and the Scenes as pages. Now think of Overlays as the words on the pages.
Here’s an example of what the Live from the Test Studio Profile looks like.
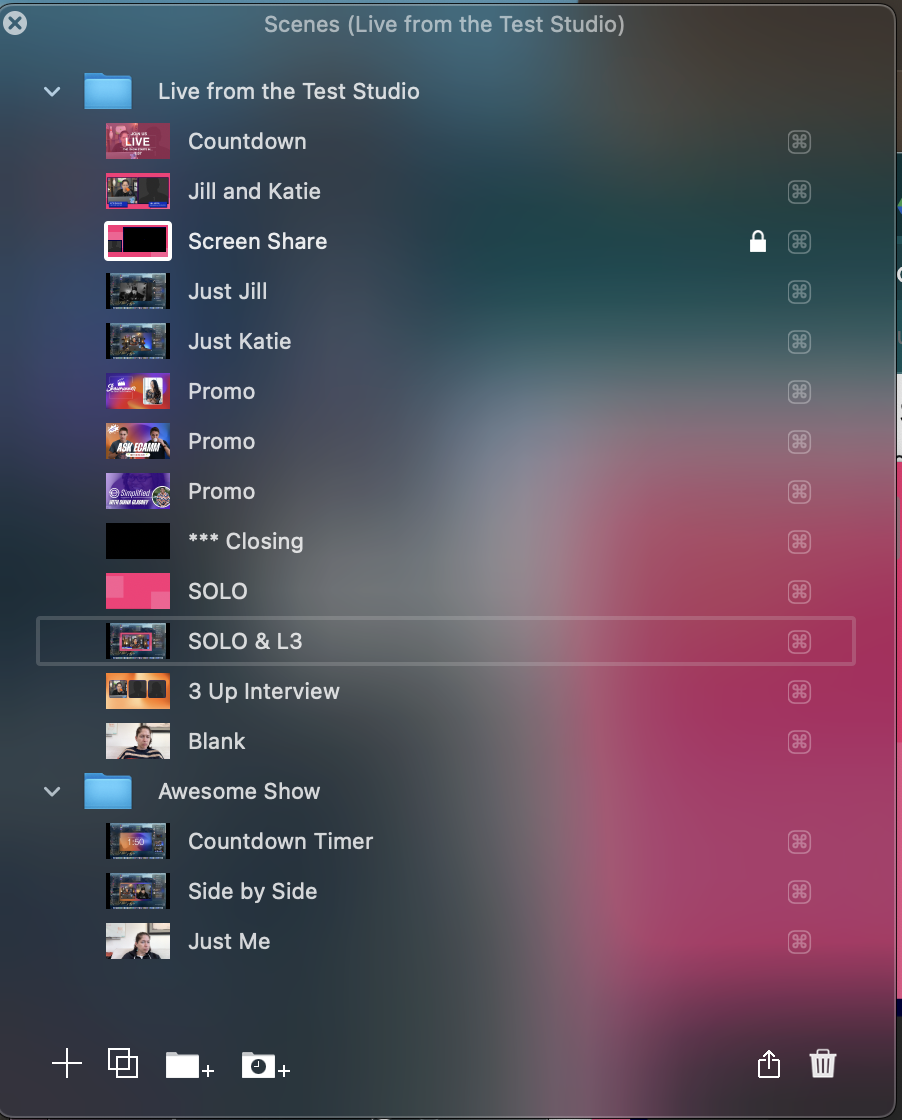
Pro tip! Keeping some extra Scenes at the end of your flow (as you can see above) gives you flexibility if something pops up while you’re streaming. For example: if Jill and Katie decided to bring on an extra guest while the show was live, they could quickly switch to the “3 Up Interview” scene and be ready to go.
Finally, don’t forget to double check the Preferences. For example: if you’re planning on repurposing your streams to use in a podcast, you’ll want to turn on Isolated Audio so you have each audio track saved separately.
Your Live Streaming Studio
Building out a dedicated space for your live broadcasts is an important part of the process. The first thing to do is really consider what you NEED rather than what you WANT. You can always start small and add onto more as you grow. Video production gear is expensive and should be considered an investment.
Remember that the gear you use is going to affect the quality of your live videos. The quality of a webcam is not the same as the quality of a mirrorless camera.
Here is what you’ll need to have in order to live stream using Ecamm Live:
- Computer
- If you’re using Ecamm Live, you’ll need a Mac computer
- We recommend the Mac Mini M1 or any of the newer Macbook Pro laptops
- Try to avoid Macbook Air computers as they’re not quite powerful enough to handle all aspects of live streaming
- A good rule of thumb is to purchase the best & newest Mac computer that you can afford
- Internet
- You’re looking for over 5mbps upload speed
- Try to connect via ethernet, if you’re at all able
- Check out our Internet Checklist
- Tools like Speedify help to make sure you have a solid connection
- PERK ALERT! Visit www.ecamm.com/blog/perks to grab a discount on Speedify
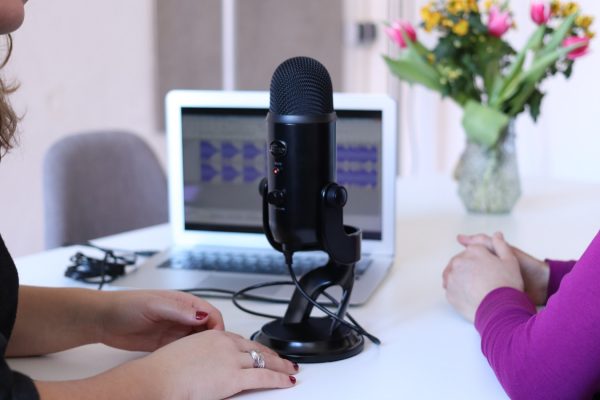
- Audio
- If you’re going to invest in gear, always start with audio as it’s the most important part of any production
- We highly recommend the Shure MV7 microphone, which offers both USB and XLR connections, but there are lots of great options out there
- If you’re connecting via XLR, you’ll need a mixer like the Scarlet Focusrite or the Rodecaster Pro
- See our All About Audio article and Audio Workshop for more information
- Lighting
- Start by controlling the natural light in your room
- 3 point lighting is ideal, if you can swing it
- More on lighting for live streams
- Camera
- There are lots of great camera options out there, including using your phone as a webcam with apps like Camo or Shoot
- PERK ALERT! Grab a discount on Camo by going to www.ecamm.com/blog/perks
- For webcams, we recommend the Elgato FaceCam
- For mirrorless cameras, we recommend Sony
- Here’s a video that we highly recommend for setting up your Sony A6400 for live streaming
- Many cameras connect to your computer with just a USB, but you may need a CamLink 4K (or similar) to connect a camera with HDMI
- To obtain that blurry background effect (it’s called a bokeh effect), you’ll need to use a lens with a large aperture like f/2.8 or less, often referred to as a “fast lens”. You’ll also want to bring the camera closer to you (or the subject) to create a narrower depth of field. We recommend having the camera as close as possible to the host, depending on your space.
- There are lots of great camera options out there, including using your phone as a webcam with apps like Camo or Shoot

Don’t forget about your background set!
You can choose something minimal, like what Marielou Mandl does here:
Or add character and personality to your background with a bookshelf or tables and props, like what Doc Rock does here:
Finally, there are a lot of “extras” that you can consider adding into your space that will help add character or create efficiencies.
These are things like:
- Green screen
- Stream Deck or Loupedeck
- Teleprompter
- Big red button
Here’s Ecamm Live’s full gear guide if you’re looking for recommendations or ideas.
See gear guides from Ecamm Live streamers
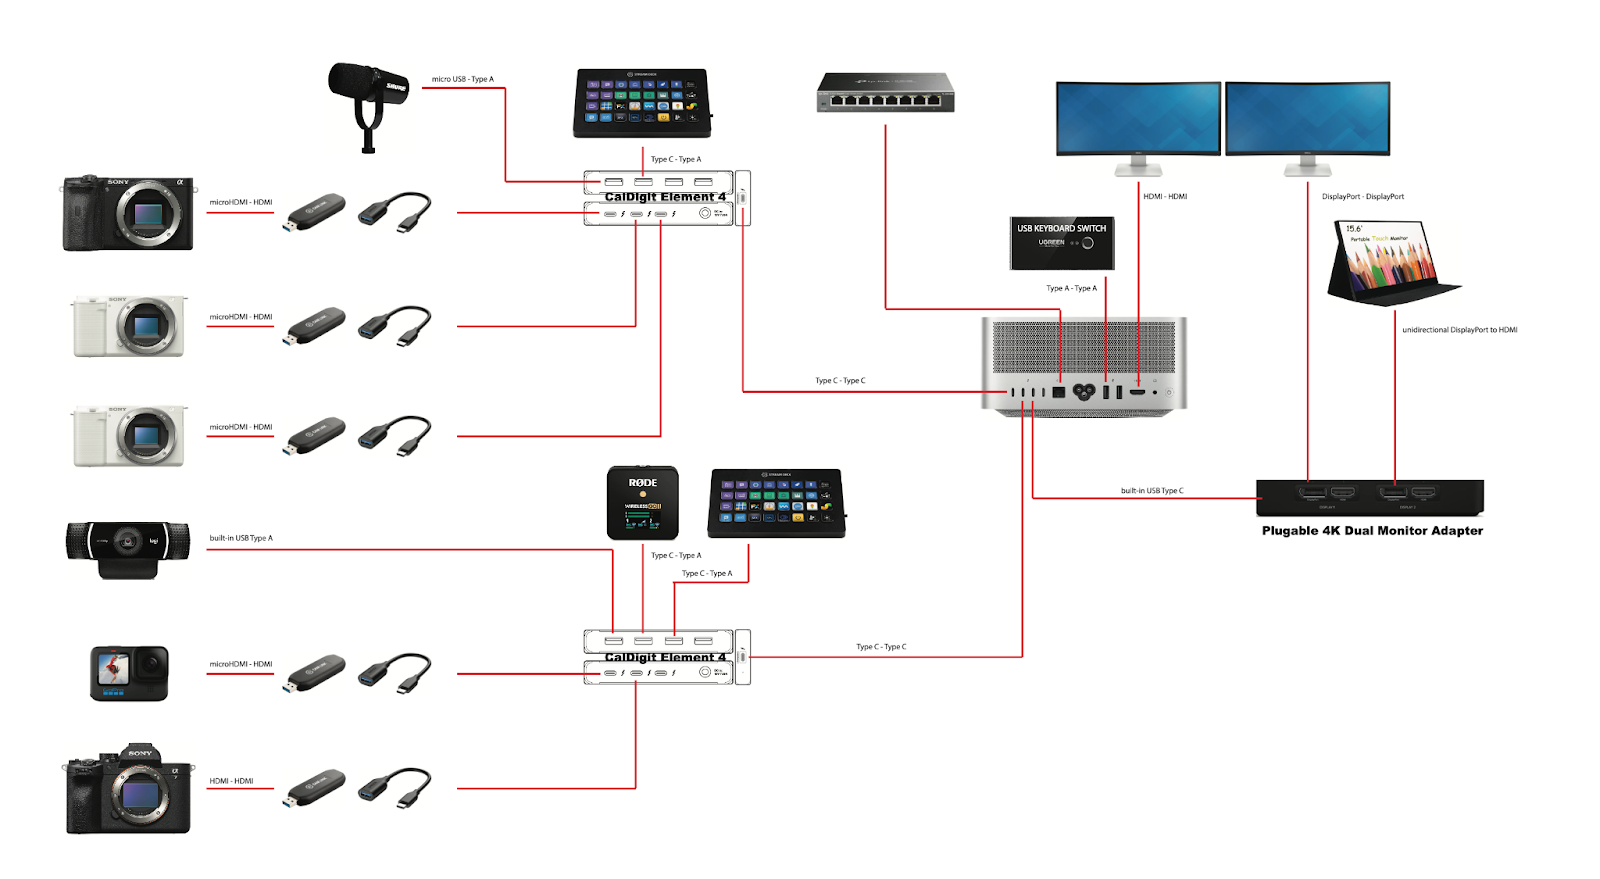
Pro tip! Create a “Studio Plan” drawing like the one below so you know how everything connects. This will make troubleshooting easier and will also help you understand how the audio and the video is coming through.
Creating the Ideal Workflow
There are a lot of ways that you can plan out and flow through your content. Since we’re big fans of efficiency and time savings, we always think about our repurposing plan when we’re going live.
Here is our recommended workflow.
- Plan and promote
- Schedule your live stream in advance
- Promote on social media, in your communities, out via a newsletter or email blast, etc.
- Pro tip: using a tool like AddEvent will help your viewers remember when your show is
- Double check your Preferences
- If you’re planning on turning your content into a podcast, be sure you’ve turned on
- Stream your show
- Don’t forget about repurposing
- Keep intros/welcomes at the beginning and Q+A at the end. This will help make it easier to trim up your videos later.
- Post production
- Once you’re done with your stream, grab the file from your recordings folder and trim the beginning and end of the video off. Make sure to remove anything that a replay viewer wouldn’t find helpful.
- Grab the video transcript of the edited file. We’re big fans of Descript for this step (they make it so easy!)
- PERK ALERT! You can get a discount for Descript at www.ecamm.com/blog/perks
- Use the video transcript to create captions (upload these with the edited video to YouTube)
- Use the video transcript to write a blog post
- Grab the audio files from your recordings folder. Make any edits/tweaks you’d like and upload them to your favorite podcast host. We recommend Captivate.fm (they’re awesome!)
- Promote
- Now you have a replay video with captions, a blog post, and a podcast episode (and you only went live ONCE!)
- Consider trimming up your video into shorter clips to upload as YouTube shorts and share across social to promote your episode and blog post
Repeat these same steps every time you go live for an effective and efficient workflow that is live streaming centric.
Camera Confidence
We get it. Live streaming can be a little scary when you’re just starting out. What if no one shows up? What if everyone shows up and you do something wrong? Live stream fails can definitely happen, but the more you practice, the more confident you’ll become.
If you’re new to streaming, try out a challenge like LEDA (Live Every Day in April/August) or jump into our Community and practice there. Having some friends, colleagues, or family members watch your streams to give you feedback is a great way to build up your confidence and get comfortable with streaming.
Practice really does make perfect. Although, live streaming is really more about being authentic than perfect, anyhow.
Engaging Your Live Viewers
One of the best parts of live streaming is that you can interact with your live viewers by highlighting comments and reactions on screen.
Spending some time welcoming live viewers into the show by name and answering their questions is a great way to build engagement and also make each person feel special. You can also take advantage of the live chat by asking questions and/or running live giveaways.
If you see the same people coming week after week to your show, consider inviting them to be a moderator. Moderators are a huge asset for live streamers as they can help share important links or information, find and identify questions, or ban/remove viewers who are acting up.
Hosting Interviews
With Ecamm Live, you can bring on remote guests using Interview Mode. This is great for co-hosted shows, panel discussions, and interviews.
Bringing on guests is an excellent way to expand your show’s reach as you can have your guest share the broadcast with their followers, fans, and friends.
A few things to remember when hosting interviews:
- Have a guest onboarding process.
- Leverage tools like Calendly to make inviting guests as easy and seamless as possible
- Make sure the invitation includes all relevant information (like where they need to be, when, and for how long) and include reminders so guests don’t forget
- Grab your guest’s headshot, bio, and links up front so you can include that information in your promotion
- Create assets and share those assets with your guest in advance with a link to the live broadcast so they can help you promote the show
- If you’re able to, share the questions up front. This helps your guest best prepare for the show and not feel caught off guard
- Schedule a practice run and sound/video check in advance.
- This helps you accomplish a few things, including making sure that your guest looks and sounds their best as well as making them feel comfortable with the process
- It also allows your guest to ask any questions about the experience
- Make recommendations on gear.
- Most guests aren’t going to be as comfortable live streaming as you are.
- Consider recommending a webcam, microphone, and light.
- Guests coming on via Ecamm’s Interview Mode should be using either Chrome, Firefox, or Brave as their internet browser in order to achieve the best results.
Steal this interview checklist for more ideas and tips.
You’ve Got This!
Anyone and everyone can live stream and Ecamm Live makes it easier than ever to get quality results. We believe in you and are here to help.
- Learn more at https://videos.ecamm.com
- Get help at https://support.ecamm.com
- Practice & network at https://ecamm.tv/community
Plus, tune into our live shows each week on YouTube. You can add our shows to your calendar here.
In the end, live streaming comes down to a few important things:
- Planning
- Promotion
- Consistency
- Confidence
- Practice
Remember: it’s not about being perfect. It’s about showing up consistently and creating content that will delight, inspire, educate, and entertain your viewers and listeners.