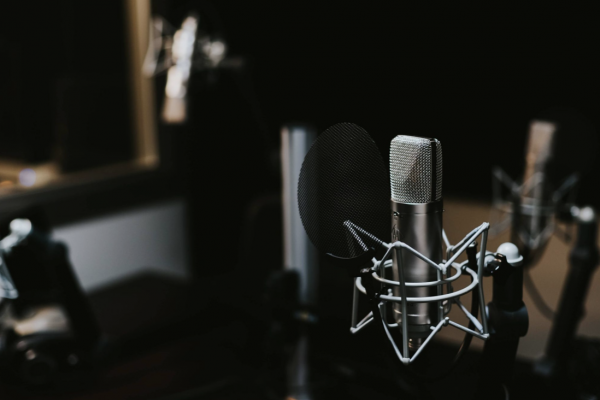
Audio is the most important aspect of live streaming, video recording, and video presentations. That may seem somewhat strange since video requires… well, a video feed. The reality is that most viewers will put up with poor video quality if they can still hear you. However, they will not stick around if they can’t. Bad audio results in bad video and can cause serious issues with your live stream (or video) success.
And since we definitely want you to be successful in the world of video, we’re sharing everything we know about audio in this post.
We’ll dive into the details, including:
- How does it all work?
- What audio features and tools does Ecamm Live offer?
- Where is your sound coming from?
- How to set up for success
- Choosing the best microphone for you
- XLR microphones vs. USB microphones
- All about mixers
- Latency (not lag)
- Gain vs. volume
- Settings and best practices
- Echo
- Troubleshooting
- Virtual microphones
Want to learn by watching? No problem. You can watch our Audio Workshop and download the Audio Workshop Guide to follow along.
How Does it all Work?
As much as we all wish that audio would just work automatically every time we sit down in our studios, that’s not exactly the case.
Audio requires you to have a basic understanding of how it works. It’s like driving. You may not need to know everything about your car in order to drive, but you do need to know where the gas pedal and brakes are and the basic rules of the road.
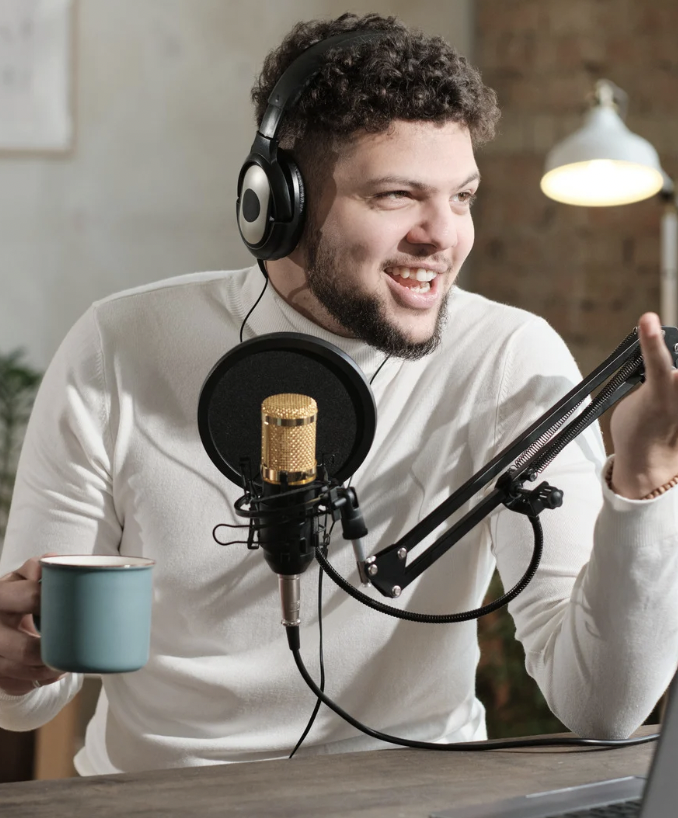
To start, you’ll need to know the input and output sources. What microphones and speakers (or headphones) are you planning on using for your live show, broadcast, or video?
If you’re using speakers, be aware that the sound coming out of your speakers can get picked up by your microphone and create a loop. This may sound like an echo. We recommend using headphones or in-ear monitors when creating videos to avoid this issue and help you get the best results. If you’re not using headphones, make sure that echo cancellation is turned on in Ecamm Live.
This may seem counterintuitive, but get into the practice of looking at your audio as well as listening to it. You should be able to see the sound levels in Ecamm Live (or on a mixer like the Rodecaster Pro). If you’re moving into the yellow or red zones, dial it down.
What Audio Tools Does Ecamm Live Offer?
Ecamm Live has a few different features and tools that are audio related, namely a stereo mixer, sound effects panel, isolated audio, mic delay, and audio monitoring.
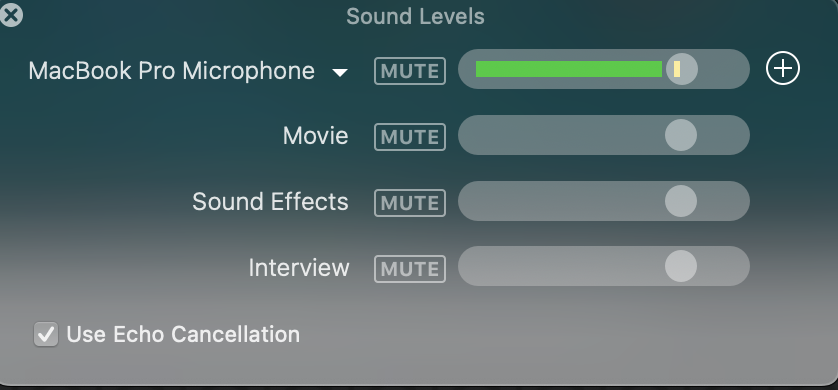
The stereo mixer is designed for mixing, balancing, and combining different sounds and audio signals, sources like microphones, sound effects, and music or previously recorded audio. When you’re in Ecamm Live, you should make sure this window is easy visible and accessible at all times. It’ll help you keep a close eye (and ear) on what’s happening with your audio. It’s also the place where you can mute different inputs and turn on (or off) echo cancellation.
As a best practice, we recommend that you keep your sliders at 80 in Ecamm Live. This gives you some wiggle room if you notice the audio is low on one of your inputs.
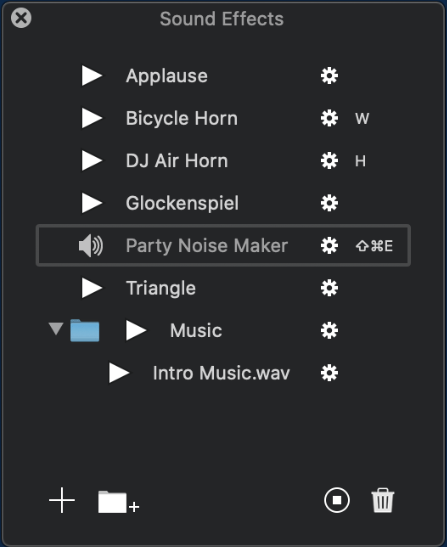
The sound effects window shows a list of music and sound effects. Sounds will be played directly into your recording or broadcast automatically. You can add the following files: AIF, WAV, MP3, M4A or OGG.
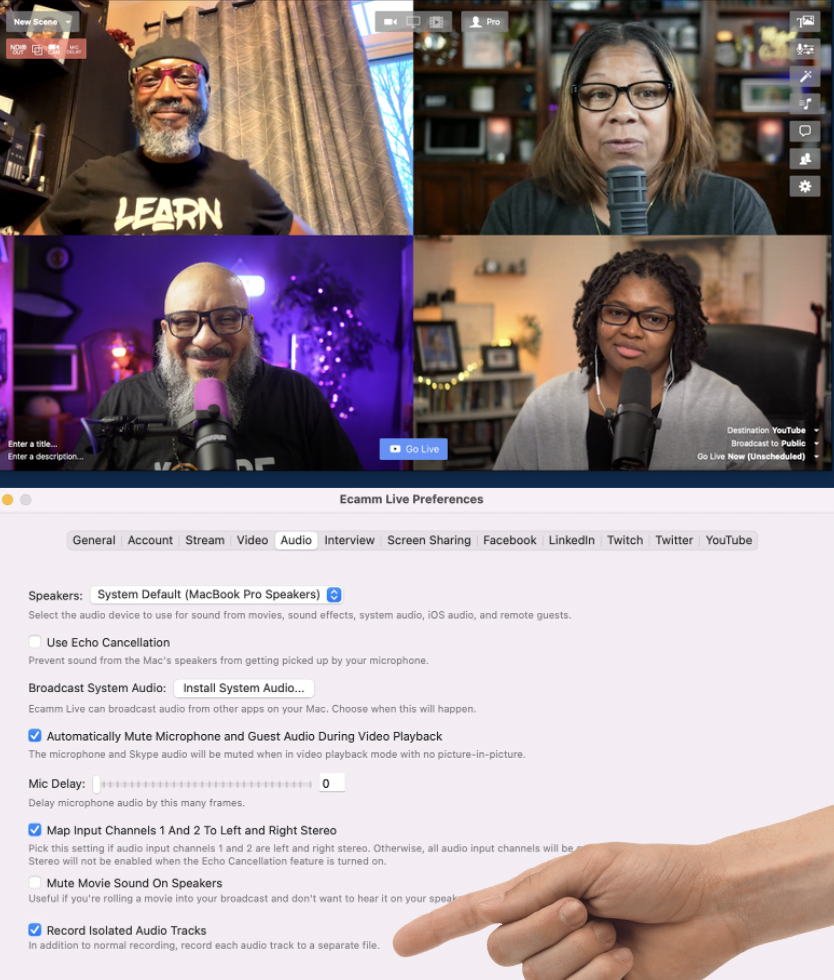
Ecamm can record individual audio files for primary and secondary mic, pre-recorded videos, sound effects, system audio and each individual Interview guest. This is great for post production work, especially if you’re producing a podcast from your live show.
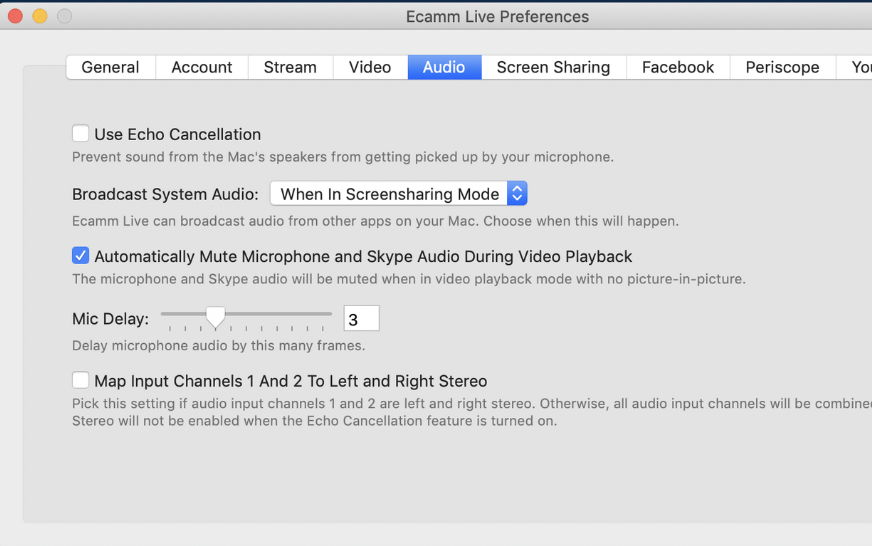
Mic delay is an important Ecamm Live feature because some video sources may have latency introduced by a slow encoder, causing audio and video that aren’t synced up. Don’t confuse this with stream latency, which is when you see a delay on streaming platforms like Facebook, YouTube, or LinkedIn.
Audio Monitoring (which is an Ecamm Pro feature) provides the ability to monitor your broadcast’s audio via any connected audio output device such as headphones or an HDMI display.
Where is my Audio Coming From?
One of the most important things you can do is have a good understanding of where your audio is coming from. The best way to approach this is by having a studio plan. Here’s an example:
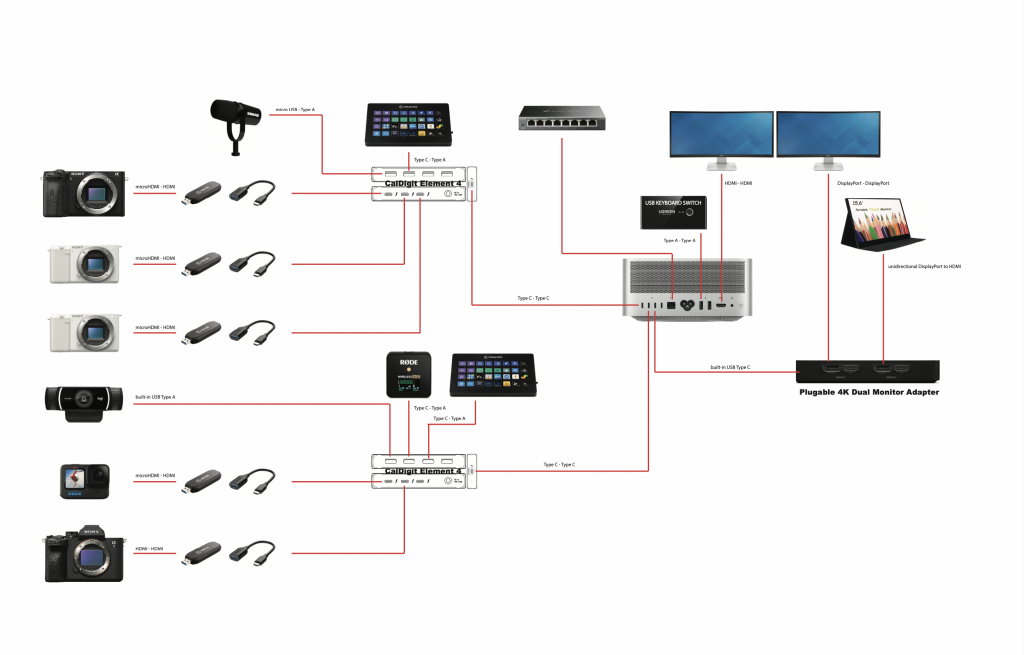
Here are some places that audio can be coming from:
- Host Audio
- Video Files
- Sound Effects & Music
- Screen Share / System Audio
- Interview Guest
Remember, testing and doing sound checks before you go live or record a video is one of the best possible ways to ensure that everything is sounding as it should. You can record a video in Ecamm Live to play back or go live into the Community (or to an unlisted YouTube) to test everything out.
Setting Yourself up for Success
Here are some basic things you can do to ensure success as you’re streaming and creating videos.
- Find a quiet place.
- Wear headphones or in-ear monitors (and request that your guests do the same).
- Design for your space. Consider adding sound dampening panels, foam, or curtains.
- Simplify, if possible. You don’t need to do everything. Start small and add on as you grow or as your needs change.
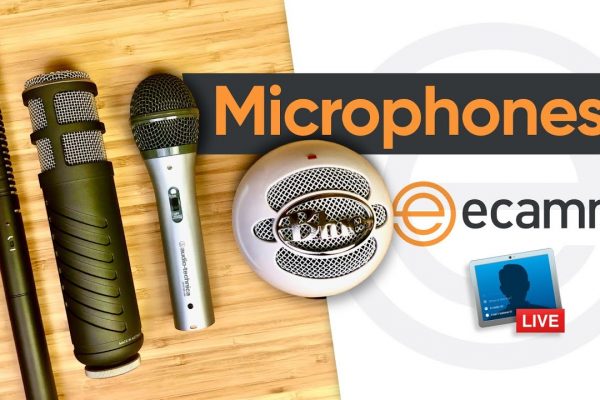
Choosing Microphones
There are so many incredible microphones to choose from these days. As you’re thinking about what microphone works best for you, consider:
- Your space – are you inside or outside? At a desk or standing up?
- Your content – do you have guests coming into your space to record or are they calling in remotely?
- Your budget
Here’s a video to walk you through all of the available options.
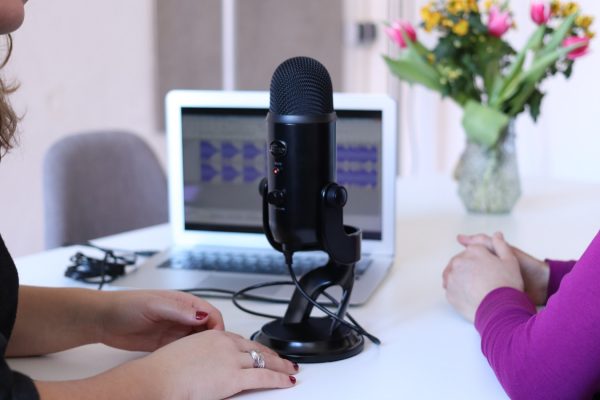
As you’re thinking about microphones for live streaming, one of the biggest things to take into account is USB vs. XLR.
USB microphones have the mixer built right into the microphone itself. They connect to your computer with just a USB cable and are pretty plug-and-play. You control the sound levels of the mic in Ecamm Live. If you’re using headphones (please do), you can plug them into the back of the USB microphone and you’ll be able to monitor your audio easily.
XLR microphones require an XLR cable and need to be connected into a mixer. The mixer connects into your computer. You can control audio levels and settings of your microphones using the mixer. When monitoring audio for XLR microphones, you’ll want to plug your headphones into the mixer and not the microphone itself.
Some microphones like Shure’s MV7 (which we use in the Ecamm Test Studio and highly recommend) offer both USB and XLR connections, giving you more flexibility and options.
Finding the Right Mixer
There are a ton of mixers out there on the market. Some have simple interfaces, while others are more complex and feature-rich. Before purchasing a mixer, it’s important to think through what you need, your budget, and how you’ll use it in your space.
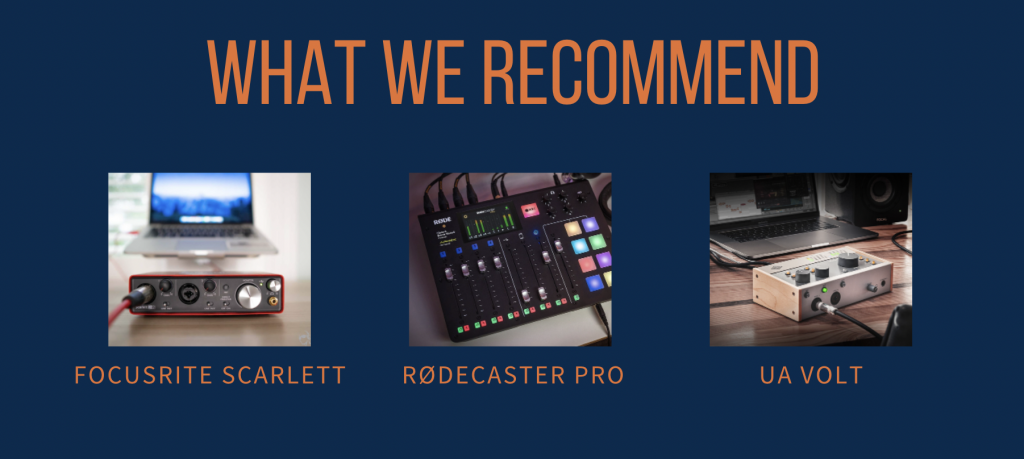
We recommend these three mixers:
- Focusrite Scarlett 2i2– easy to use and reliable
- Rodecaster Pro – feature-rich with lots of functionality
- UA Volt – easy to use, powerful, and reliable
Remember that any piece of gear is going to require training and practice. Before you use your mixer in production, be sure to set it up correctly and run a few tests to make sure everything is sounding the way you want.
Some Audio Terminology
Here are some common terms that you’ll hear when you’re setting up and working with audio.
Latency … not Lag
You may hear the word “lag” used in the world of live streaming and video. When it comes to audio, it’s not a lag, but latency that you may be experiencing.
Latency happens when the USB interface or USB microphone converts the signal from analog to digital to record it and then from digital to analog so that you can hear yourself in your headphones. This process of two-way conversion takes only a few milliseconds to happen, but when it’s beyond about 20 milliseconds, the delay becomes distracting.
Gain vs. Volume
Gain is the input level. Try to set this at the source. For most of us, it will be our interface (or mixer). For some, it’ll be within Ecamm Live.
Volume is the output level. This is what we are sending to our broadcast.
Slap Echo or Slapback
Slap echo or slapback is a single echo resulting from non-absorbing (i.e., reflective) surfaces, characterized by a significant amount of high-frequency content. This means the sound is hitting a wall (for example) and slapping back into your microphone, which sounds like an echo. You can solve this by adding sound dampening to your studio space.
Audio Settings & Best Practices
Here are our recommended audio settings and best practices to set you up for success.
- Headphone levels are not real; they are perceived. Please do a test to set your audio levels.
- Set Ecamm Live in-app audio to 80 and gain stage on your interface. This means keep the settings in Ecamm Live at 80 and use your interface (example: Rodecaster Pro) to turn up or down each microphone’s volume.
- Pre production is incredibly important. Please always setup and practice with your gear and double check settings and preferences before you go live or record a video.
- When bringing on interview guests, always ensure that they are wearing headphones and run a quick audio check before you broadcast.
Dealing with Echoes
There are a few things that can cause an echo in your broadcast or video.
AUDIO IN
If a microphone is close to your speakers it can cause echo. If the speakers are playing loud enough to be heard by the microphone, they’ll pass that audio back into the mic creating a weird loop that sounds like an echo. Wearing headphones or in-ear monitors can eliminate this issue.
AUDIO OUT
Audio Monitor can give a perception of echo (although that is not what the audience hears). It’s best to plug your headphones into your interface’s headphone jack (directly into the USB microphone or mixer, like the Focusrite Scarlett or Rodecaster Pro).
GUEST
Guest echos come from their speakers and microphone. In most cases, it’s because they have multiple tabs open on their internet browser and one of those tabs has sound. Ask them to double check their tabs and close everything except the interview window. We recommend all guests wear headphones.
Troubleshooting Echoes
To troubleshoot any echo you may be hearing in the broadcast, you’ll need to find where that echo is coming from. Here are some steps you can take.
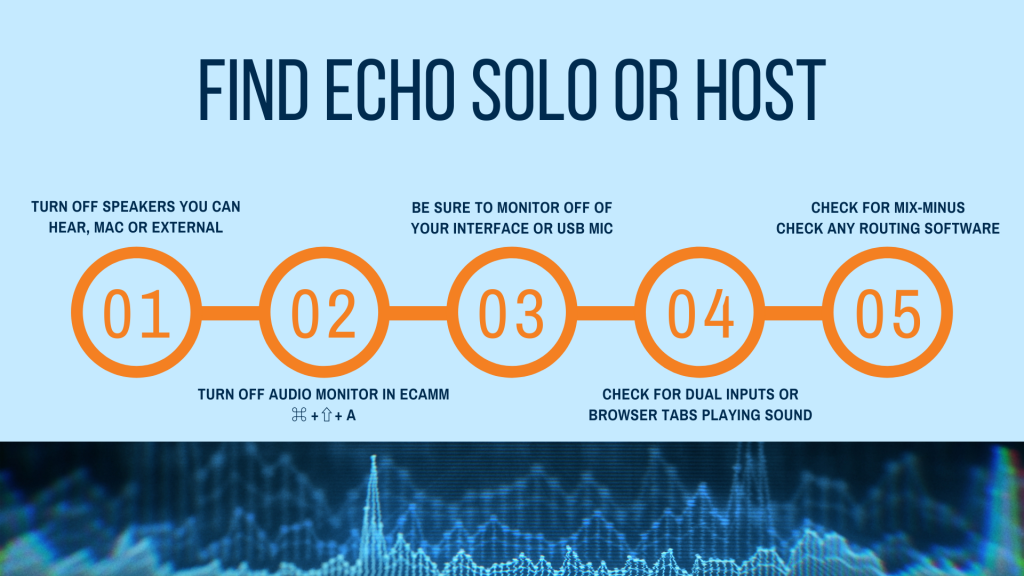
If you’re doing the show solo, start by turning off the speakers you can hear (Mac or external), then turn off Audio Monitor in Ecamm, make sure that you’re monitoring the audio off of your interface or your USB microphone, check for dual inputs or browser tabs that may be playing sound, and finally check for mix-minus and any routing software.
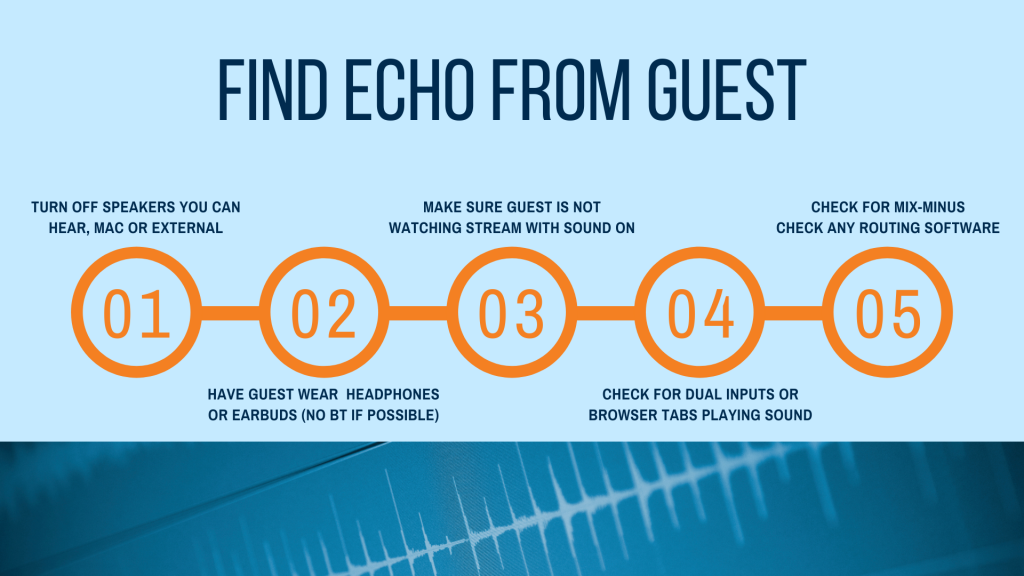
If you have a guest on your show, follow the same steps as above and then make sure your guest is wearing headphones and has turned off/closed any open browsers or browser tabs.
Troubleshooting Audio
Always start by looking at your audio levels. Is it accidentally on mute? Double-check your levels and keep an eye on the panel during your video productions.
It’s almost always caused by a cable. As a best practice, keep backup cables (and a backup microphone) at the ready in case you need to make a trade.
If you’re still having issues, reboot everything. Reboot your computer, interfaces, and other connected hardware. Sometimes you will need a full shutdown and reboot as it is different from a simple restart.
Nothing working? We’re here to help. You can reach our tech support team using our onsite chat at https://www.ecamm.com
What is a Virtual Microphone?
Virtual Mic (or Virtual Microphone) allows you to send the audio output of Ecamm Live into other apps like Zoom, Meet, Teams, and more. This will let you drive the entire show using Ecamm Live, including all of your sound effects, video clips, interviews, and more.
You’ll need to be an Ecamm Live Pro member in order to use Ecamm’s virtual microphone. Activate Virtual Mic by going to the menubar and finding Outputs ➝ Virtual Mic and switching it to On. If this is your first time using the feature, choose to install the Virtual Mic. Then, in the other app’s camera menu, you’ll see Ecamm Live Virtual Mic as a choice. You might have to Quit and come back into the other app before you see it.
If you want 2-way audio (for example, you want the Zoom participants to hear the audio from Ecamm and for Ecamm to hear the Zoom audio), you’ll need to do audio routing. We recommend Loopback.
PERK ALERT! Ecamm members get 30% off Loopback by emailing marketing@ecamm.com
You’ve Got This!
Audio can sometimes feel daunting, but the important thing is to spend time setting everything up correctly, practicing and testing your equipment and workflows, and staying calm while tracking down any issues and troubleshooting.
Ecamm Live members are always welcome to practice, test, and ask questions in the Ecamm Community.